How to Plan Your Hawaii Activities in 5 Steps
It’s no secret that I LOVE to travel, but for me, planning is equally enjoyable. For years, Hawaii was on my bucket list. When we finally had the chance to go, I wanted our family to see and do as much as we could!
I see so many questions in forums about how to plan activities for all sorts of places, but this post focuses on Hawaii. However, the steps I use to plan out our itinerary are the same, regardless of the destination.
So where do I begin when I am planning out our activities?
Step #1: Research
As with any destination, you have to figure out exactly what areas you’ll see. We’re working on visiting all 50 states so most of our travel revolves around what state we’ll hit next. However, states are pretty big with lots cities and places to visit. So, you first have to narrow down where you’ll be visiting.
Sometimes, our decision is based off a specific area we want to explore. Other times, the location we see depends on our transportation. If we’re flying, more than likely our final destination will be near an airport. However, if it’s a road trip, then what we visit really depends on the route we’re driving.
Hawaii: Choose your island(s)
Hawaii is unique in that there are several islands to choose from! And the only way you can move from one to another is by an intra-island flight (unless you’re cruising).
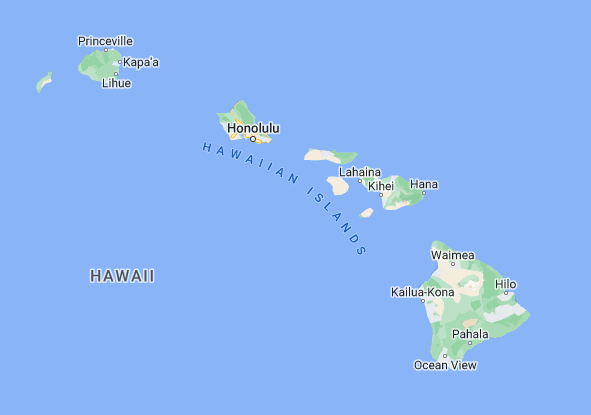
I started by researching each of the Hawaiian Islands. I looked at available hotels, activities and recommendations from blogs, forums and basic Google searches. Then, I narrowed it down to Oahu and Maui, although the Big Island and Kauai are now on my future bucket list!
Research Platforms
Pinterest is always one of my first stops. It’s such a great tool to find information on all kinds of topics! I search phrases like “Fun things to do in Maui” or “Best activities in Oahu with kids” or “Free things to do in Waikiki.” I found several blog posts giving me lots of ideas.
Facebook Groups
Facebook has a group for everything! I joined a Hawaii Travel group and read through several general posts. Then I used the search tool to find information on more specific things, like Pearl Harbor, Kualoa Ranch, restaurant recommendations and more.
Most of the time, you can find answers to your questions without even needing to ask the group. These groups have tons of posts so just searching will yield tons of information! Plus, you get your answers instantly, rather than waiting for someone to comment.
Google is another great resource. Just type your questions into the search and see what pops up. You can check out direct websites for places you want to visit to see operating hours, cost, etc. Google will also link you to blogs or other forums that can help you.
Step #2: Compile Your List
As I read through all the different information I found, I jotted down things that sounded fun. I also noted restaurants and other suggestions that seemed helpful. As you can imagine, my list was pretty large! Especially since I was looking for things on two different islands!
Once I had a good list, I started narrowing it down. We only had about 5.5 days on Oahu so there was no way we could see everything. And even if we could, I didn’t want to be running constantly—I enjoy downtime and being able to just hang at the pool too.
Step #3: Decide on a Budget
Although I’d love to be able to do every activity I want, the reality is, cost is a factor. And in Hawaii, things aren’t cheap! The good news is, even if your budget is limited, you can still find plenty of free or cheap things to do.
Free/Cheap Activities
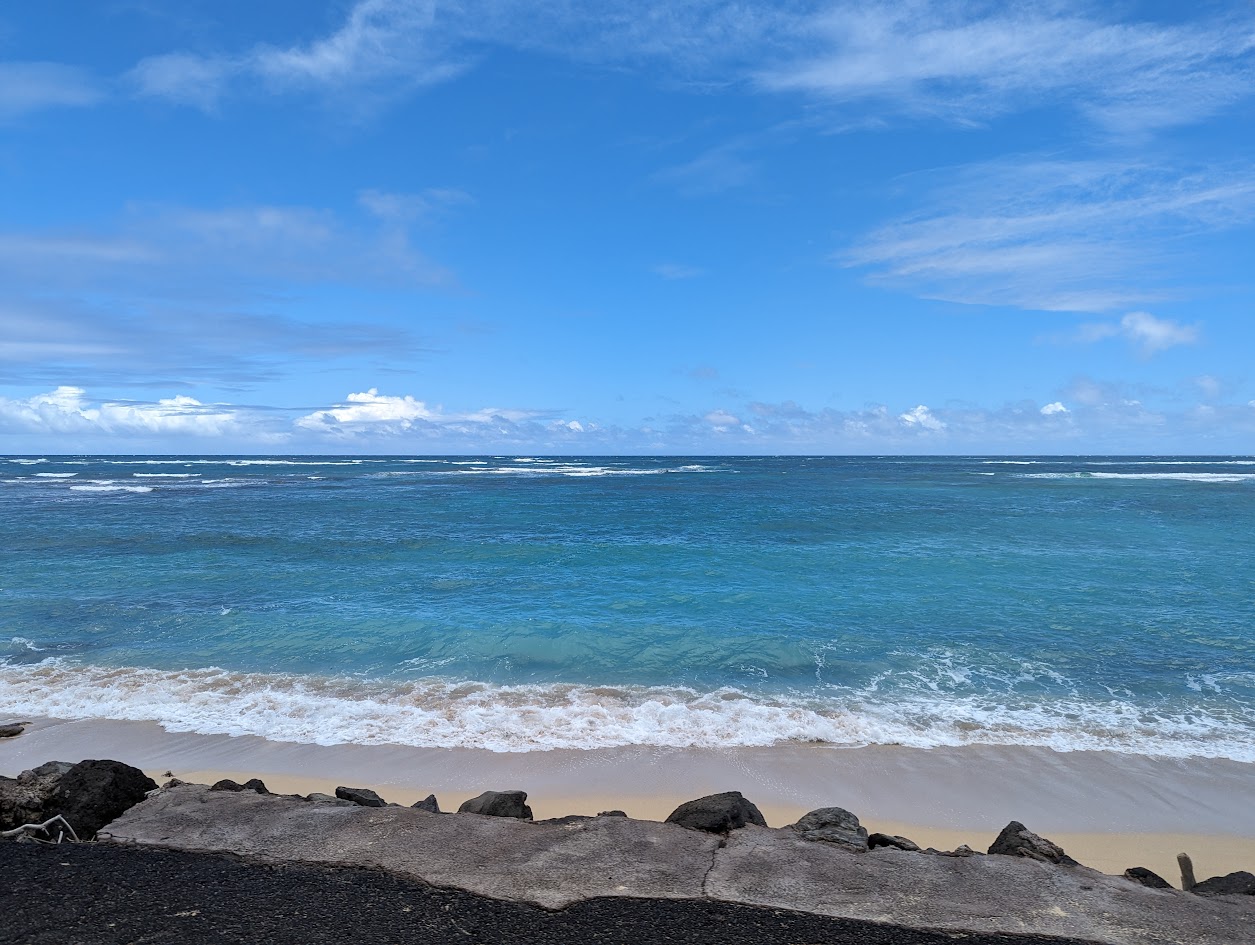
Beaches
Hawaii has some of the best beaches in the world! And you can enjoy them for free! Our hotel was in Waikiki, but we visited beaches like Waimanolo, Sandy Beach, Lanikai, Pipeline Beach, and Waimea Bay, which were all amazing!
Hotel Activities
You can find a variety of hotels on both Maui and Oahu. Some are more expensive than others, but you can find budget-friendly options too. I will say that most hotels and resorts on the islands do have a resort fee, which includes access to different amenities (some better than others). Just be sure to include that fee into your overall accommodation budget.
No matter where we travel, I try to find a hotel that has a pool. My kids can easily burn off some steam in the pool for a few hours—and it doesn’t cost us anything extra. Many hotels in Hawaii also have cultural activities, like ukulele or hula lessons and fun things for the kids like movie nights, lawn games, etc. Between these activities, the hotel pool and hanging at the beach, you can easily cut down on the amount of money you spend on activities.
Walkable Areas
If you’re not planning to rent a car, then staying in a walkable area is a good idea. Sometimes hotel costs may be a bit higher, but it saves you from paying for transportation costs to get to dinner or other places nearby.
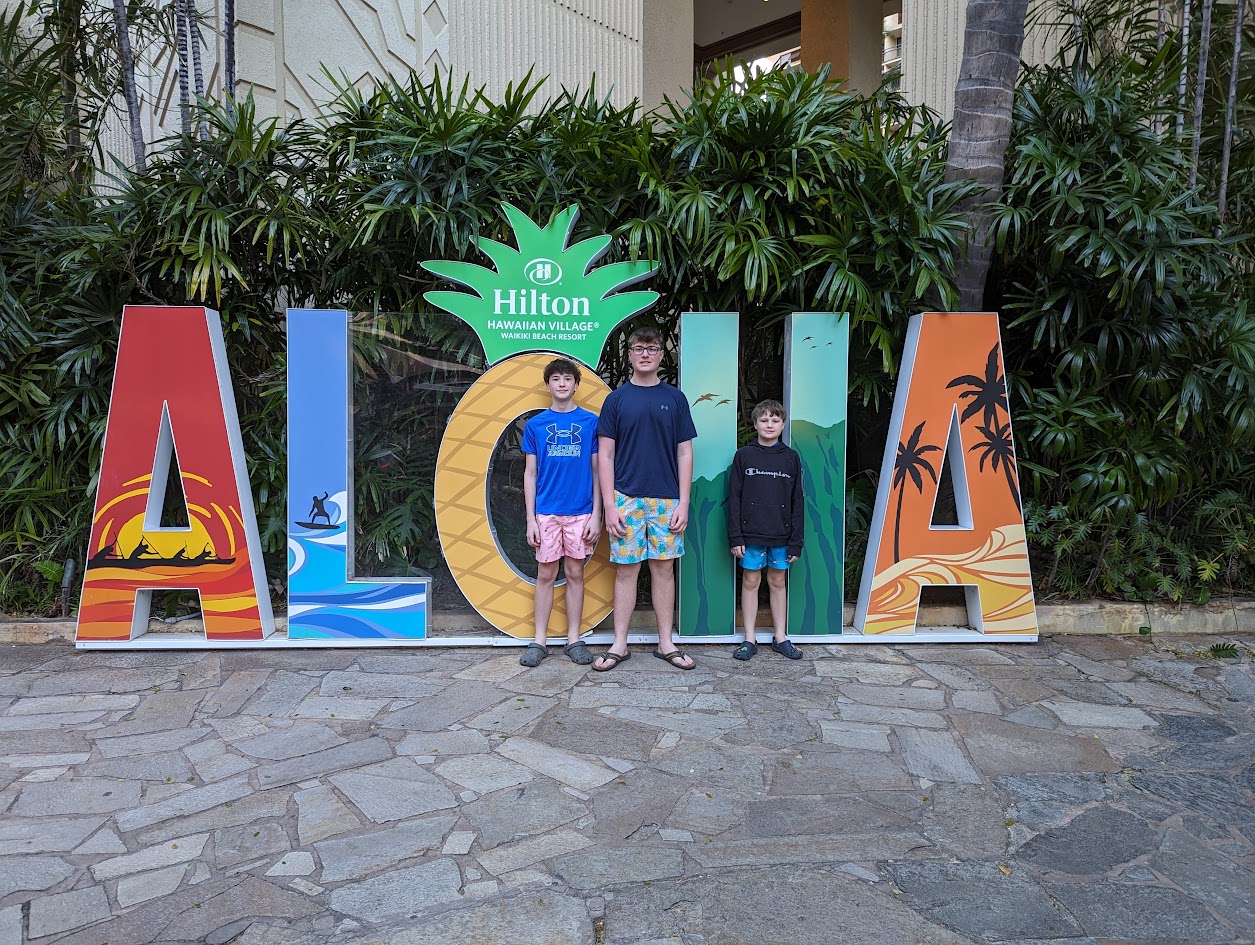
We stayed in two different hotels in Waikiki because we added a day to the beginning of our trip. For the first night, we decided to book a smaller, cheaper hotel. Although the cheaper hotel was not right on the beach (Hilton Garden Inn Waikiki), it was within walking distance to not only the beach, but restaurants and activities too.
It had a typical hotel pool, restaurant and convenience store, plus provided credits for beach chairs and umbrellas, 1hr stand up paddleboard/body board, towels, sunscreen and more. It’s right in the heart of Waikiki so there are a variety of shops and restaurants right outside the door.
There are also several restaurants that offer happy hours and live music so even having a drink or appetizer and enjoying the beach view can be an inexpensive way to enjoy Hawaii.
Hikes & Lookouts
In order to do certain hikes or check out lookouts with amazing views, you’ll likely need a car. You can use public transportation or pay for tours that include a shuttle, but a car rental may be a cheaper option—especially if you’re a family. A rental car also gives you the freedom to go where you want, when you want.
We decided to rent a car for our entire stay on both Oahu and Maui. Initially, we weren’t going to, but quickly realized that with all that we wanted to do, renting a car just made the most sense.
I love finding cool spots to see and photograph and Hawaii has plenty of options! And when they are free or cheap—that’s even better! We’ll share all of the places we visited below.
Activities
If you’re looking for free or cheap activities, one of the most-known in Oahu is Pearl Harbor. There are lots of tours and “extras” you can add on to your time at Pearl Harbor. However, if you just want to see the memorial, you can make a reservation (up to 6 weeks in advance) and pay just $1/person to reserve the time and date of your choice. You can read all about Pearl Harbor in this post.
Shopping
There is no shortage of shopping in Hawaii! In Waikiki, there are plenty of shops and restaurants to browse as you walk the Waikiki Beach Walk. Or check out the International Market Place or Rainbow Bazaar at Hilton Hawaiian Village.
There is also a Macadamia Nut Farm near Kualoa Ranch and the Dole Plantation retail store on the North shore. You can also head to the Aloha Swap Meet or even hop over to Disney’s Aulani for some themed merchandise. If you need more shopping, check out the Ala Moana Shopping Mall or visit the town of Haleiwa on the North Shore.
Maui Activities
Maui was a little more laid back than Oahu, but it still had plenty of things to do for free or cheap. Since we had a car, we were able to drive the Road to Hana, which has tons of different stops. You can see waterfalls, botanical gardens, beaches and more on this one road.
National Park
We also drove to Haleakala National Park, which does have an entrance fee, but if you have a 4th grader, you can get in free with the Every Kid Outdoors Pass. The Every Kid Outdoors pass gives your 4th grader (and everyone in the vehicle) access to National Parks all over the US, for free! We used this benefit a few years ago and saw all 5 of Utah’s beautiful National Parks! If you don’t have a 4th grader, you can pay the $30 entrance fee and drive to the summit of Haleakala. The pass is good for 3 days.
Other Activities in Maui
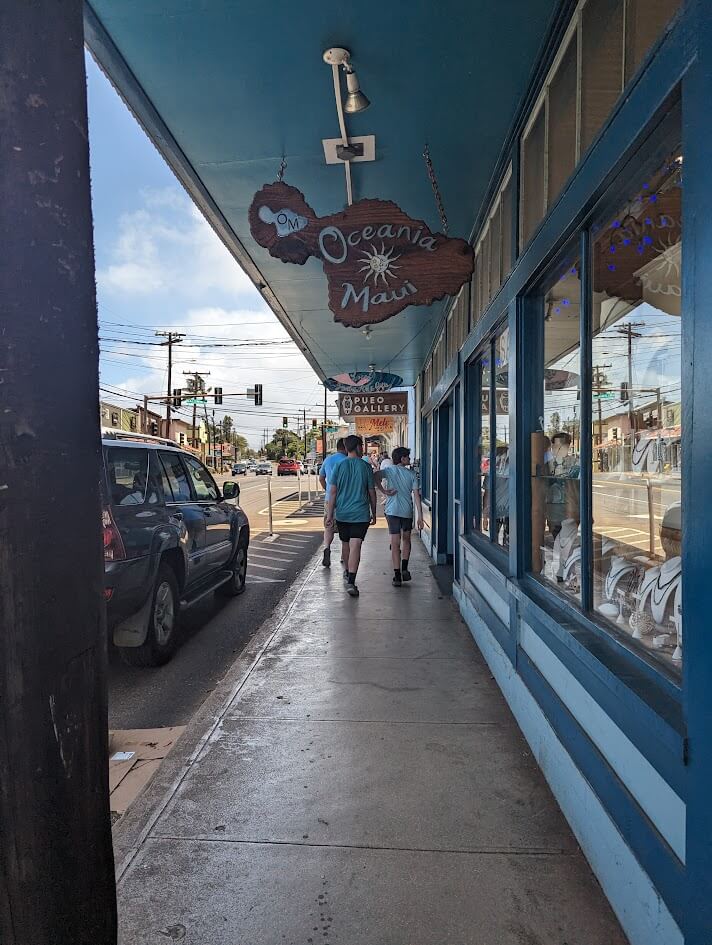
We also checked out Hookopia Beach Park and enjoyed the sunbathing turtles. Afterwards, we walked the small town of Paia and checked out the shops.
When it comes to food, Maui has a few different Food Truck parks and some great happy hours that allow you to eat and just enjoy the vibe on the cheap!
Although there are lots more things you can do on Maui, we chose to spend more time at our resort and just relax before we headed home.
Go City Pass
Since this was our first-time visiting Hawaii and may be our only time, we wanted to make sure we got a pretty good sampling of what it had to offer. You can spend as much or as little money as you want in Hawaii, but we’ve found that the Go City Oahu Pass offers a ton of value for the price.
When we visited California last summer, we purchased a Go City Pass for our time in Los Angeles. It was a great value and allowed us to do several activities for one low price. As I was researching Hawaii, I found that Oahu offers a pass as well. As a matter of fact, lots of cities offer this pass or other similar options so be sure to check what’s available wherever you’re traveling.
Included Activities
I started looking at all the places I jotted down that I wanted to visit and realized that many of them were part of the Go City Pass! This is when I really started to build my itinerary. Go City offers passes for two to seven days and the price depends on the number of days you choose.
The nice thing is that you don’t have to use the days consecutively either. You just have to use all the days within two weeks. This allows you to have some downtime on your trip too! In addition, the pass gives you access to one premium attraction. These attractions are typically more expensive than others, but can really make the pass worthwhile.
Premium Activities
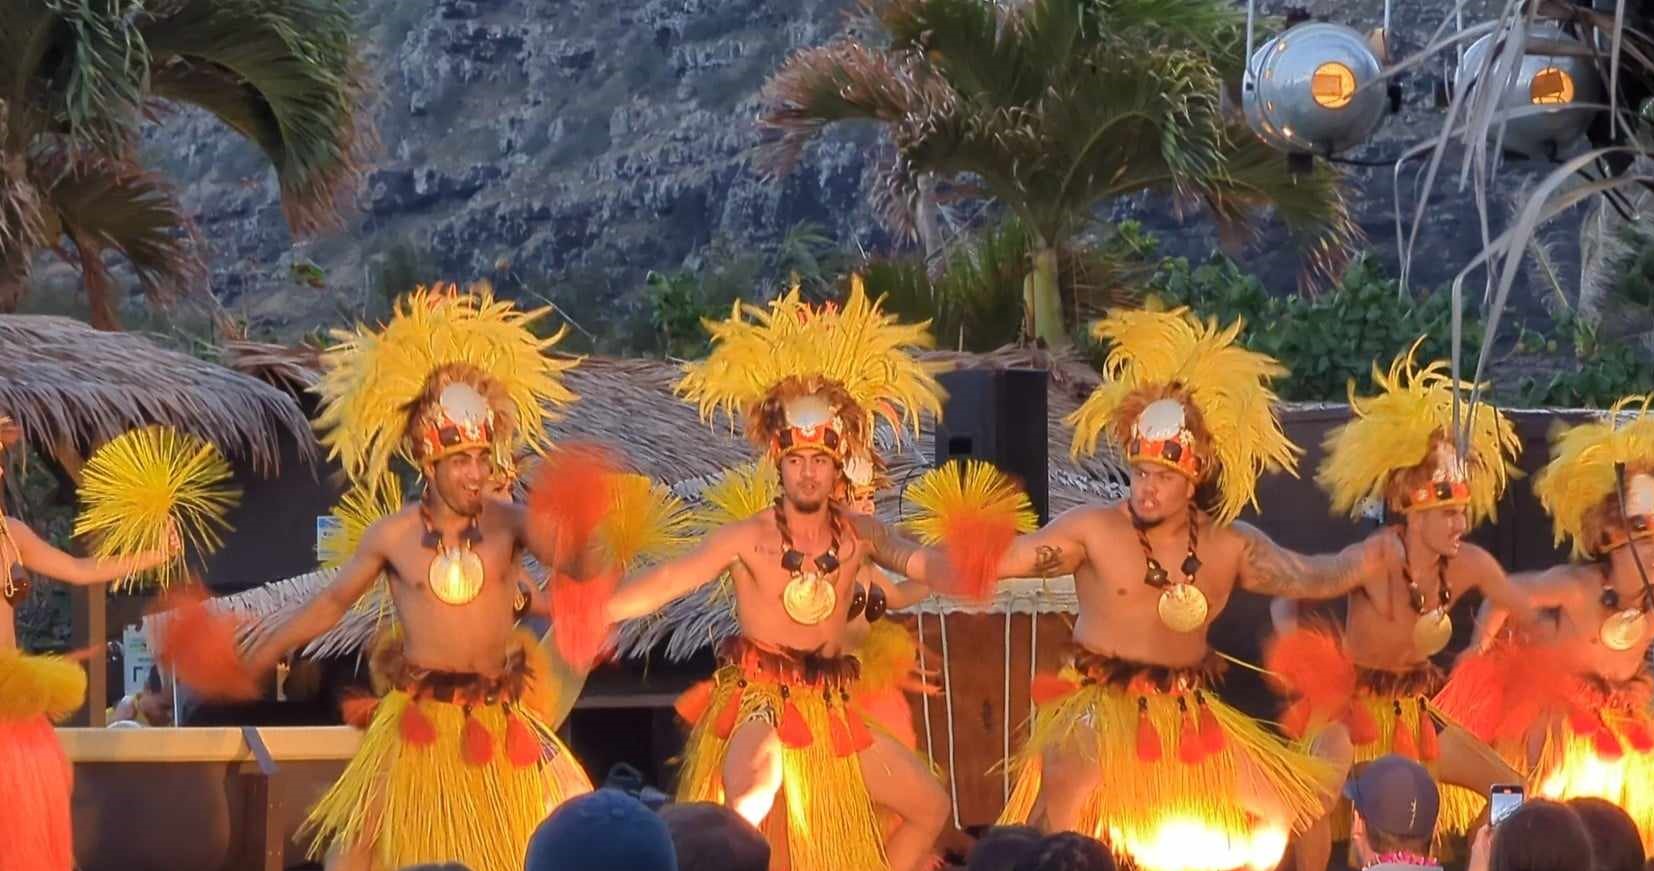
One of the things we really wanted to do on our trip to Hawaii is take part in a Luau. I knew it’d be expensive, but I didn’t realize how expensive! Even for a very basic option, it’d easily cost our family of 5, almost $600. However, the cost of the Go City Pass (after finding some discounts) was around $860, meaning that we could do the Luau + several other activities for not much more than the cost of the luau alone.
Other Activities
In addition to the Luau, we also visited Kualoa Ranch, Sea Life Park, Pearl Harbor Aviation Museum, USS Missouri and the Polynesian Cultural Center. We also did a two-hour snorkel tour with Honolulu Snorkel Co. Now if we wanted to, we could have done so many other activities too at no additional cost. However, we chose to do no more than two activities per day so we could enjoy our time at each of these places and not feel rushed.
And if you decided against renting a car, some of the options with the Go City Pass are tours that offer transportation. There are also activities that are pretty close to Waikiki so you could easily grab a Lyft or Uber, if needed.
Step #4: Narrow Down Your List
Now it’s time to narrow your list down to things that you really want to do. I had so many different things on my list, but I knew some of them just had to go—otherwise, we’d never sleep!
Most of the time, we travel as a family so my choices are geared more towards the kids than anything. I really try to plan things that we’d all enjoy. This isn’t always the easiest task, and it definitely doesn’t mean I choose only things my kids would want—I add adult stuff in there too!
I tried to do one activity in the morning and one in the afternoon/evening. I didn’t want to overdo it with the activities and be exhausted, but I also wanted to see as much as I could. Then, I came up with a list of must-do activities and then things that were not as important, but if we could easily fit them in, we’d add them to the list.
Schedule a Rest Day
One thing I HIGHLY suggest is to schedule yourself some downtime. Our flight arrived in Hawaii on Wednesday at 10am HST (which was 4pm EST). We were in bed by about 8pm each night, but we were up EARLY every morning. Saturday was our scheduled rest day, and we totally needed it! We were pretty good the first few days, but that third full day, we were pretty exhausted! That’s when the jet lag really caught up to us.
And because we were up so early, those first few days, we really took advantage of some early activities. Not only were we well-rested and ready to go at that time, we also beat the rush-hour traffic!
Step #5: Create Your Itinerary
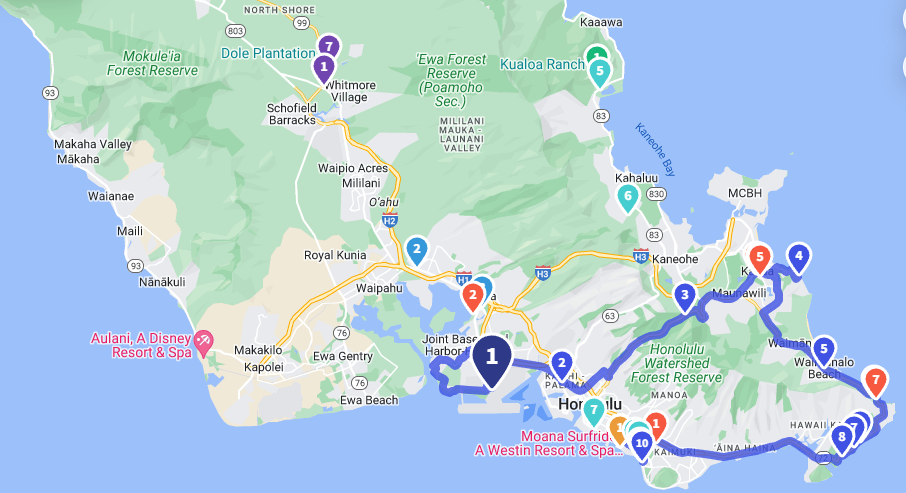
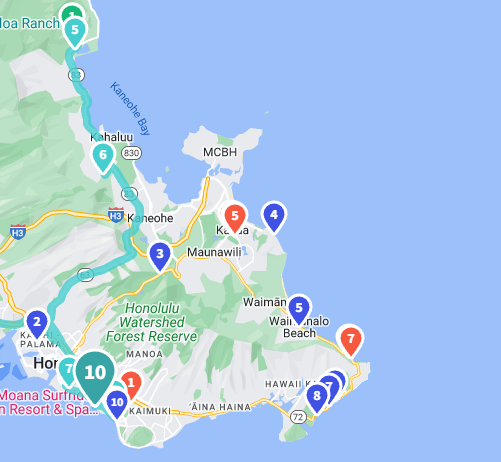
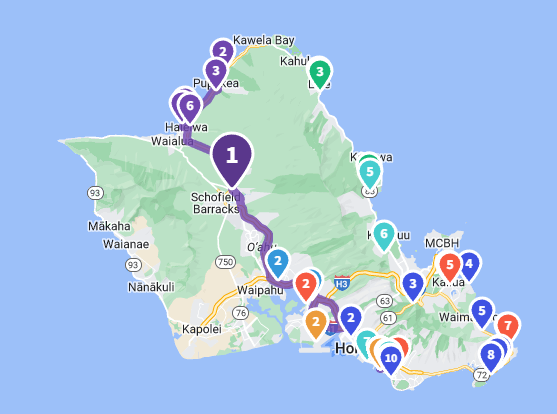
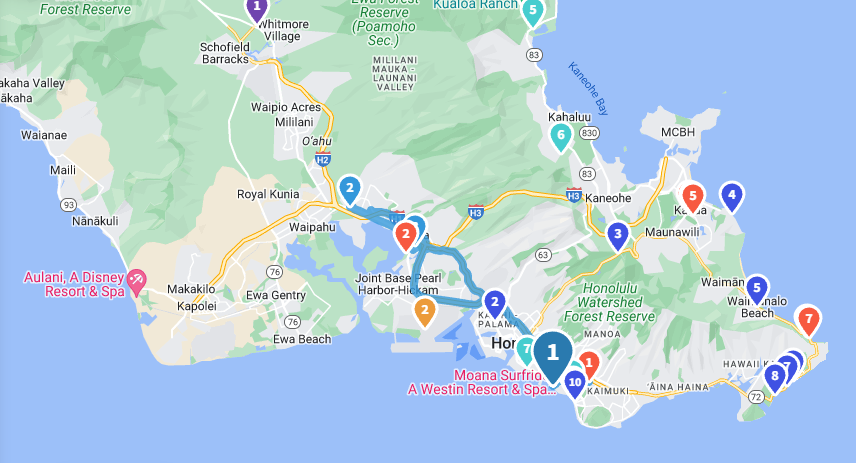
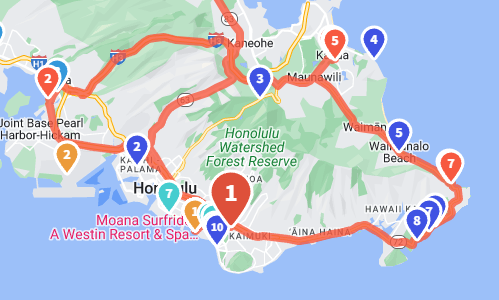
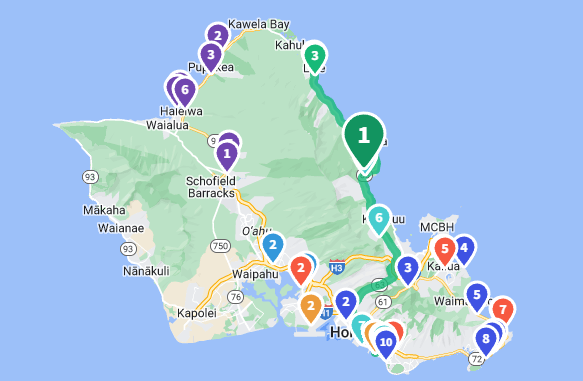
Once I had my list of must do activities, I started to create my itinerary. For Oahu, I broke the island up into four quadrants and then jotted down the activities we wanted to do in each of those quadrants. Although Oahu is a relatively small island, we still had a considerable amount of driving needed to see all of these places. Breaking these activities up into quadrants let me plan a route with the least amount of driving!
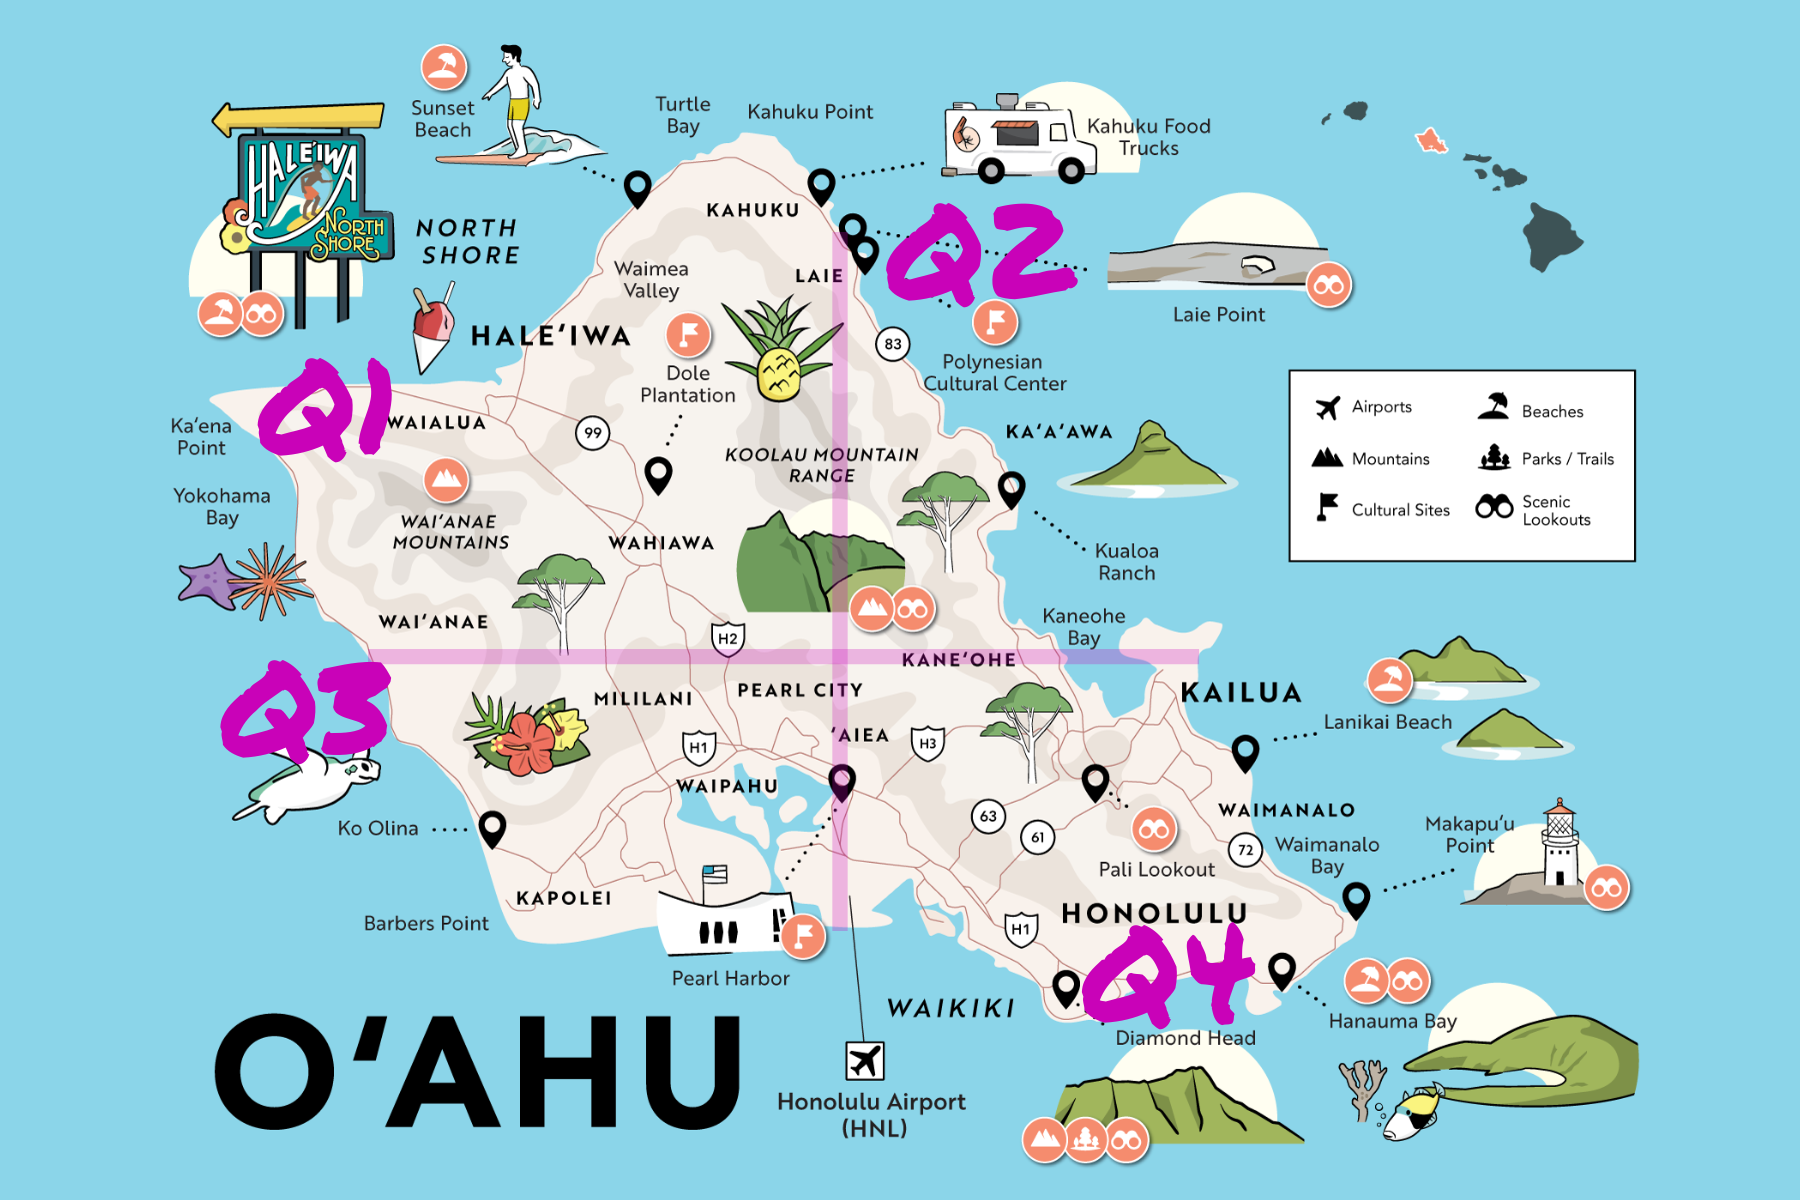
Quadrant #1
- North Shore
- Haleiwa
- Dole Plantation
Quadrant #2
- Polynesian Cultural Center
- Kualoa Ranch
- Byodo-In Temple
Quadrant #3
- Pearl Harbor
- Aloha Swap Meet
- Disney’s Aulani
Quadrant #4
- Airport
- Nu’Uanu Pali Lookout
- Lanikai Beach
- Waimanolo Beach
- Sandy Beach
- Halona Blowhole
- Lanai Lookout
- Hilton Hawaiian Village
- Ala Moana Shopping Center
- Honolulu Snorkel Co.
- Waikiki Beach Walk
- International Market Place
- Sea Life Park
- Aloha Kai Luau
The bulk of the time we were in Oahu, we spent in Quadrant #4. This is where a lot of the activities were located, but also where our hotel was in Waikiki. If you’re deciding where to stay on the island, Waikiki will be more city-like, whereas the North Shore will be quieter. We decided that we wanted our home base to be near the airport and in an area with a variety of restaurants, so Waikiki fit the bill.
Mapping Out Days
Once I had our quadrants mapped out, then I went to work figuring out what days we’d do each of the activities. Be sure to jot down days things are open and closed so you don’t get there and realize it’s not open. For instance, the Polynesian Cultural Center is closed on Sundays and Wednesdays, so we made sure to avoid it on those days. And the luau we planned for runs every day except Saturday.
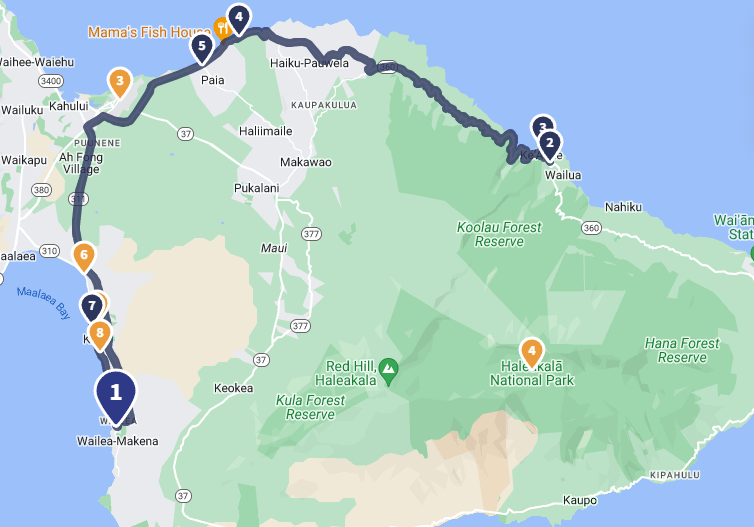
Here is how I mapped out our itinerary and how much time I allotted for each stop. I recently started using the Wanderlog app and really like that it allows me to plan a full itinerary that’s accessible right on my phone! Here is a link to our Oahu and Maui guide.
Day 1 – Wednesday
Our flight arrived at the airport at 10:10am so I figured by the time we grabbed our luggage and got to our rental car, it’d likely be around 11am. Check-in at our hotel wasn’t until 4pm so we had time to kill. We decided to do a loop around the island from the airport to our hotel.
Stop #1: Foodland (Dillingham)
We flew Southwest from LAX to Honolulu (6-hour flight), which doesn’t provide a meal on the plane. You just get some snacks like crackers and dip, pretzels and brownie brittle so we knew we’d be hungry by the time we landed.
I read that Foodland had a great grab and go section with all sorts of items (both hot and cold). My husband is a fan of poke and they had several varieties. He grabbed poke, while I picked a salad. The kids had some spam misubi, fried chicken and sushi. Everything we had was good and fueled us for our afternoon adventure! Plus, we only spent around $40 for the five of us to eat, which was really reasonable.
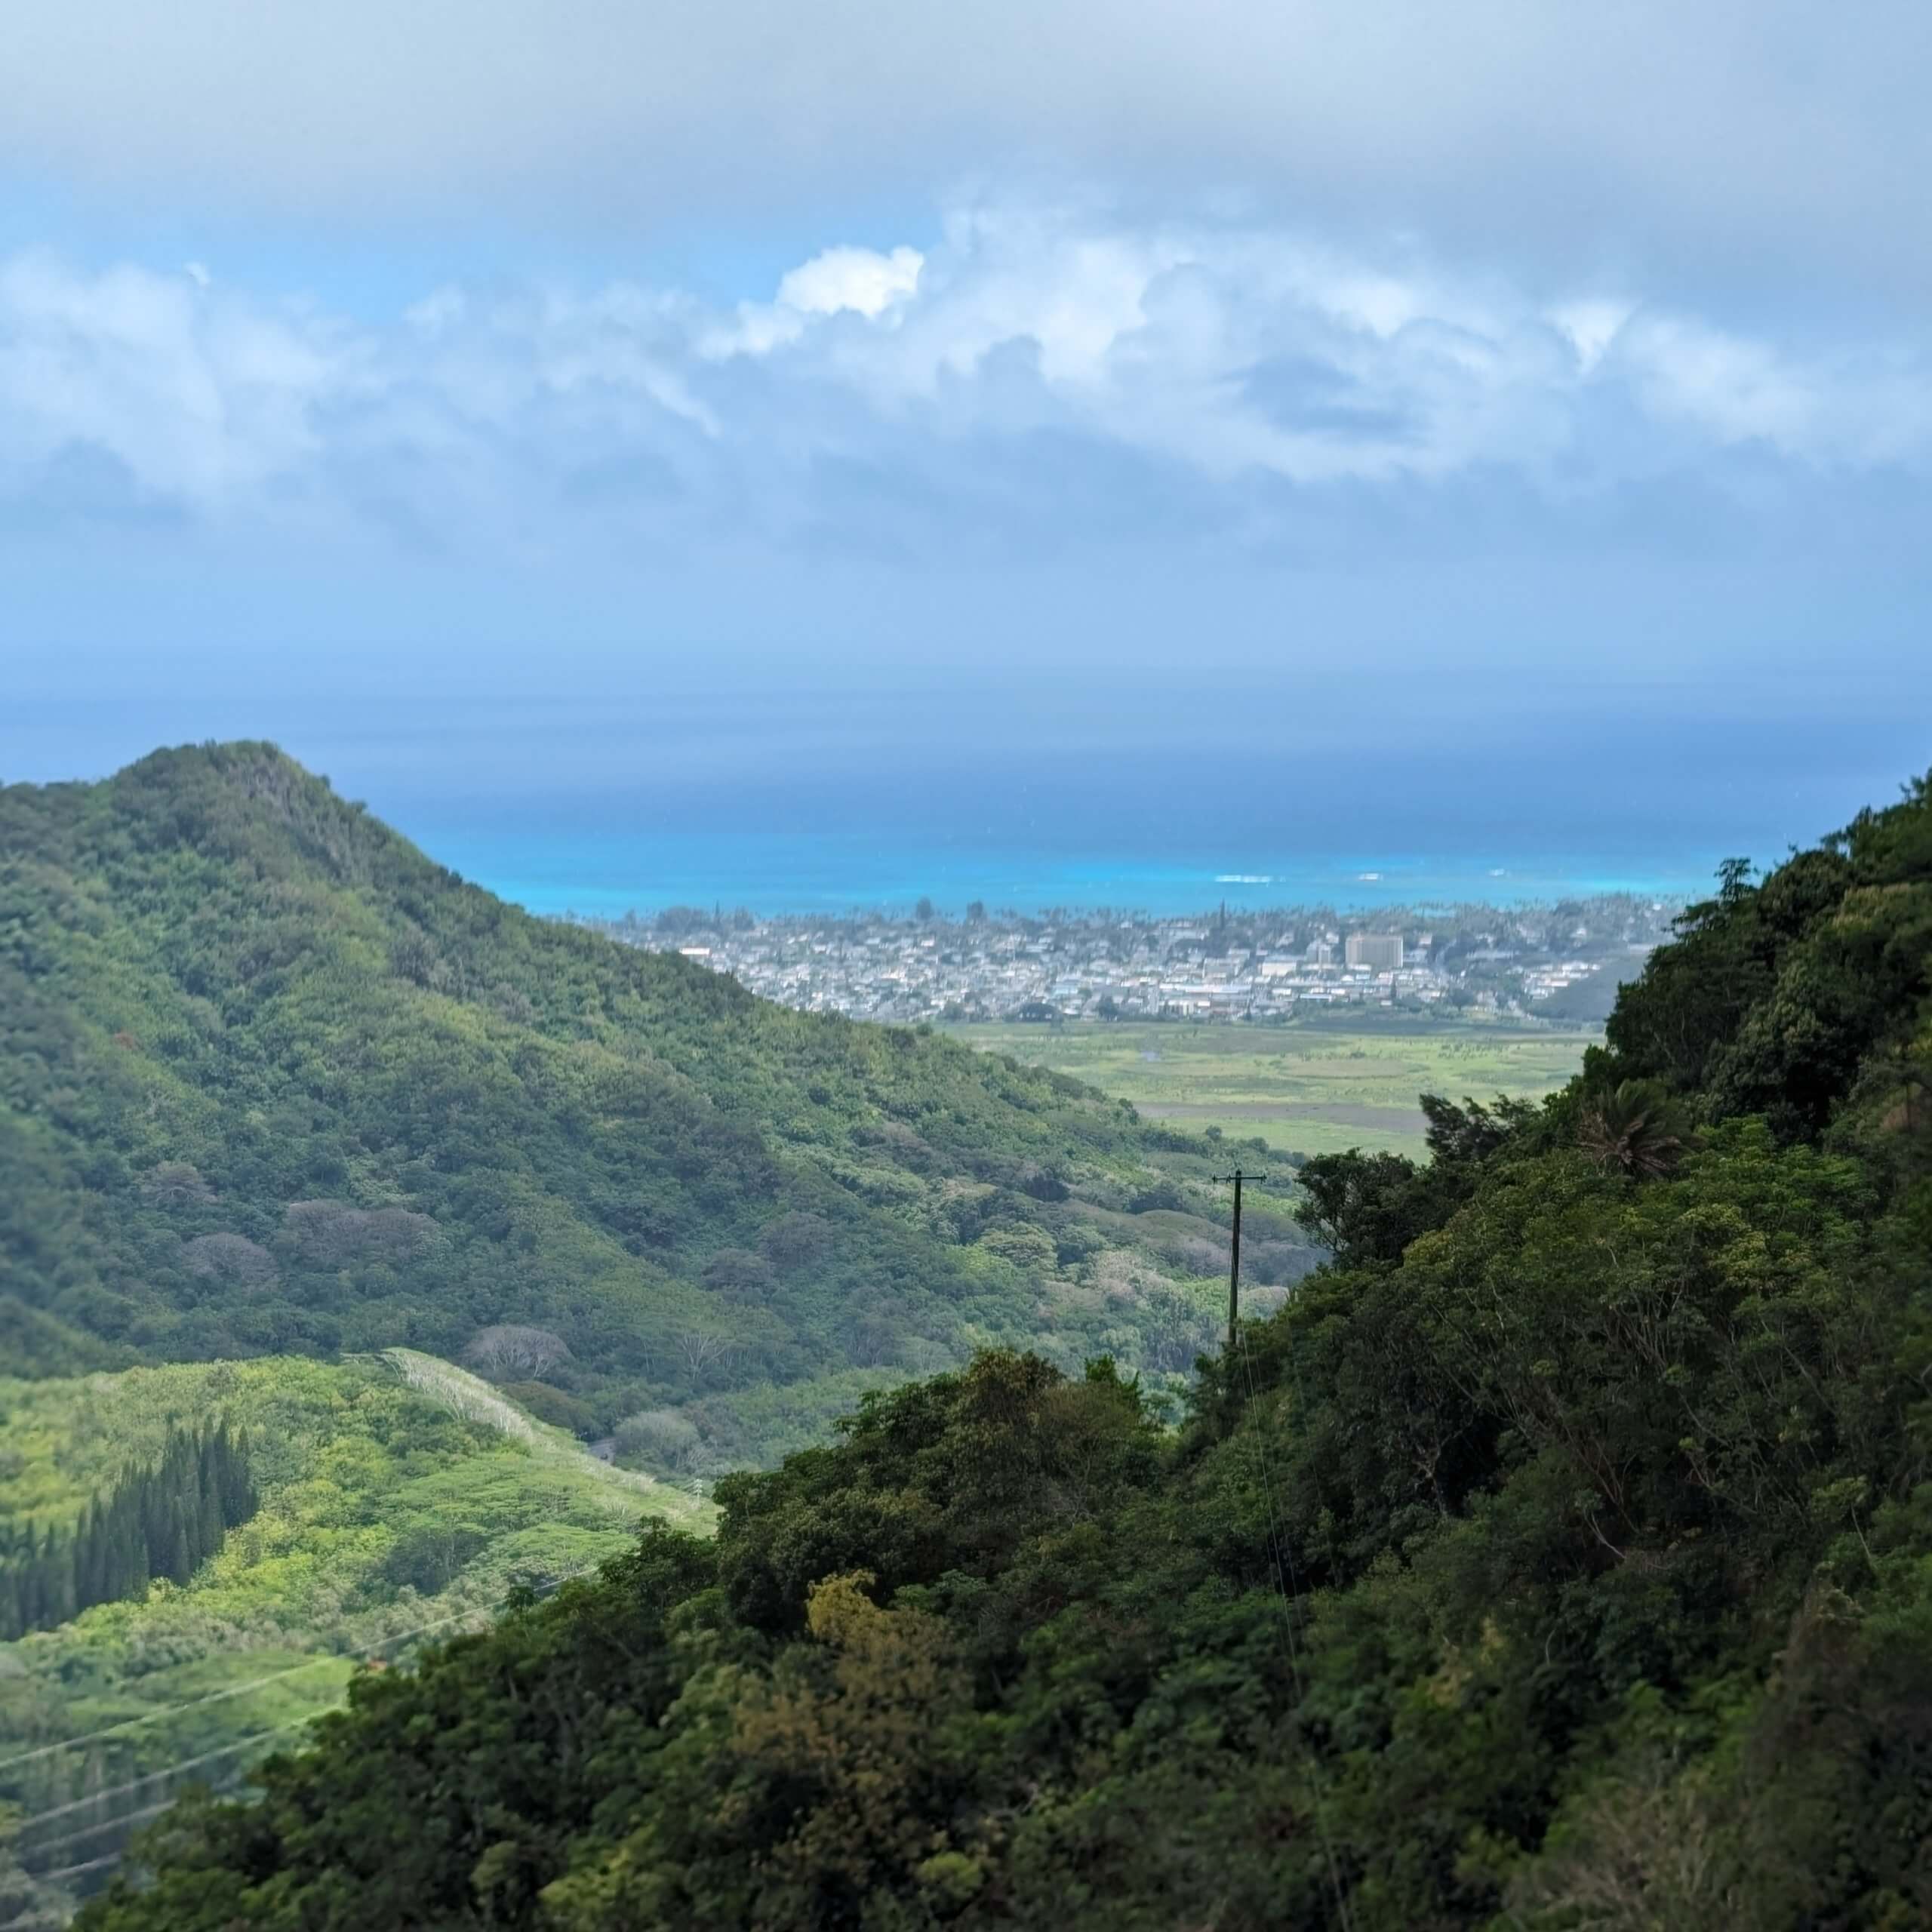
Stop #2: Nu’uanu Pali Lookout
We heard that this was a pretty cool view. Plus, it was on our route and was a free activity (besides the $7 parking fee). The view was really pretty and worth the stop. The day we went was SUPER windy—we literally felt like we were going to blow over! But the kids got a kick out of it.
Stop #3: Lanikai Beach
I really wanted to stop here, but it ended up being more of a drive by. The water is absolutely gorgeous in this area; however, it’s in a residential area so parking isn’t the easiest to find. And you have to be careful to follow parking rules, so you don’t get towed. We decided to keep on driving instead of fighting for a spot. It probably would have been easier if we stopped earlier in the day, but it was pretty busy by noon.
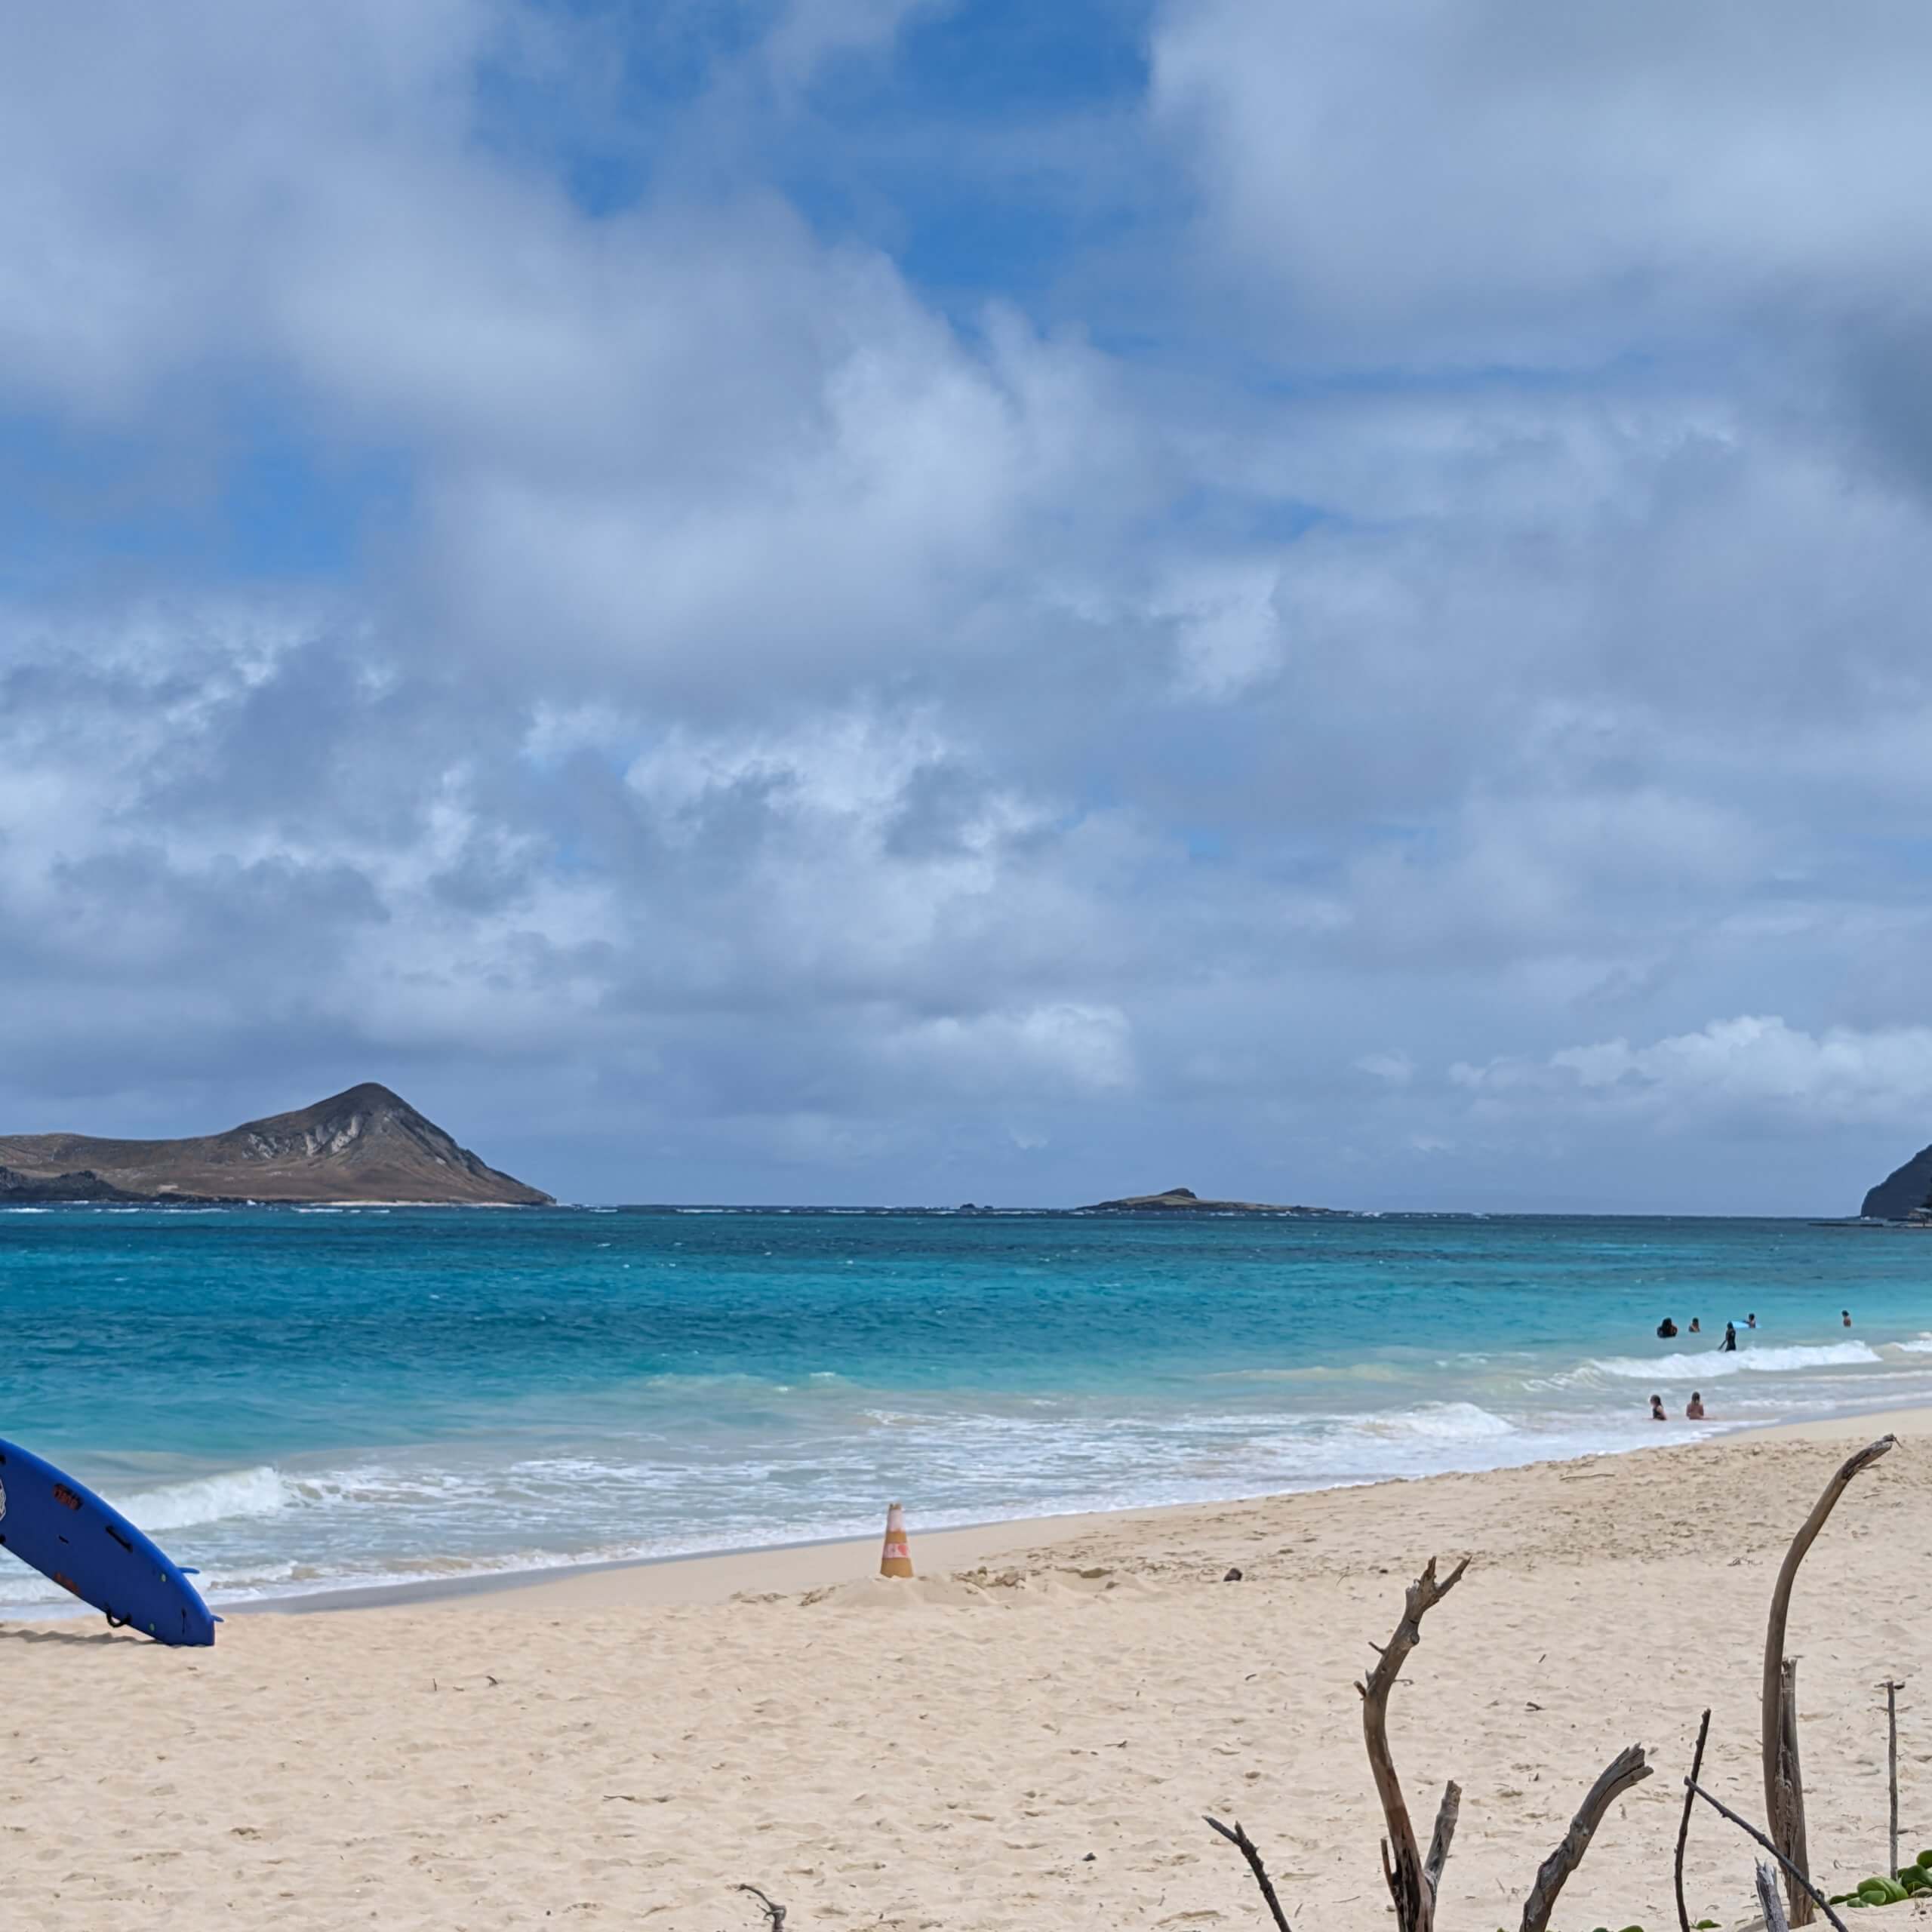
Stop #4: Waimanolo Beach
The water here was just as pretty and plenty of parking is available. We walked down to the beach and my youngest did get in the water; however, it was super windy and chilly so no one else swam. We only stayed for a short time.
Stop #5: Sandy Beach
This was just another photo opportunity. We grabbed a few photos and continued driving.
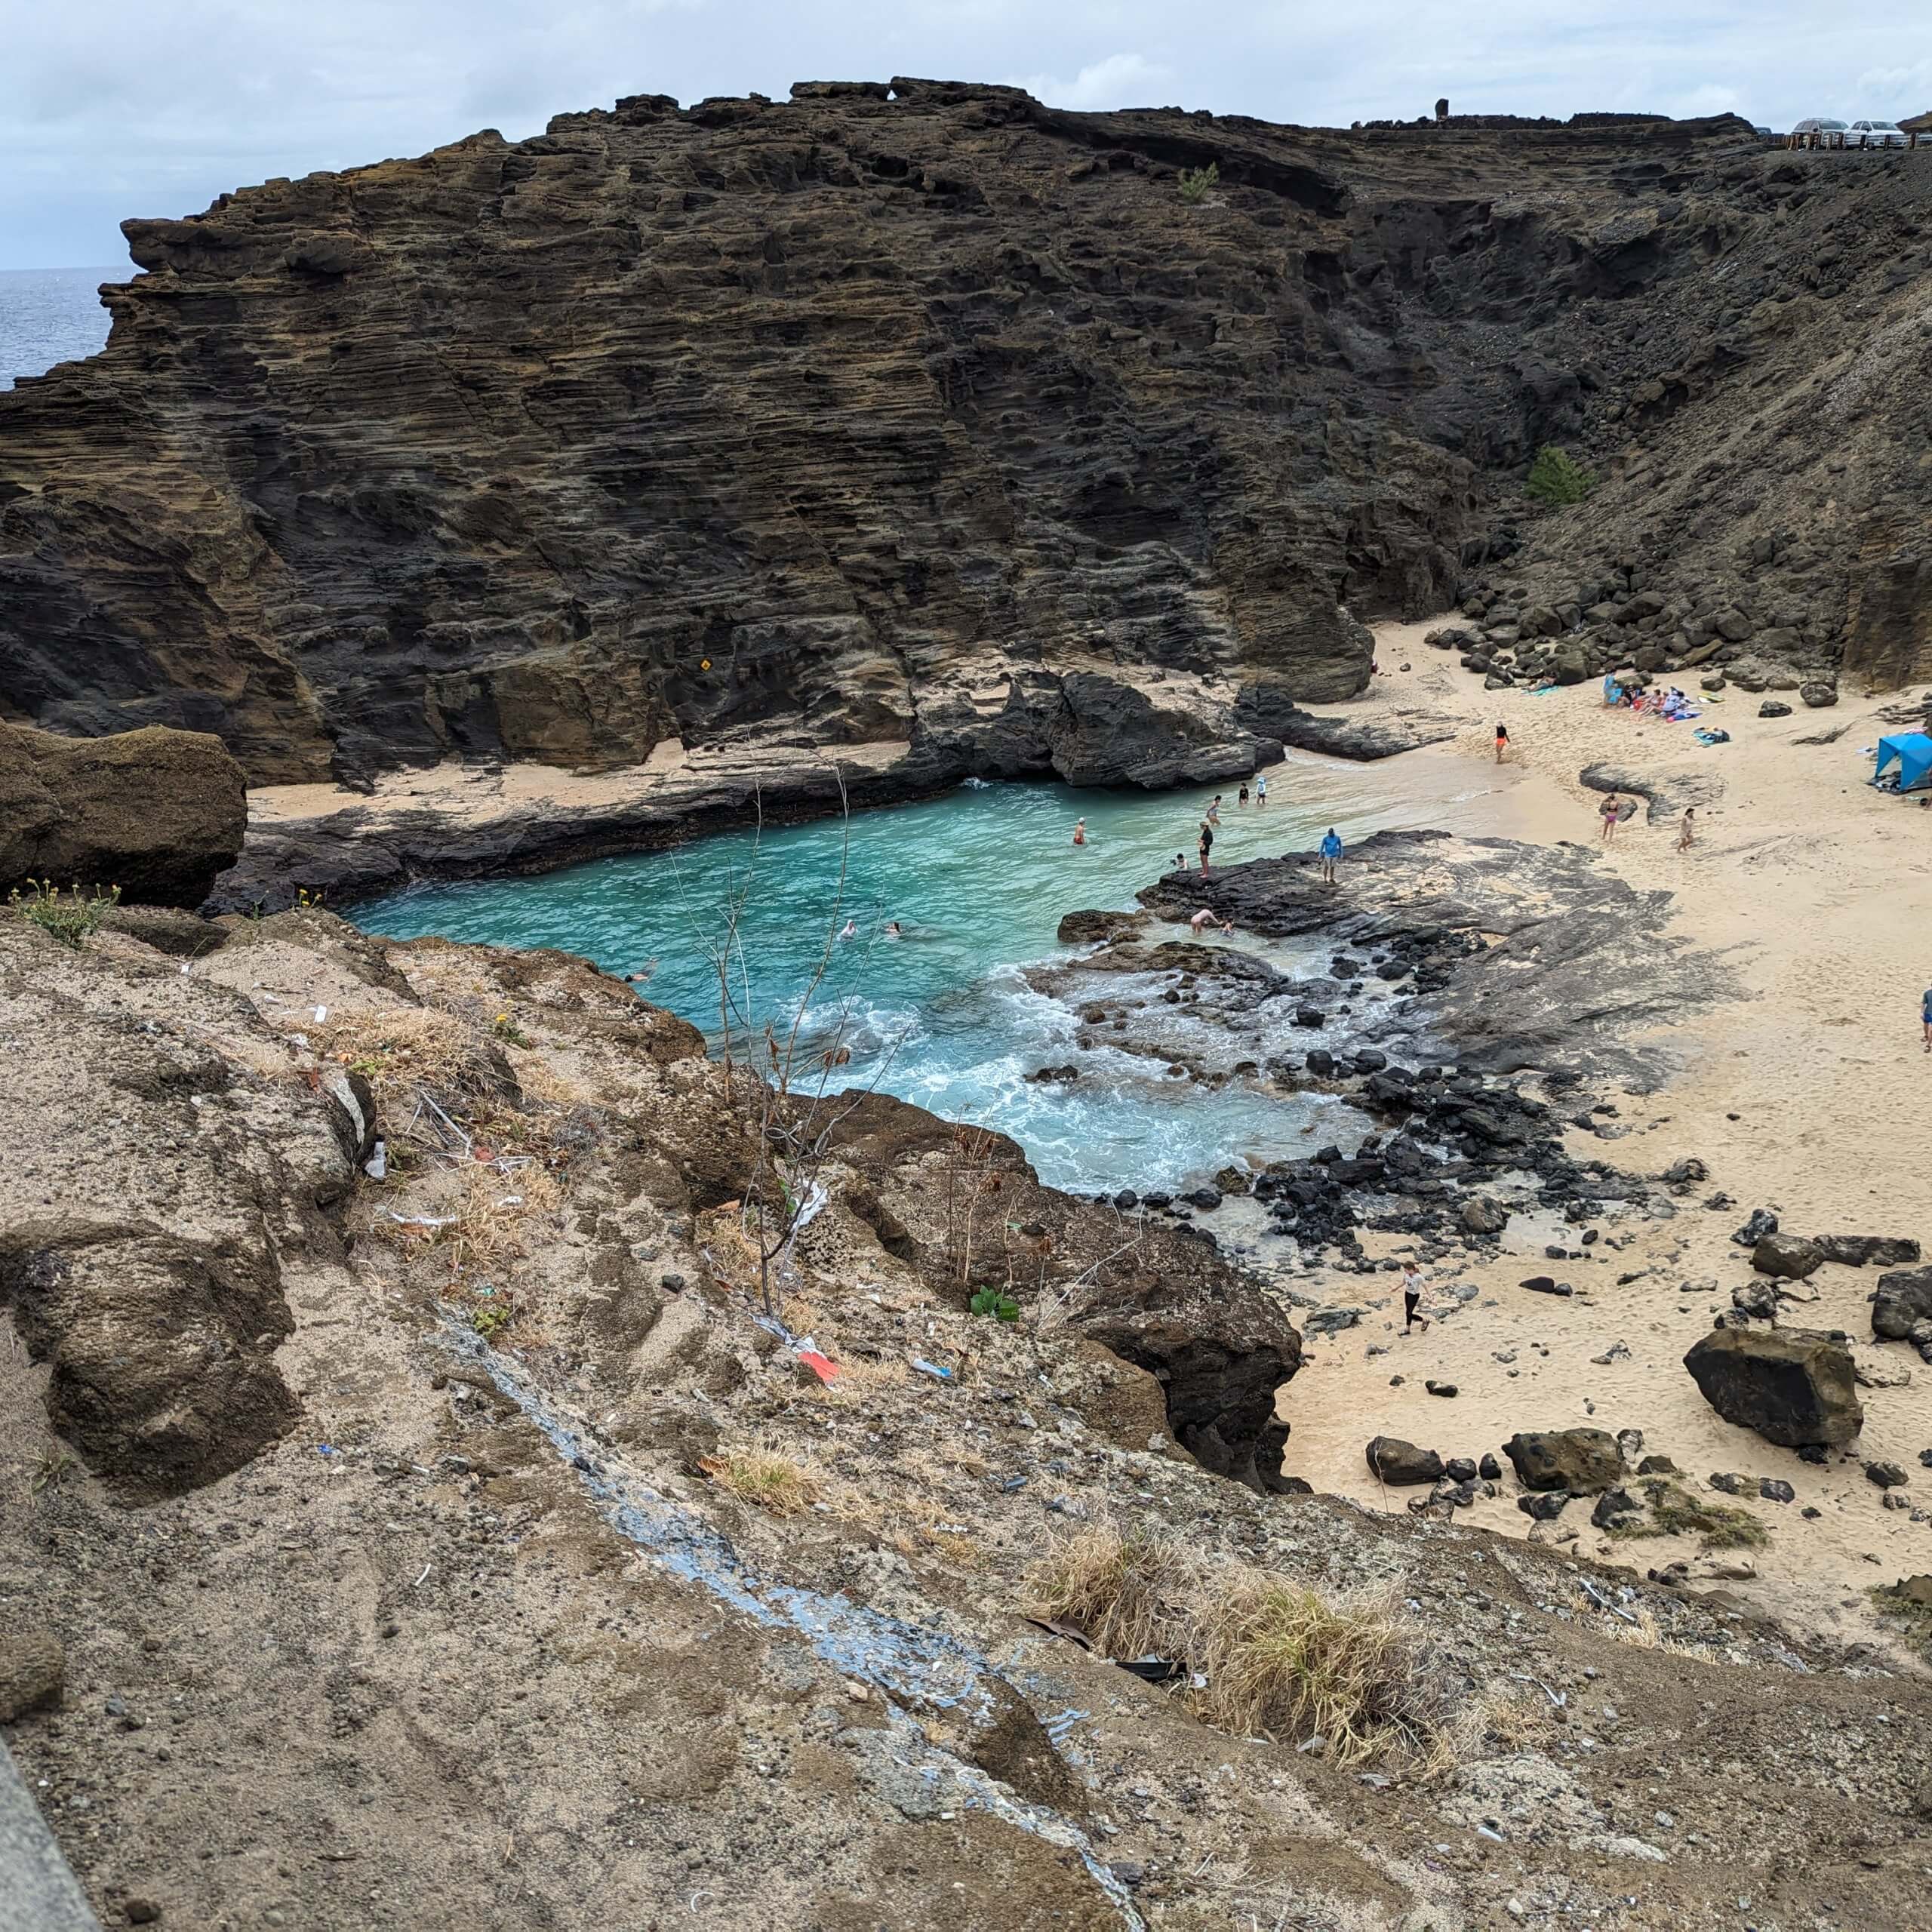
Stop #6: Halona Blowhole
This was another quick stop for us. We just needed enough time to snap some pictures. These beaches are not really meant for swimming. They are super rough and we even heard locals talking about how you won’t see them in the water because it’s dangerous.
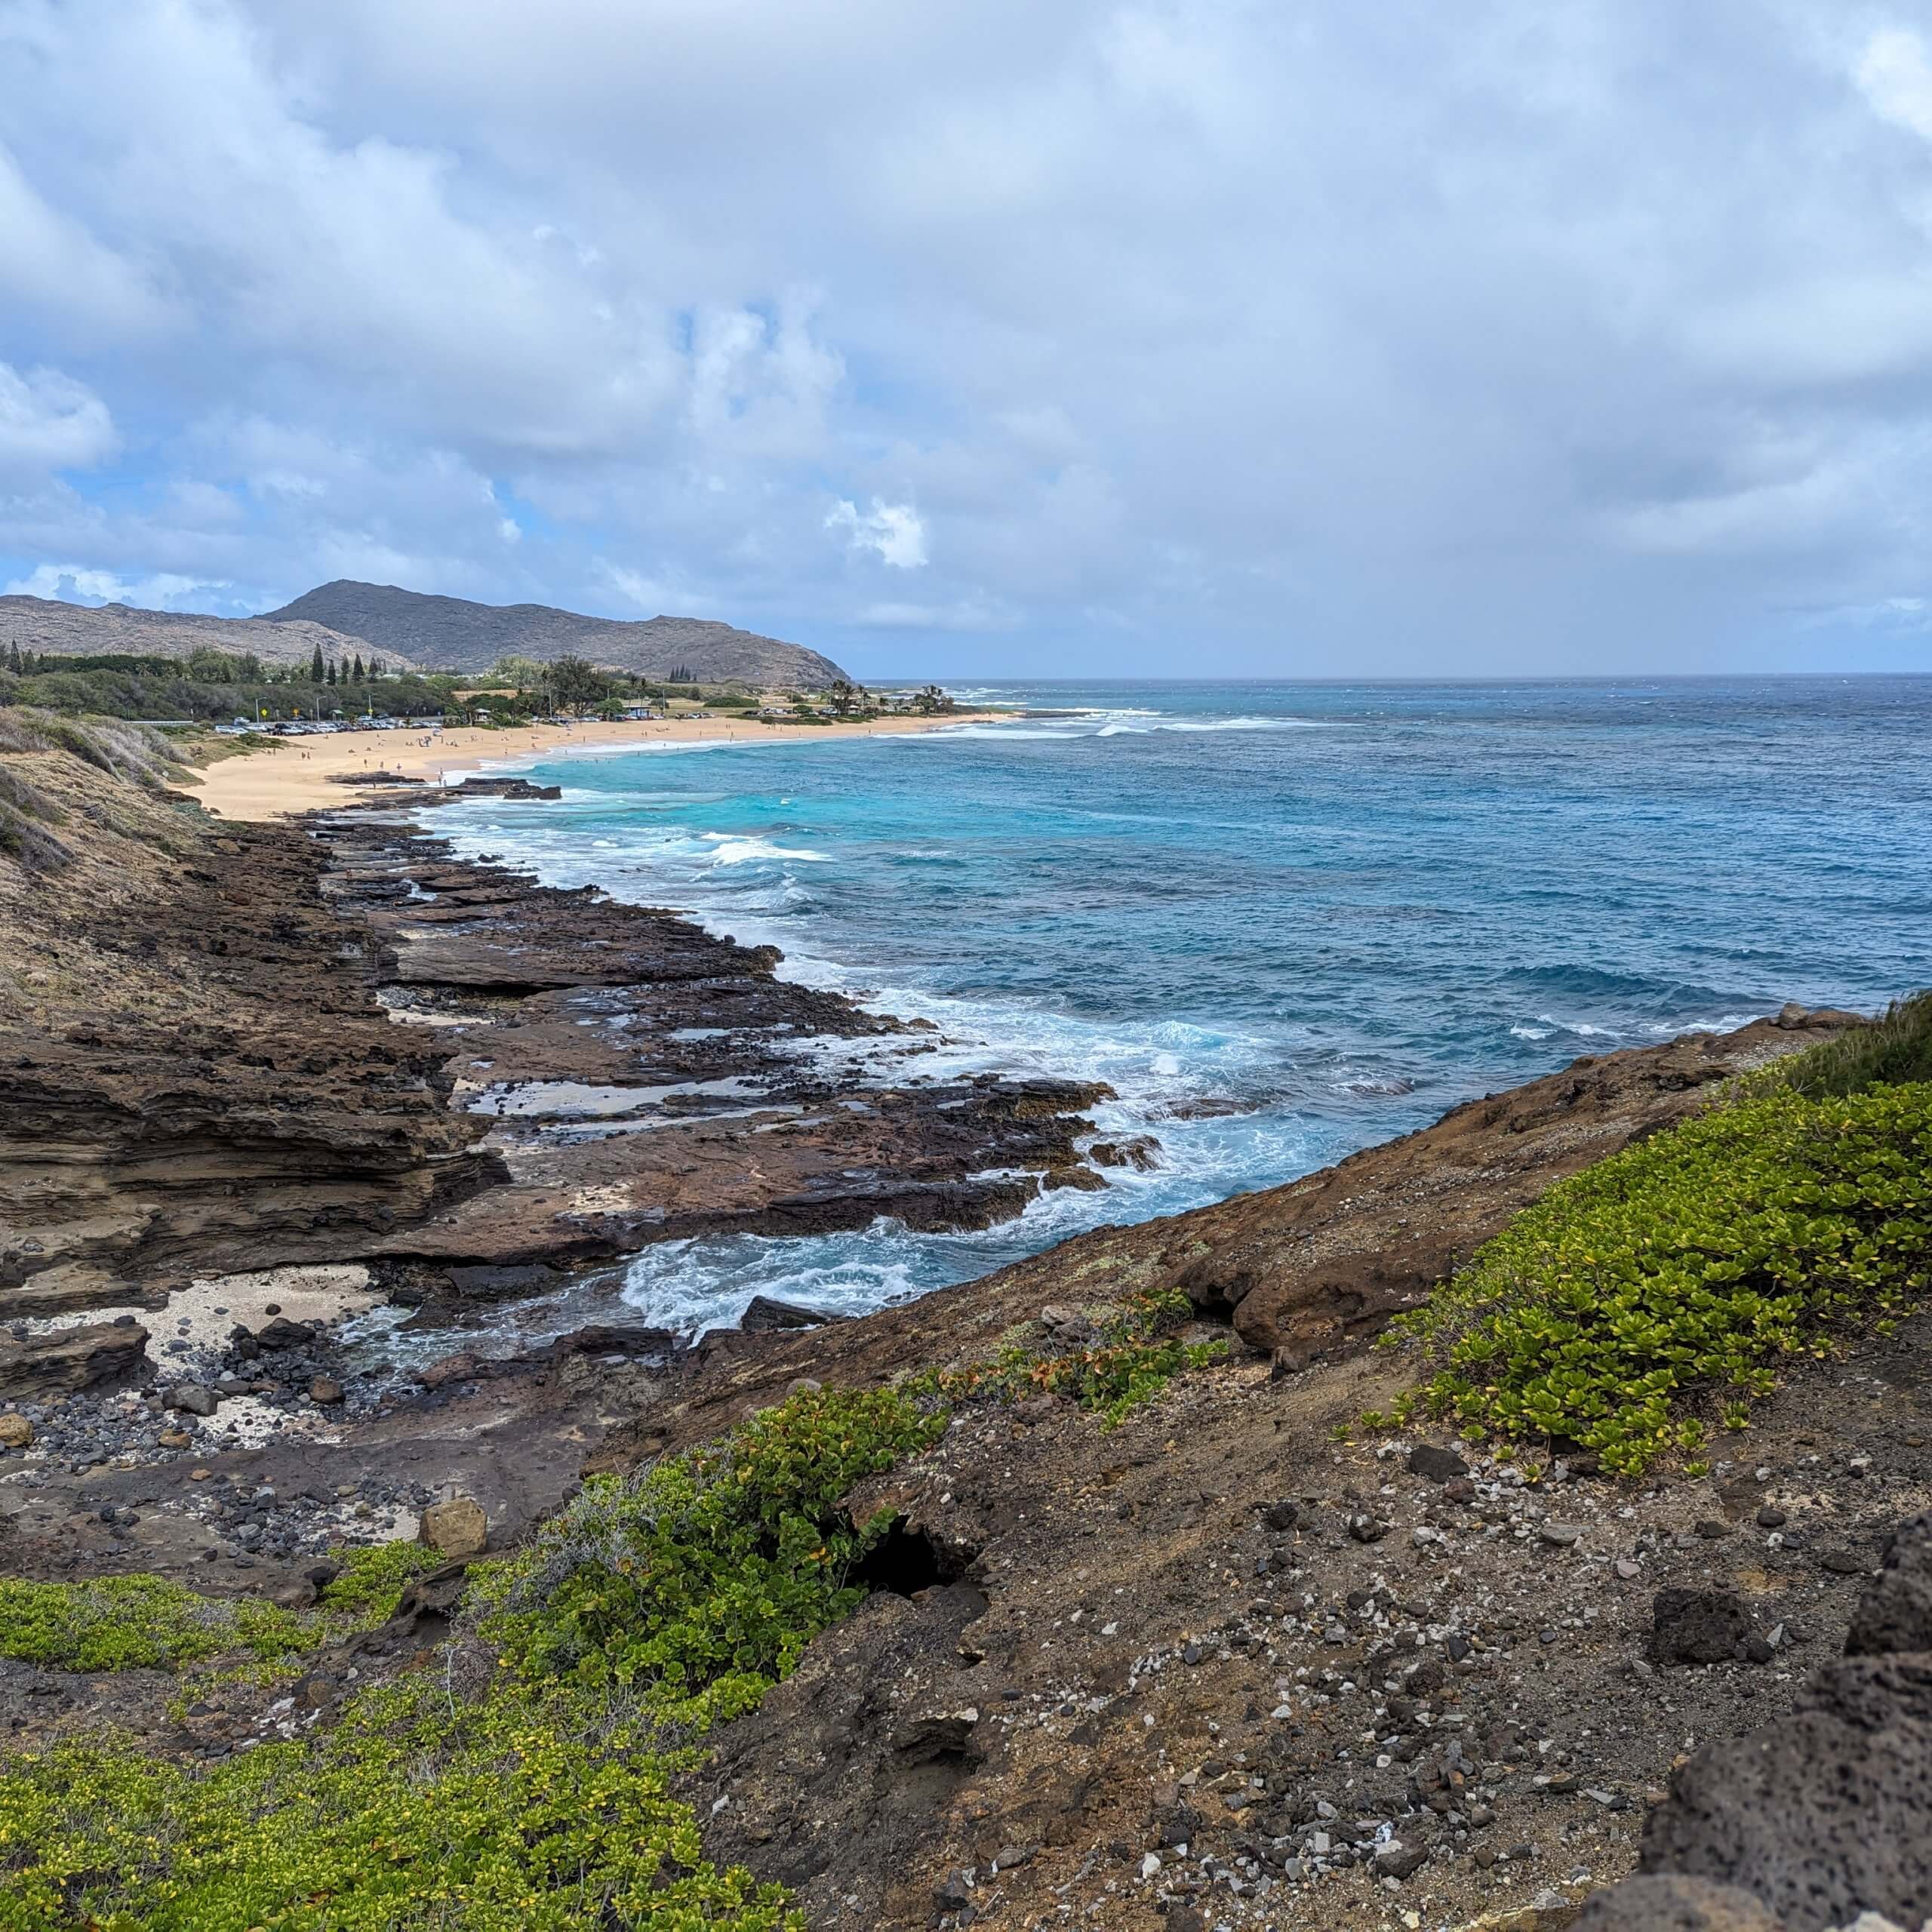
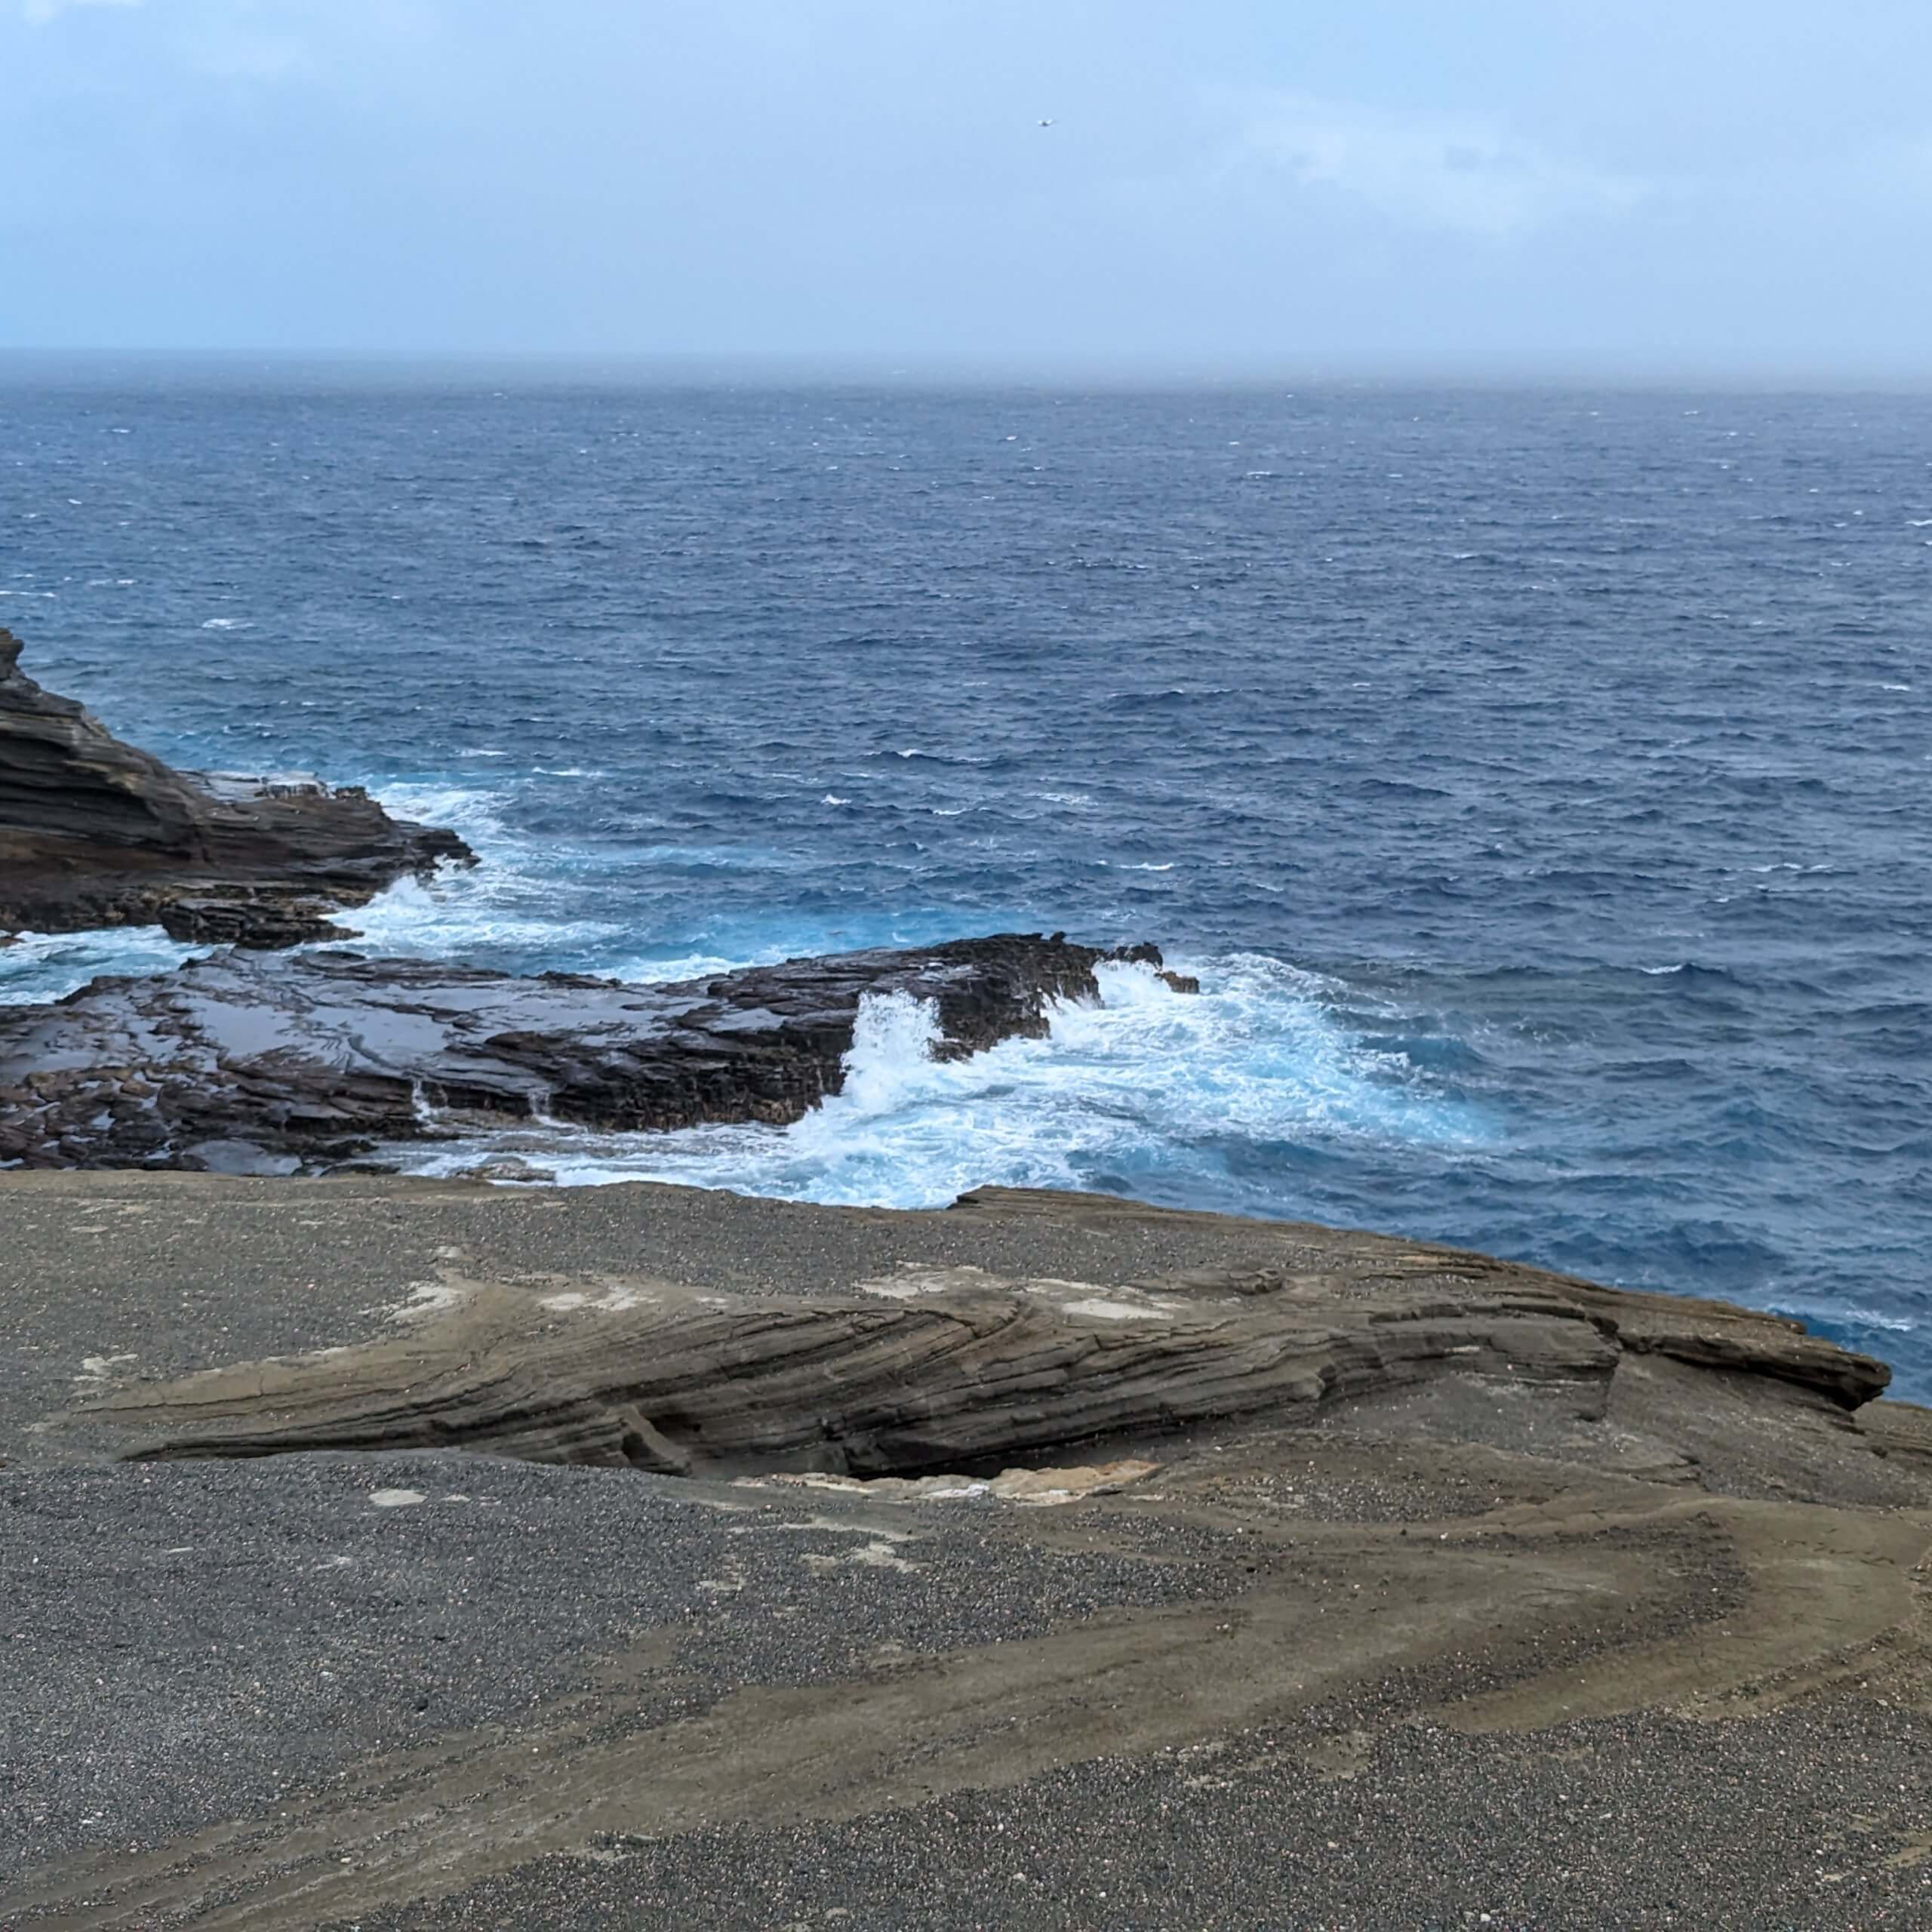
Stop #7: Lanai Lookout
This was the last stop on our loop. These were quick stops with some pretty views and good photo opportunities.
Stop #8: Hilton Garden Inn Waikiki
We headed to our hotel but got stuck in some rush hour traffic. By around 2pm or so, our bodies were feeling pretty exhausted. Between the long travel day both today and then yesterday, we were in need of some relaxing!
Thankfully when we got to the hotel, we got a second wind. We unloaded the car and parked and then walked around Waikiki stopping at Tiki’s Bar and Grill for dinner. We made reservations early so we could save some money on their happy hour specials—enjoying my first mai tai on the island was just what I needed!
It was an early night for us- we were in bed by around 8pm.
Day 2 – Thursday
I was up by about 1:30am Hawaii time, which was 7am in Ohio. I couldn’t fall back to sleep so I just started my day early. The kids slept longer, but everyone else was up by around 4am. If you live on the East Coast, plan to have some early nights and early mornings while your body adjusts to the time change.
Because we were only staying at this hotel for one night, we didn’t unpack (other than what we needed for the night). I made sure to pack our bags so that we only had to touch one of our bags. We packed up our stuff and loaded the car by about 6am.
Hilton Diamond/Gold Benefits
Our hotel (Hilton Garden Inn-Waikiki) gave us $30 to spend in food and beverage credit, which is a Hilton Gold/Diamond perk. You can read all about how easy it is to get this perk in this post.
There is a convenience store called the Wiki Wiki Market at the hotel that had both hot and cold food items. We ended up using the credit to purchase sandwiches for lunch. Since we had a pretty packed day, we wouldn’t have time to have a sit-down lunch so being able to eat a packed lunch was not only convenient, but also saved us on having to purchase a meal. You can read all about how we saved money—and how we utilized those food and beverage credits each day of our trip!
Luggage Hold
We headed over to the Hilton Hawaiian Village to drop off our luggage since that’s where we’d be staying for the next 5 nights. We didn’t want to travel with our luggage because Hawaii is known to have car break ins. The hotel will take your luggage and hold it and then deliver it to your room when it’s ready, which is so helpful.
Go City Pass
This was our first full day in Hawaii and the first day we utilized our 3-day All Inclusive Go City Pass. We used it for our Kualoa Ranch Jungle Tour and a snorkel tour with Honolulu Snorkel Company.
Stop #1: Kualoa Ranch – Jungle Tour
I figured that for at least the first few days of our trip, we’d be up early so we took advantage of early morning activities. We had the Jungle Tour booked for 8:20am at Kualoa Ranch. This tour was not included in the Go City Pass; however, you were able to upgrade to this tour for $15/person. We heard both the Jungle and Movie Sites Tours were good, so we thought the $15 upgrade was worth it.
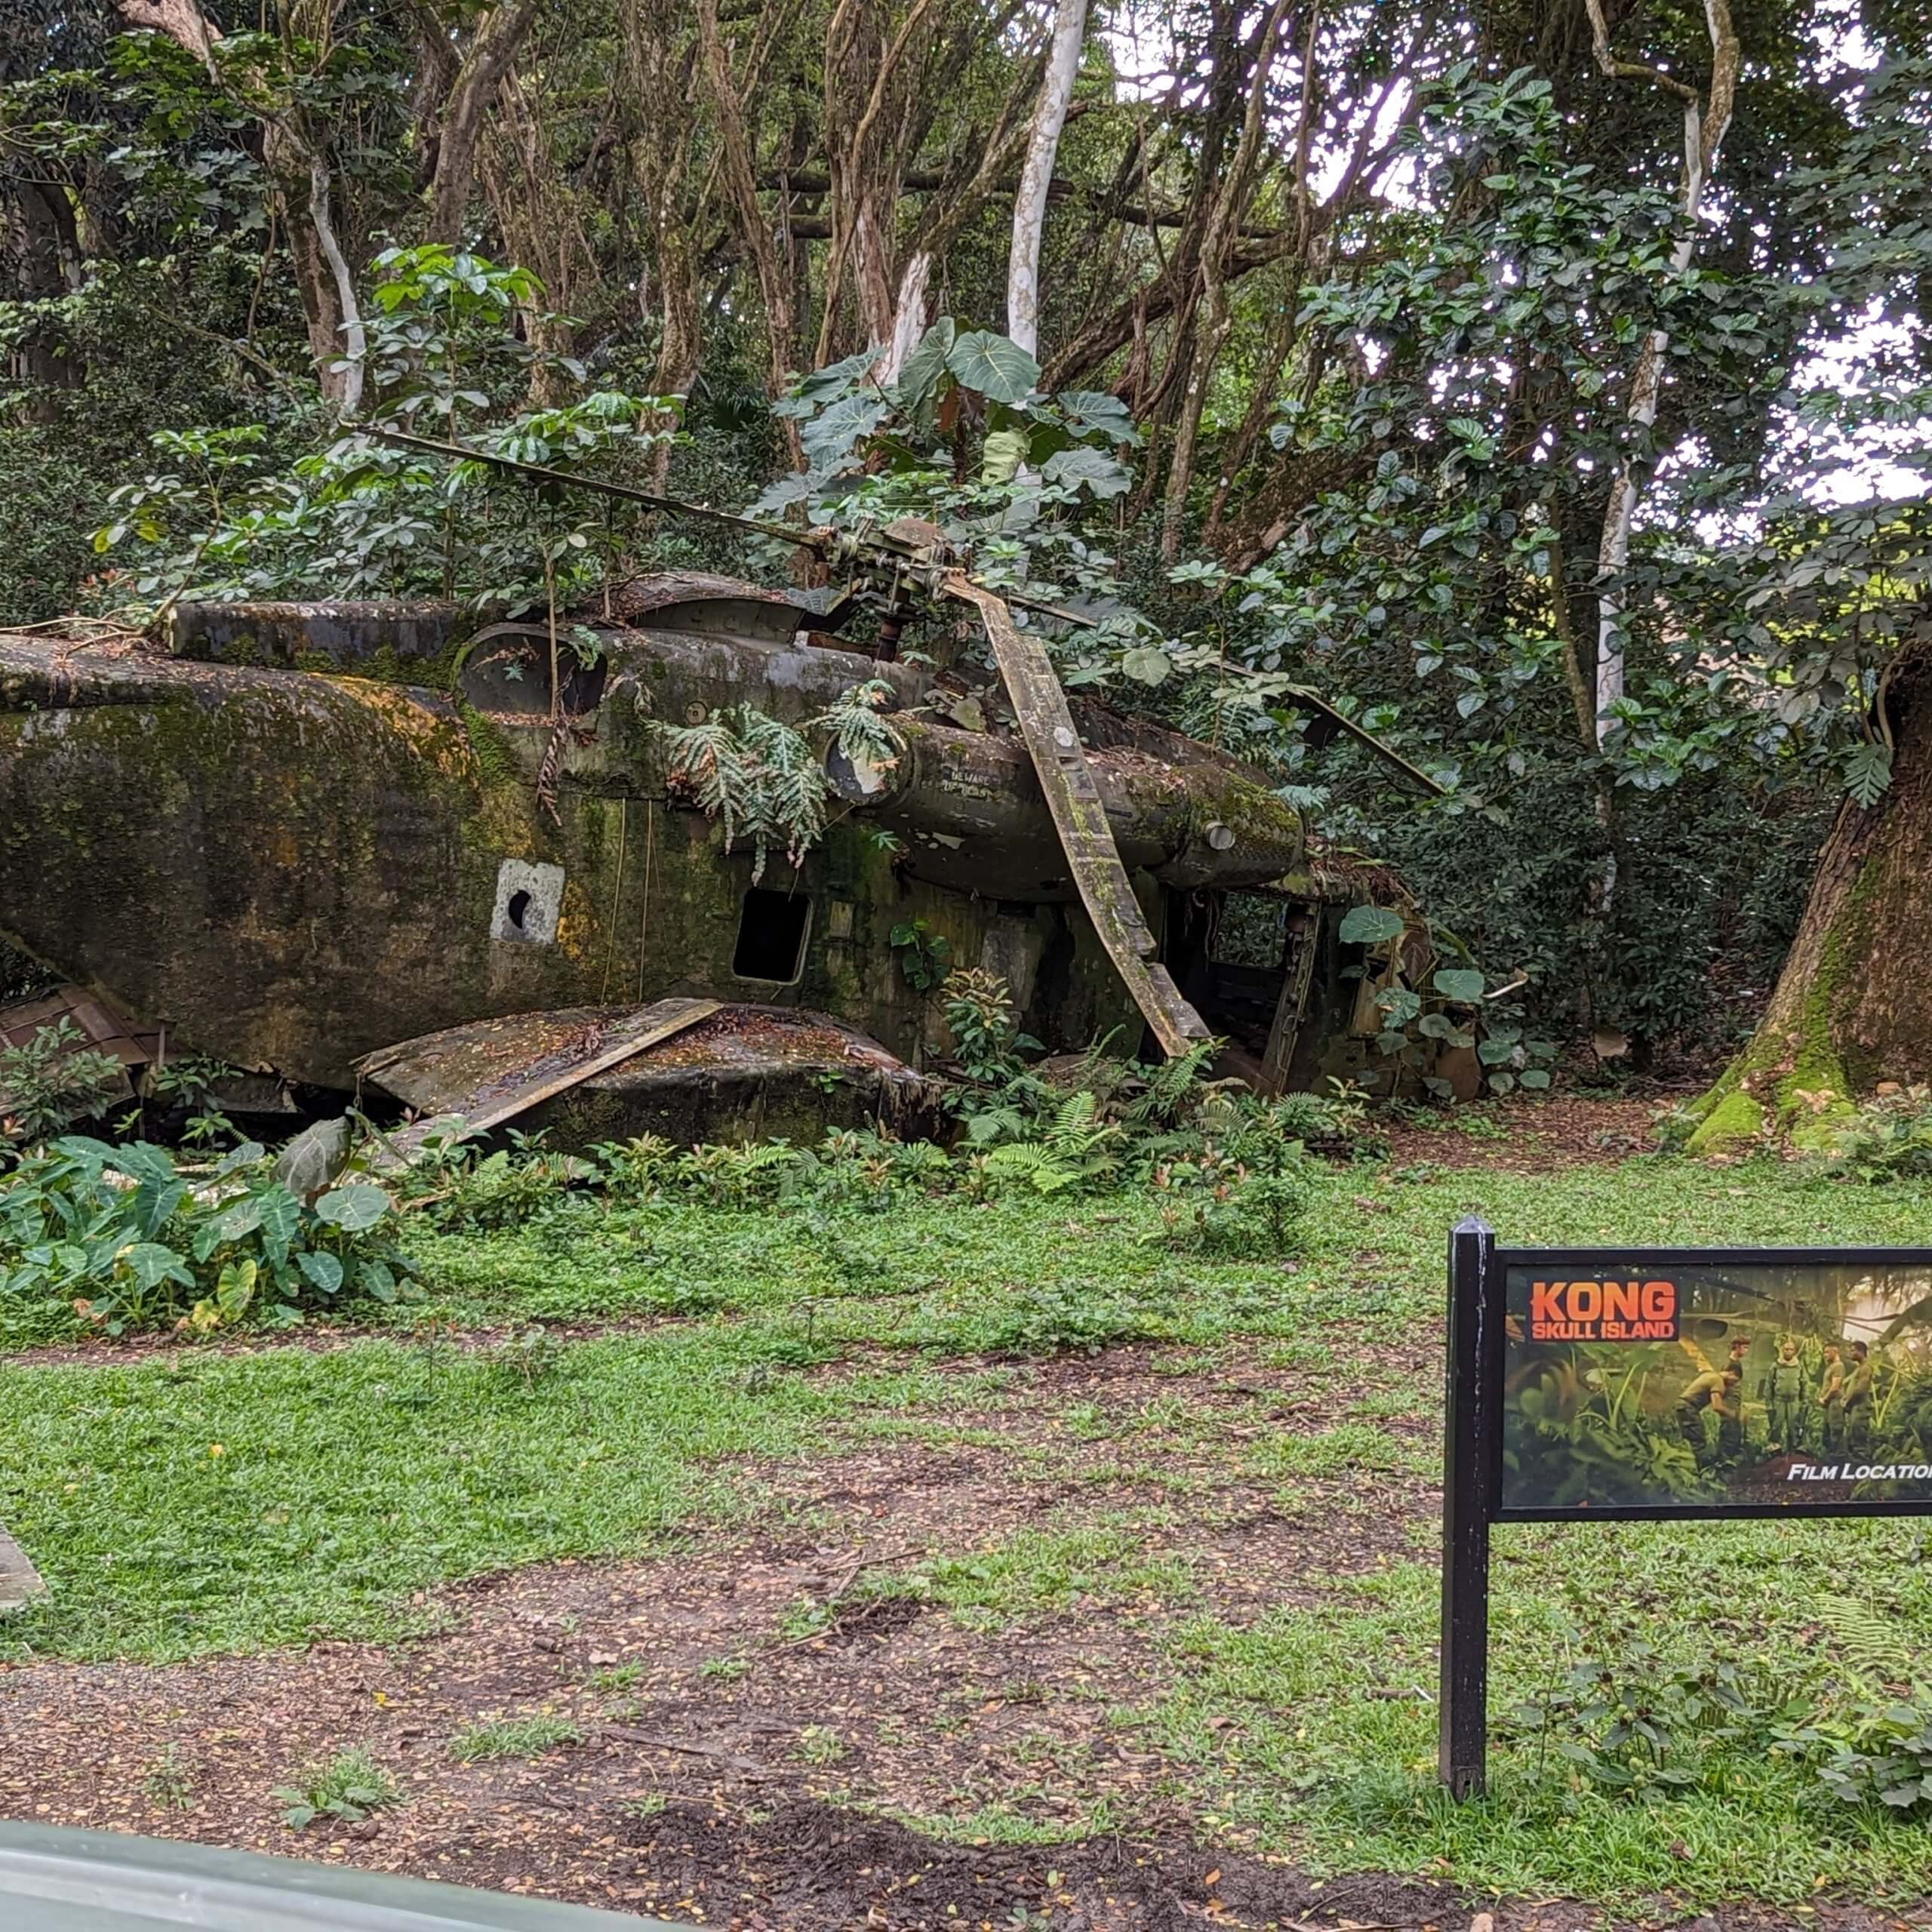
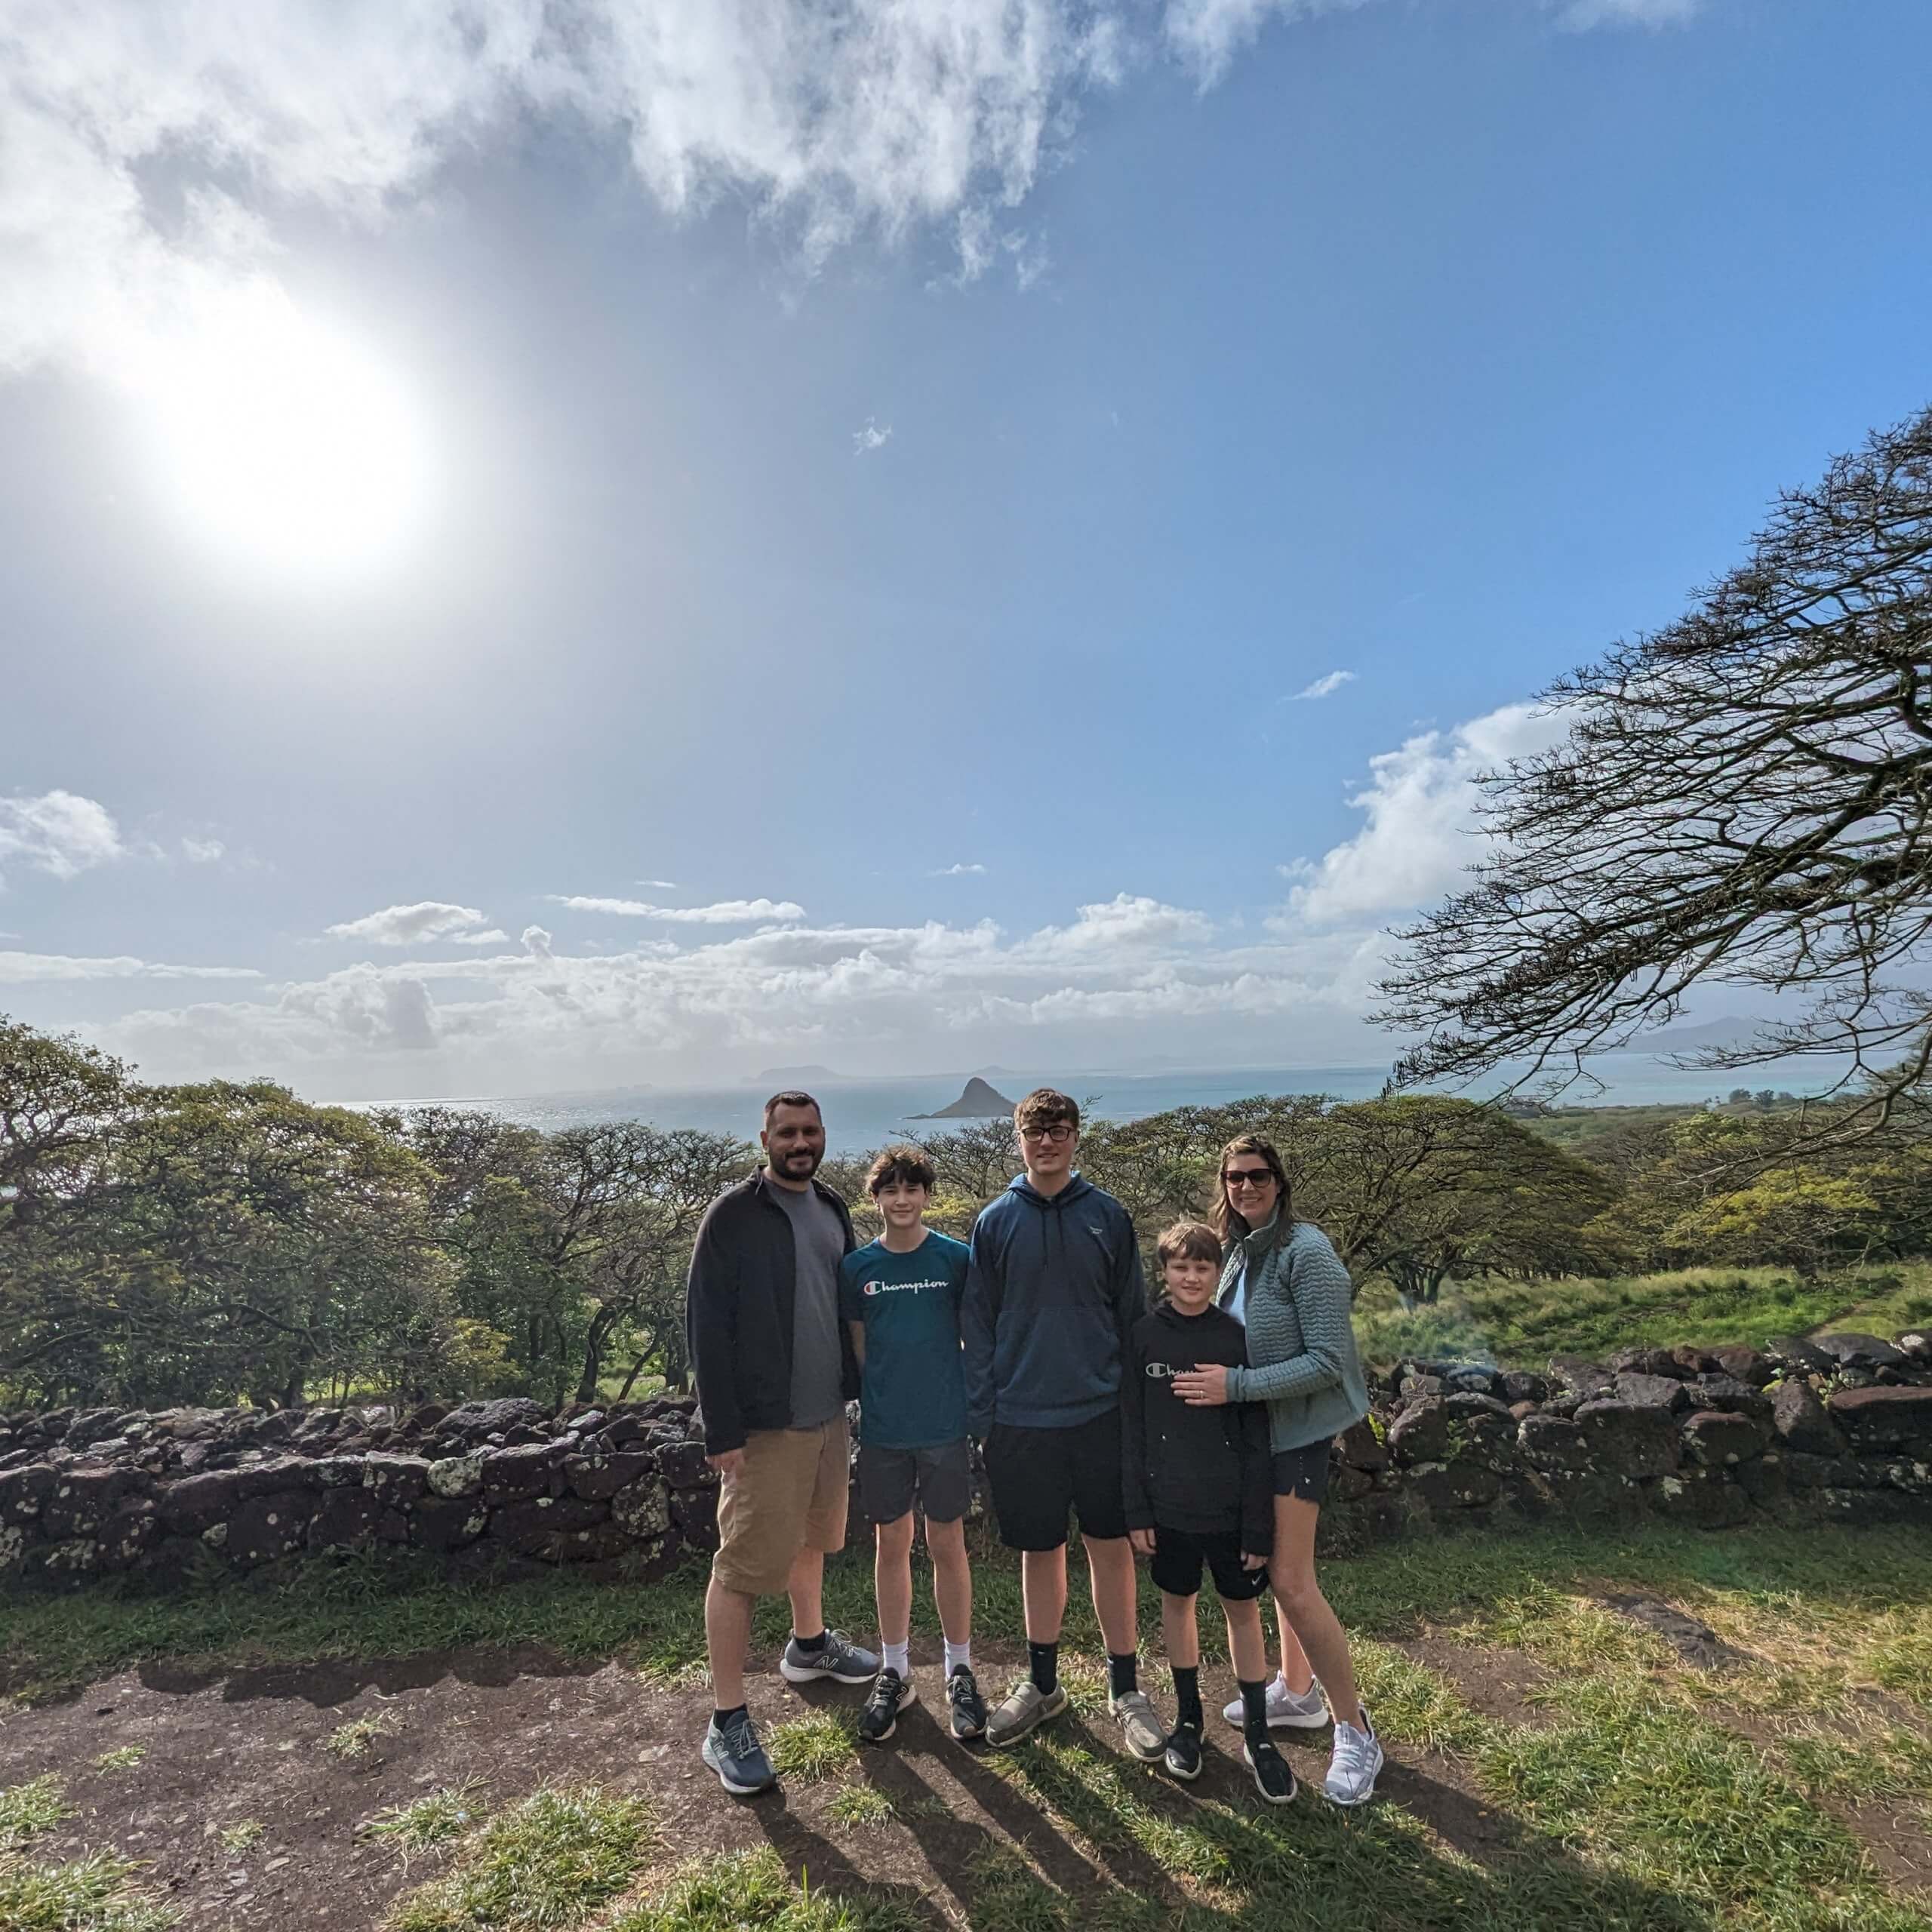
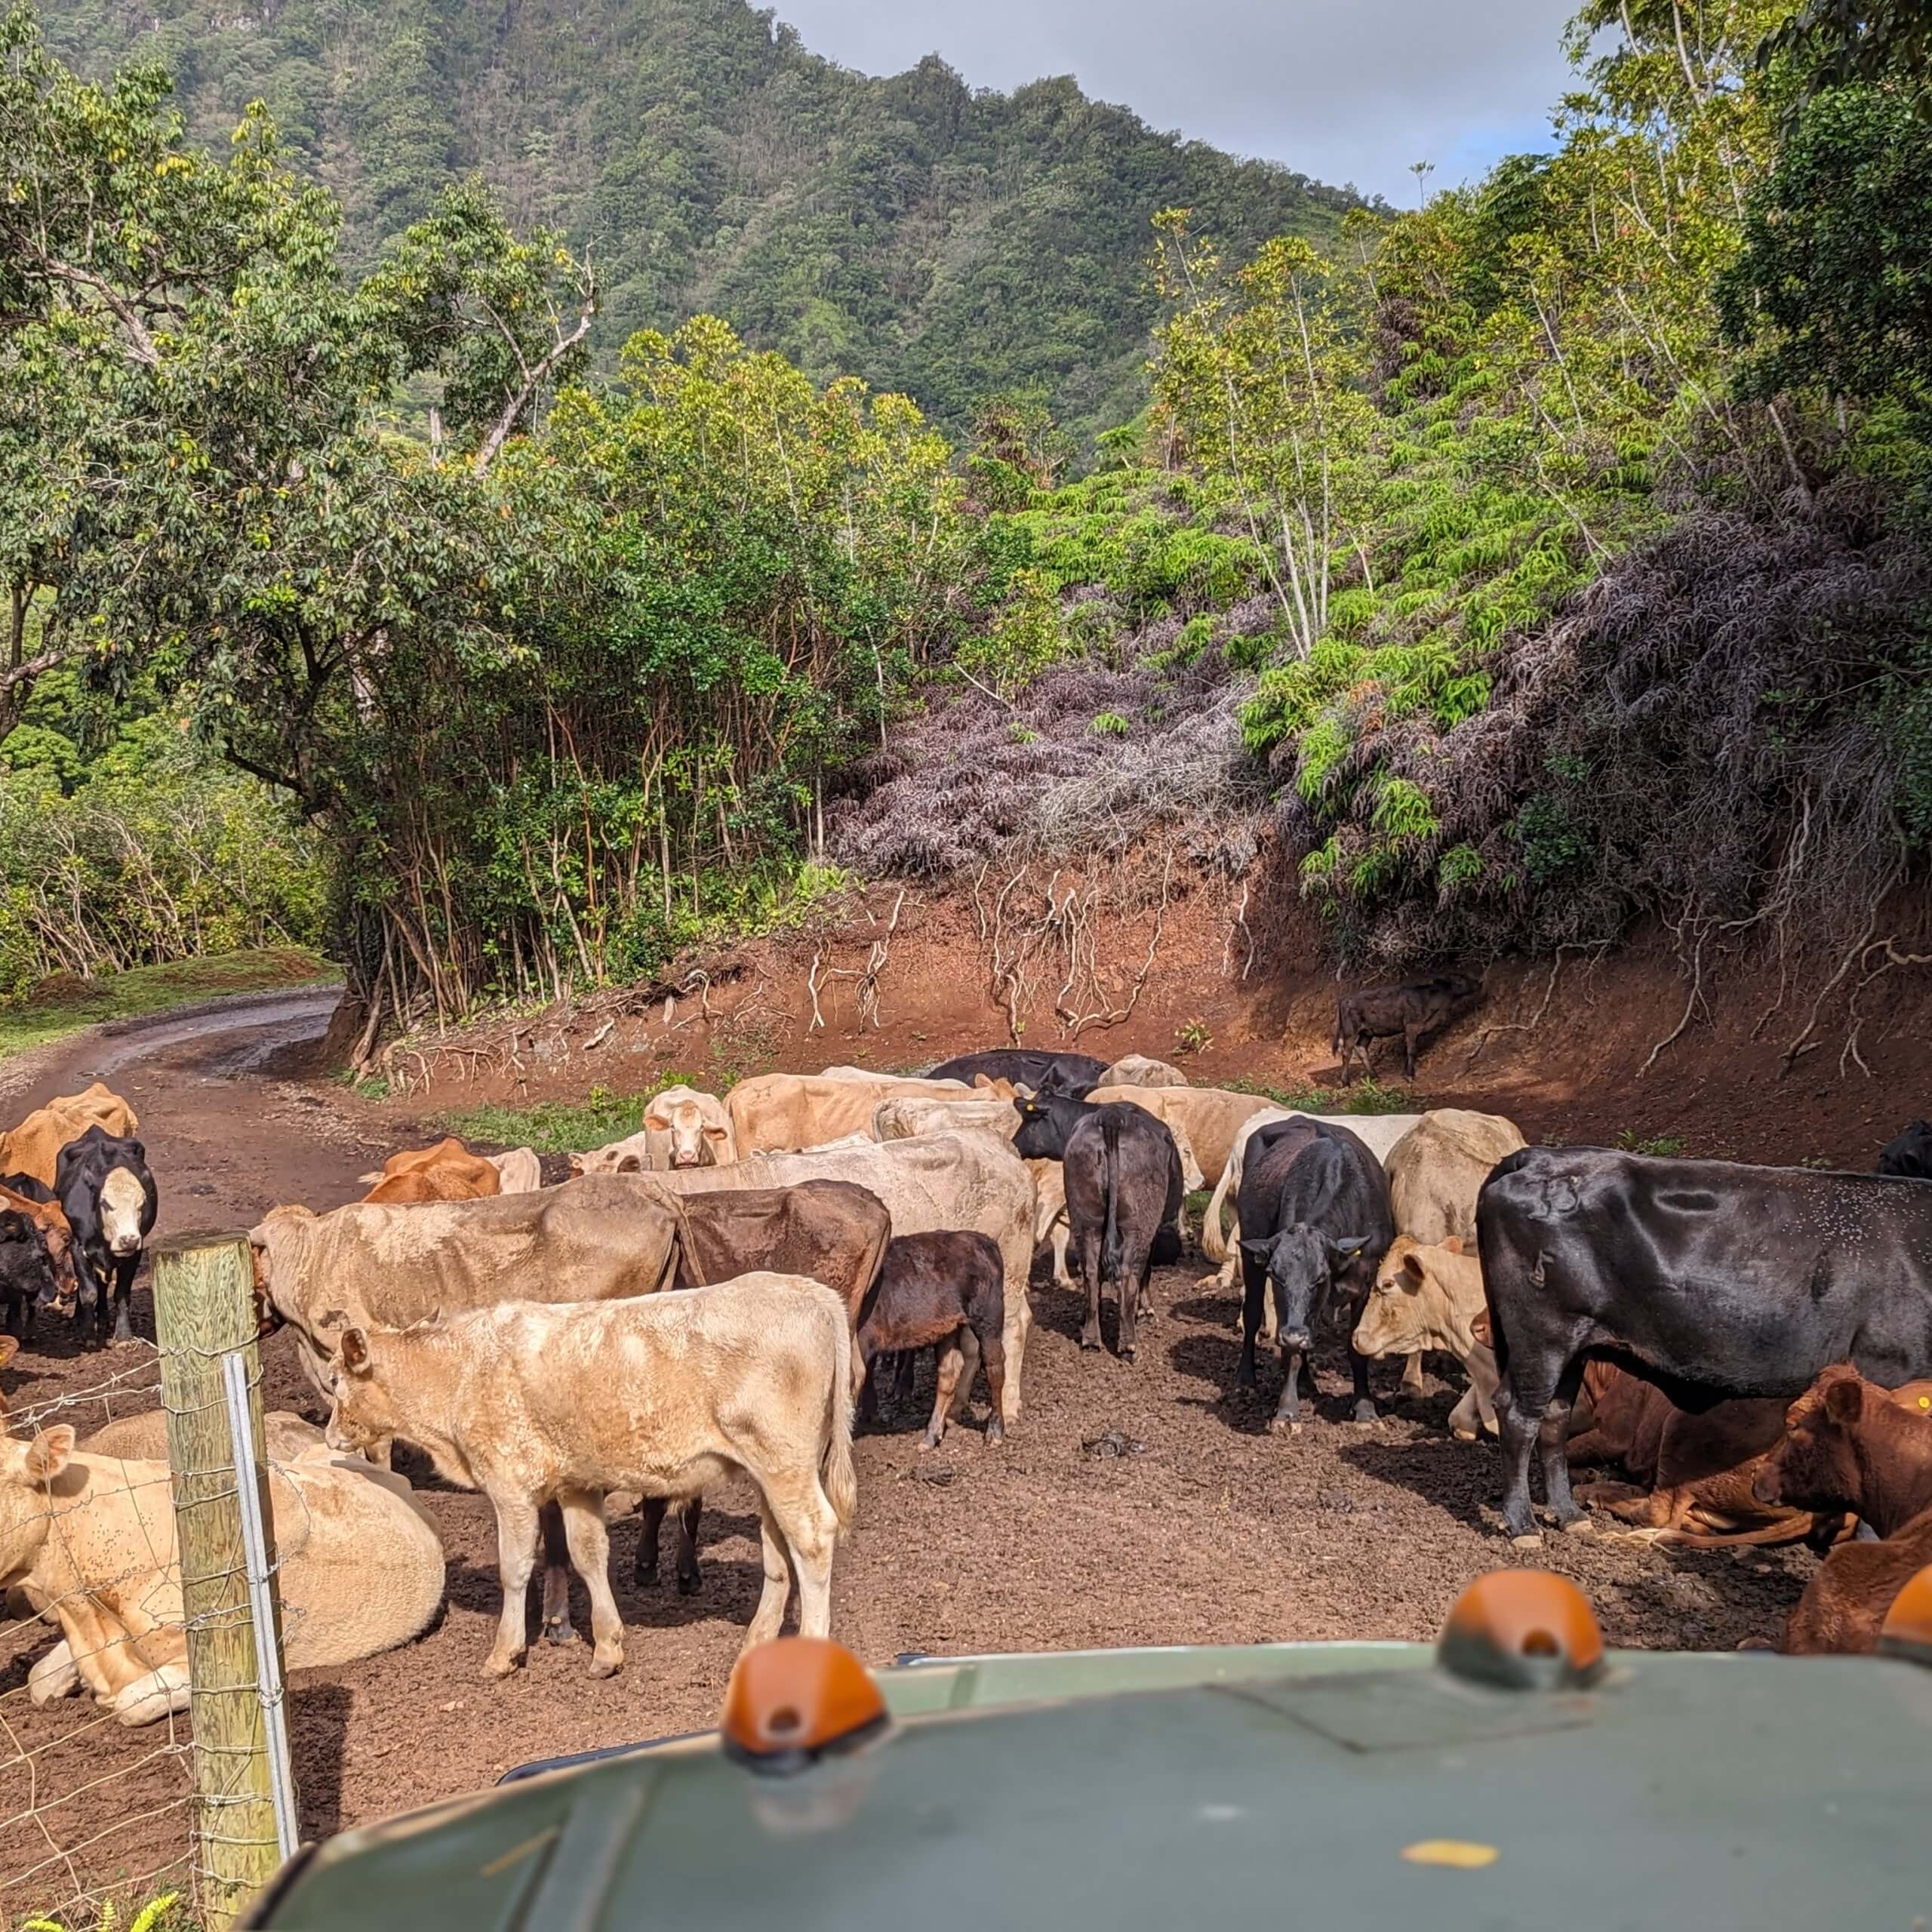
Kualoa Ranch is a good 45-minute drive from Waikiki and we needed to be at the ranch about 45 minutes before our tour so keep that in mind if you’re planning a trip. The tour was 90 minutes and took us all around the ranch in an open-air, covered vehicle. We saw some movie sites along with some pretty cool views. Kualoa also has a shop and quick service restaurant if you’re in need of food.
Stop #2: Tropical Farms Mac Nut Farm
Just a few minutes down the road was the Mac Nut Farm. This is a retail shop but has several flavors of Kona Coffee that you can sample as well as lots of flavors of Macadamia Nuts you can try. They also had a fruit vendor out back. We sampled (and purchased) coffee, nuts and grabbed some fresh pineapple with Li Hing powder. It was a fun little stop and definitely worth it—especially if you like nuts or coffee!
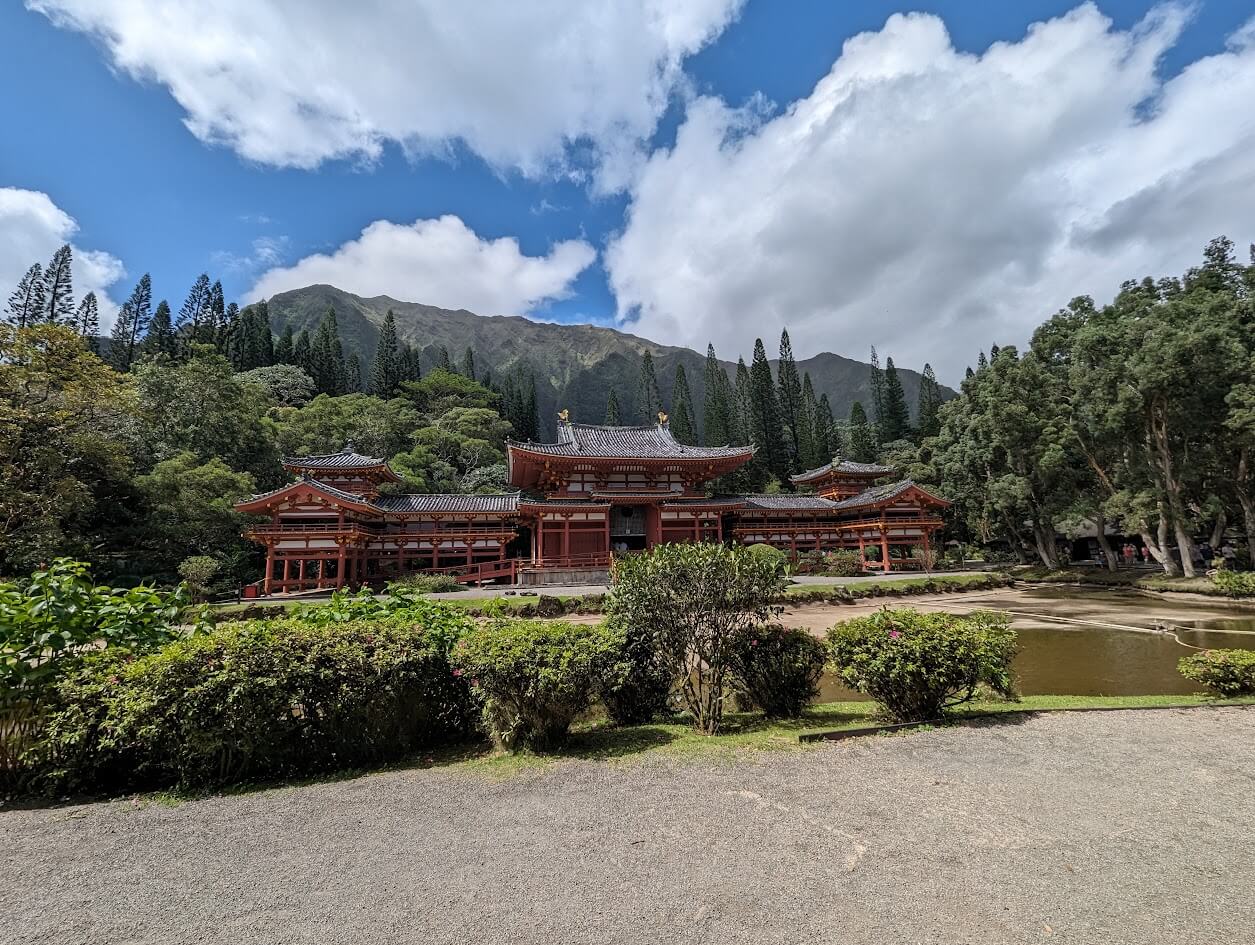
Stop #3: Byodo-In Temple
Our next stop was on our way back to Waikiki and only about 15-20 minutes from the Mac Nut Farm. This stop was inexpensive ($5 adults, $2 kids) and the view was absolutely gorgeous! It was cool to walk through the temple and read about some of the traditions. It felt like you stepped out of Hawaii and right into Japan. I highly recommend a quick stop here!
Stop #4: Honolulu Snorkel Company – Snorkel Tour
From the temple, we headed back towards Waikiki and stopped at the Kewalo Basin Harbor for our snorkel tour. We got there around lunch, so it was a perfect time to eat our packed lunch before we snorkeled. The tour itself was really good. I was honestly more worried about jumping into cold water than anything, but you get used to it pretty quickly!
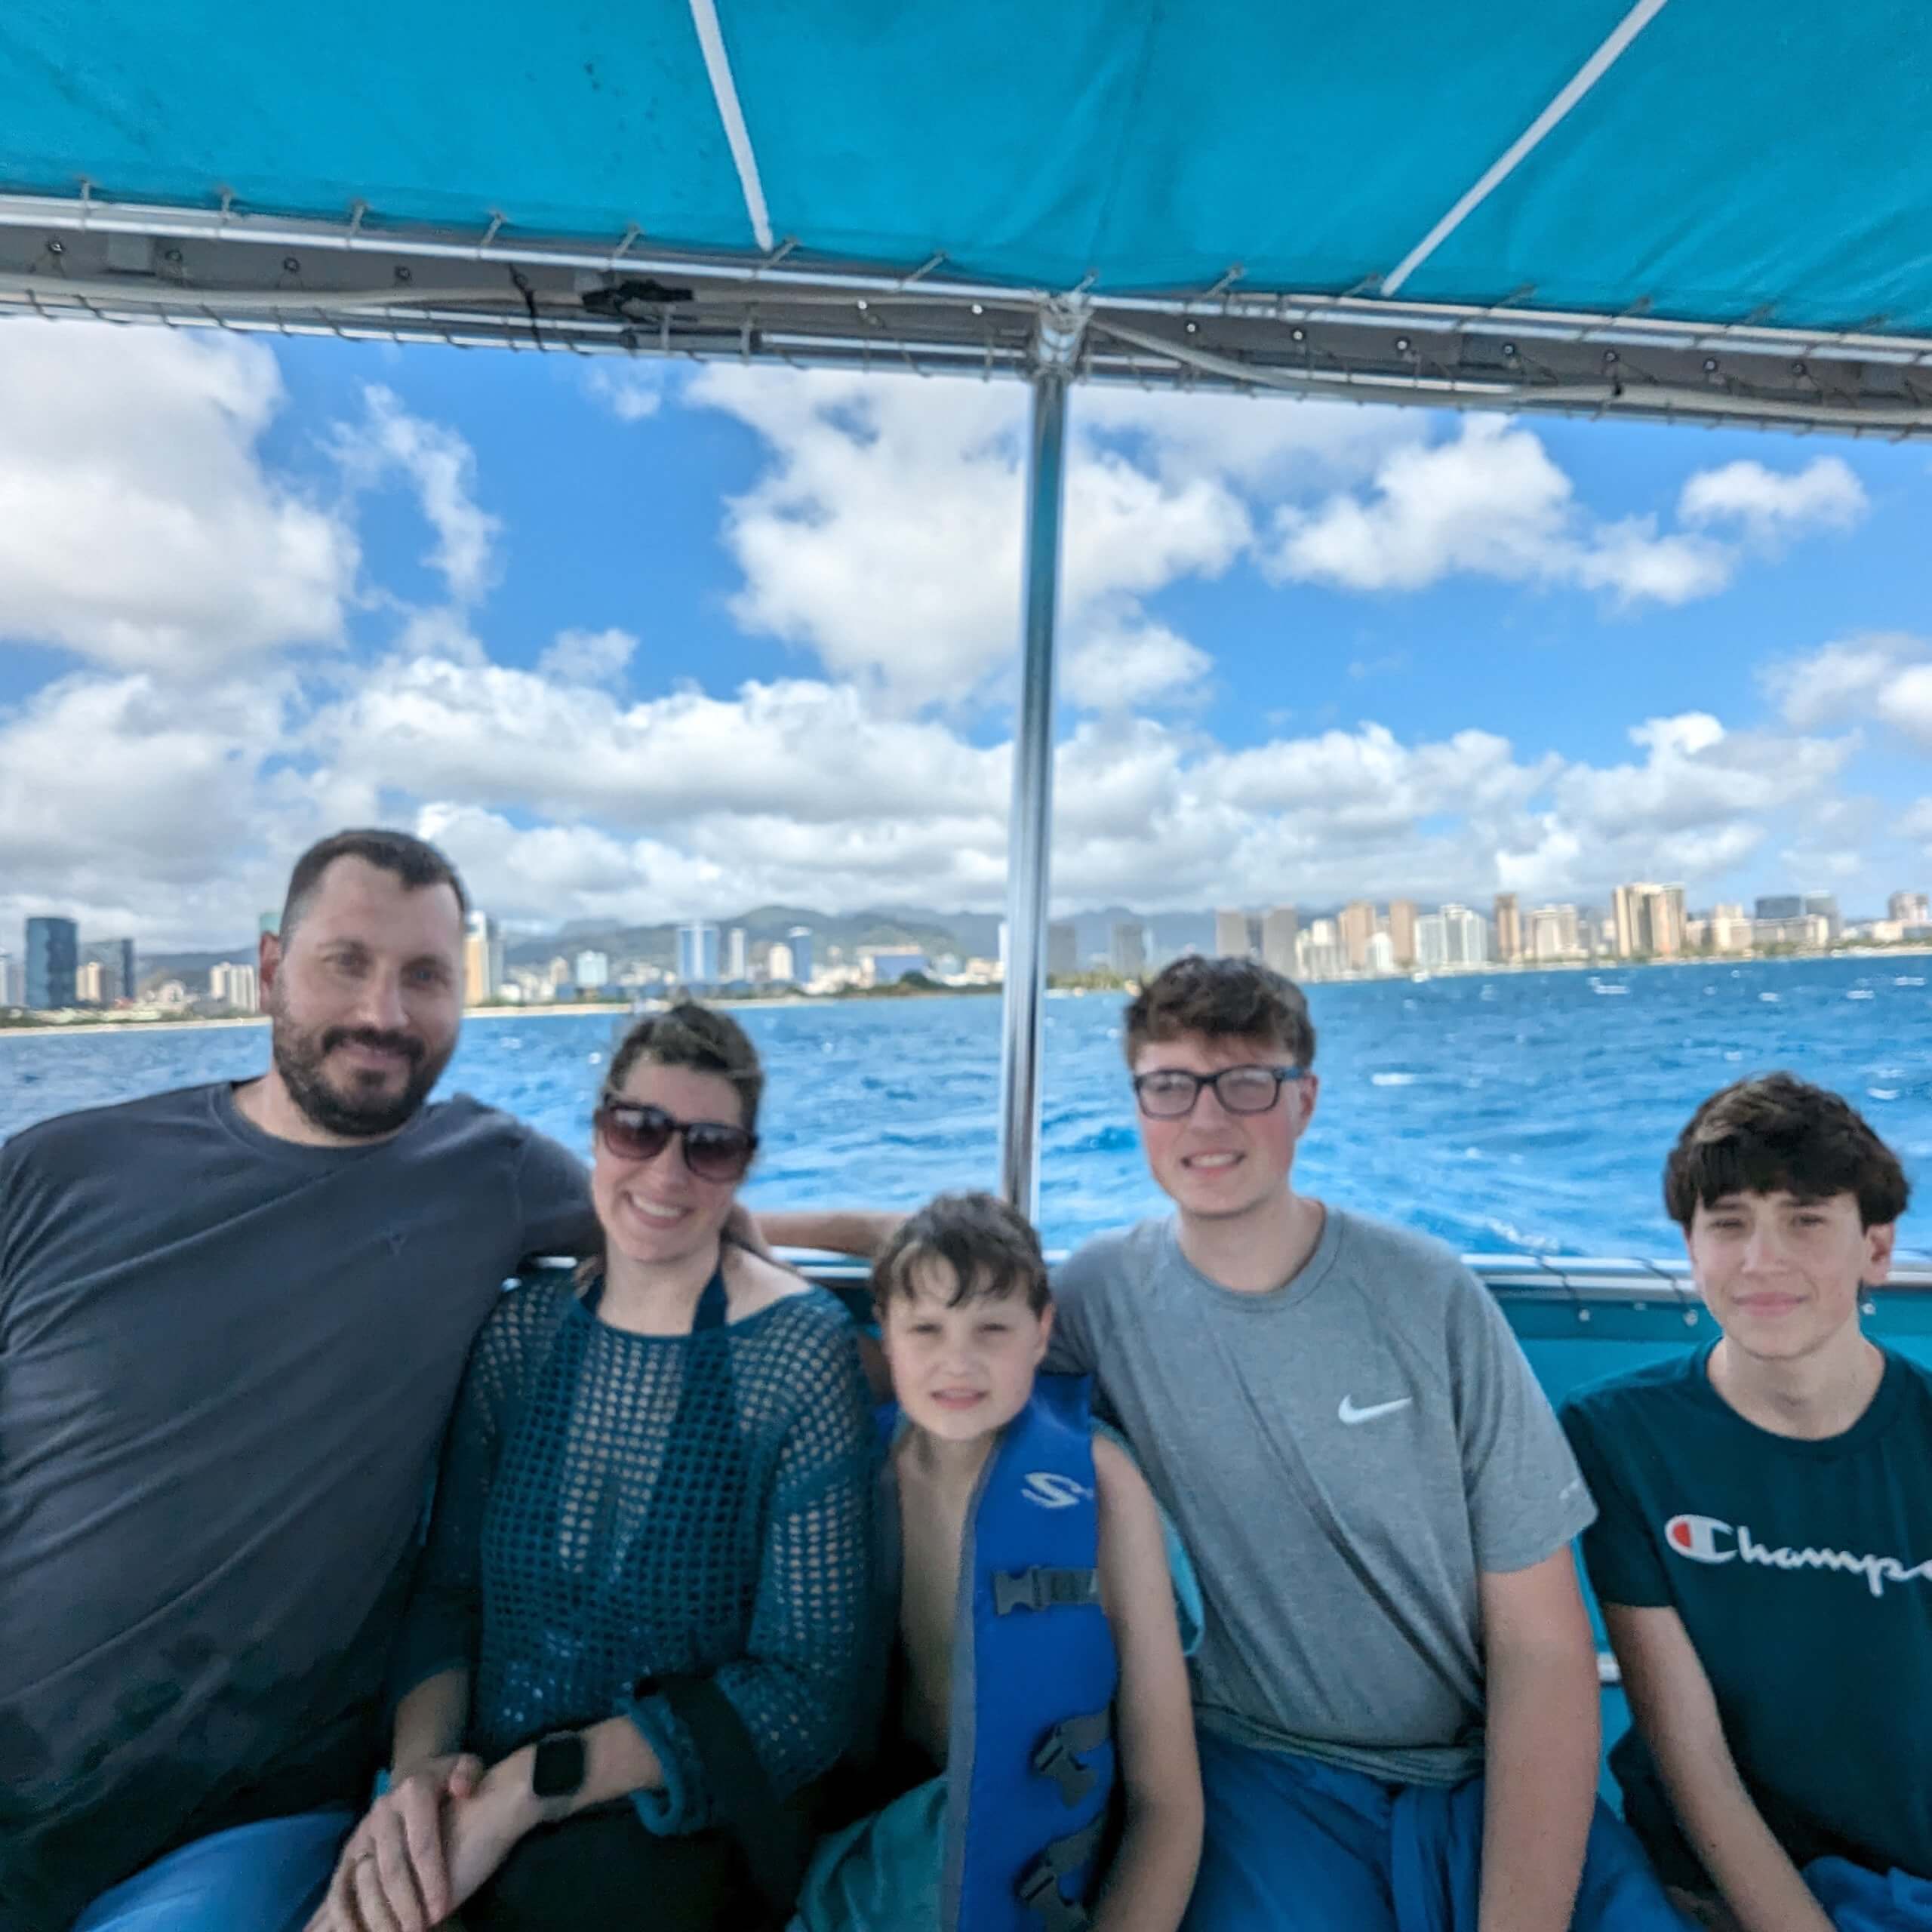
My husband and I have snorkeled in Cozumel and Barbados, but the Caribbean waters are so much warmer than Hawaii! I didn’t have the option to stay on the boat and wuss out though because it was our kids’ first-time snorkeling. Although they can all swim (and we had life jackets), I still wanted my nine-year old to be right by me!
We saw some fish and sea turtles and our kids all enjoyed the experience. I think it’ll be something we do again in the Caribbean, just because it’s a different experience with different sea life.
This tour was also part of our Go City Pass. Had we paid for this tour separately, it would have cost our family around $365.
Stop #5: Hilton Hawaiian Village
After the Snorkel tour, we headed back to our hotel, which was less than a 10-minute drive. It was nice to start our day further away and then work our way back towards Waikiki. Once we were checked into our hotel, our bags were delivered and we unpacked, took in the view from our balcony and rested. Then we grabbed a couple of drinks from the bar, using our $36 daily food and beverage credit.
Stop #6: Dinner – Morimoto Asia
Morimoto Asia in Disney Springs is my kids’ favorite restaurant, so we had to make reservations in Waikiki as well! The food is really good. It’s a little pricey, depending on what you get, but it’s definitely worth it.
After dinner, we walked around Waikiki and checked out some shops. I headed to Hula Grill to grab a slice of their famous Hula Pie to go. The boys ended up getting ice cream at another shop before we headed back to the hotel for the night.
Day 3 – Friday
Today we planned a tour with Kevo’s Beach Bus. We caught our shuttle at the Prince Hotel, which was about a 10-minute walk from Hilton Hawaiian Village. We read about this tour in a Facebook group, and it sounded like it would be fun—especially for our three boys, who are not the easiest to please.
This tour was more of an adventure than a sit on the bus and look out the window kind of tour.
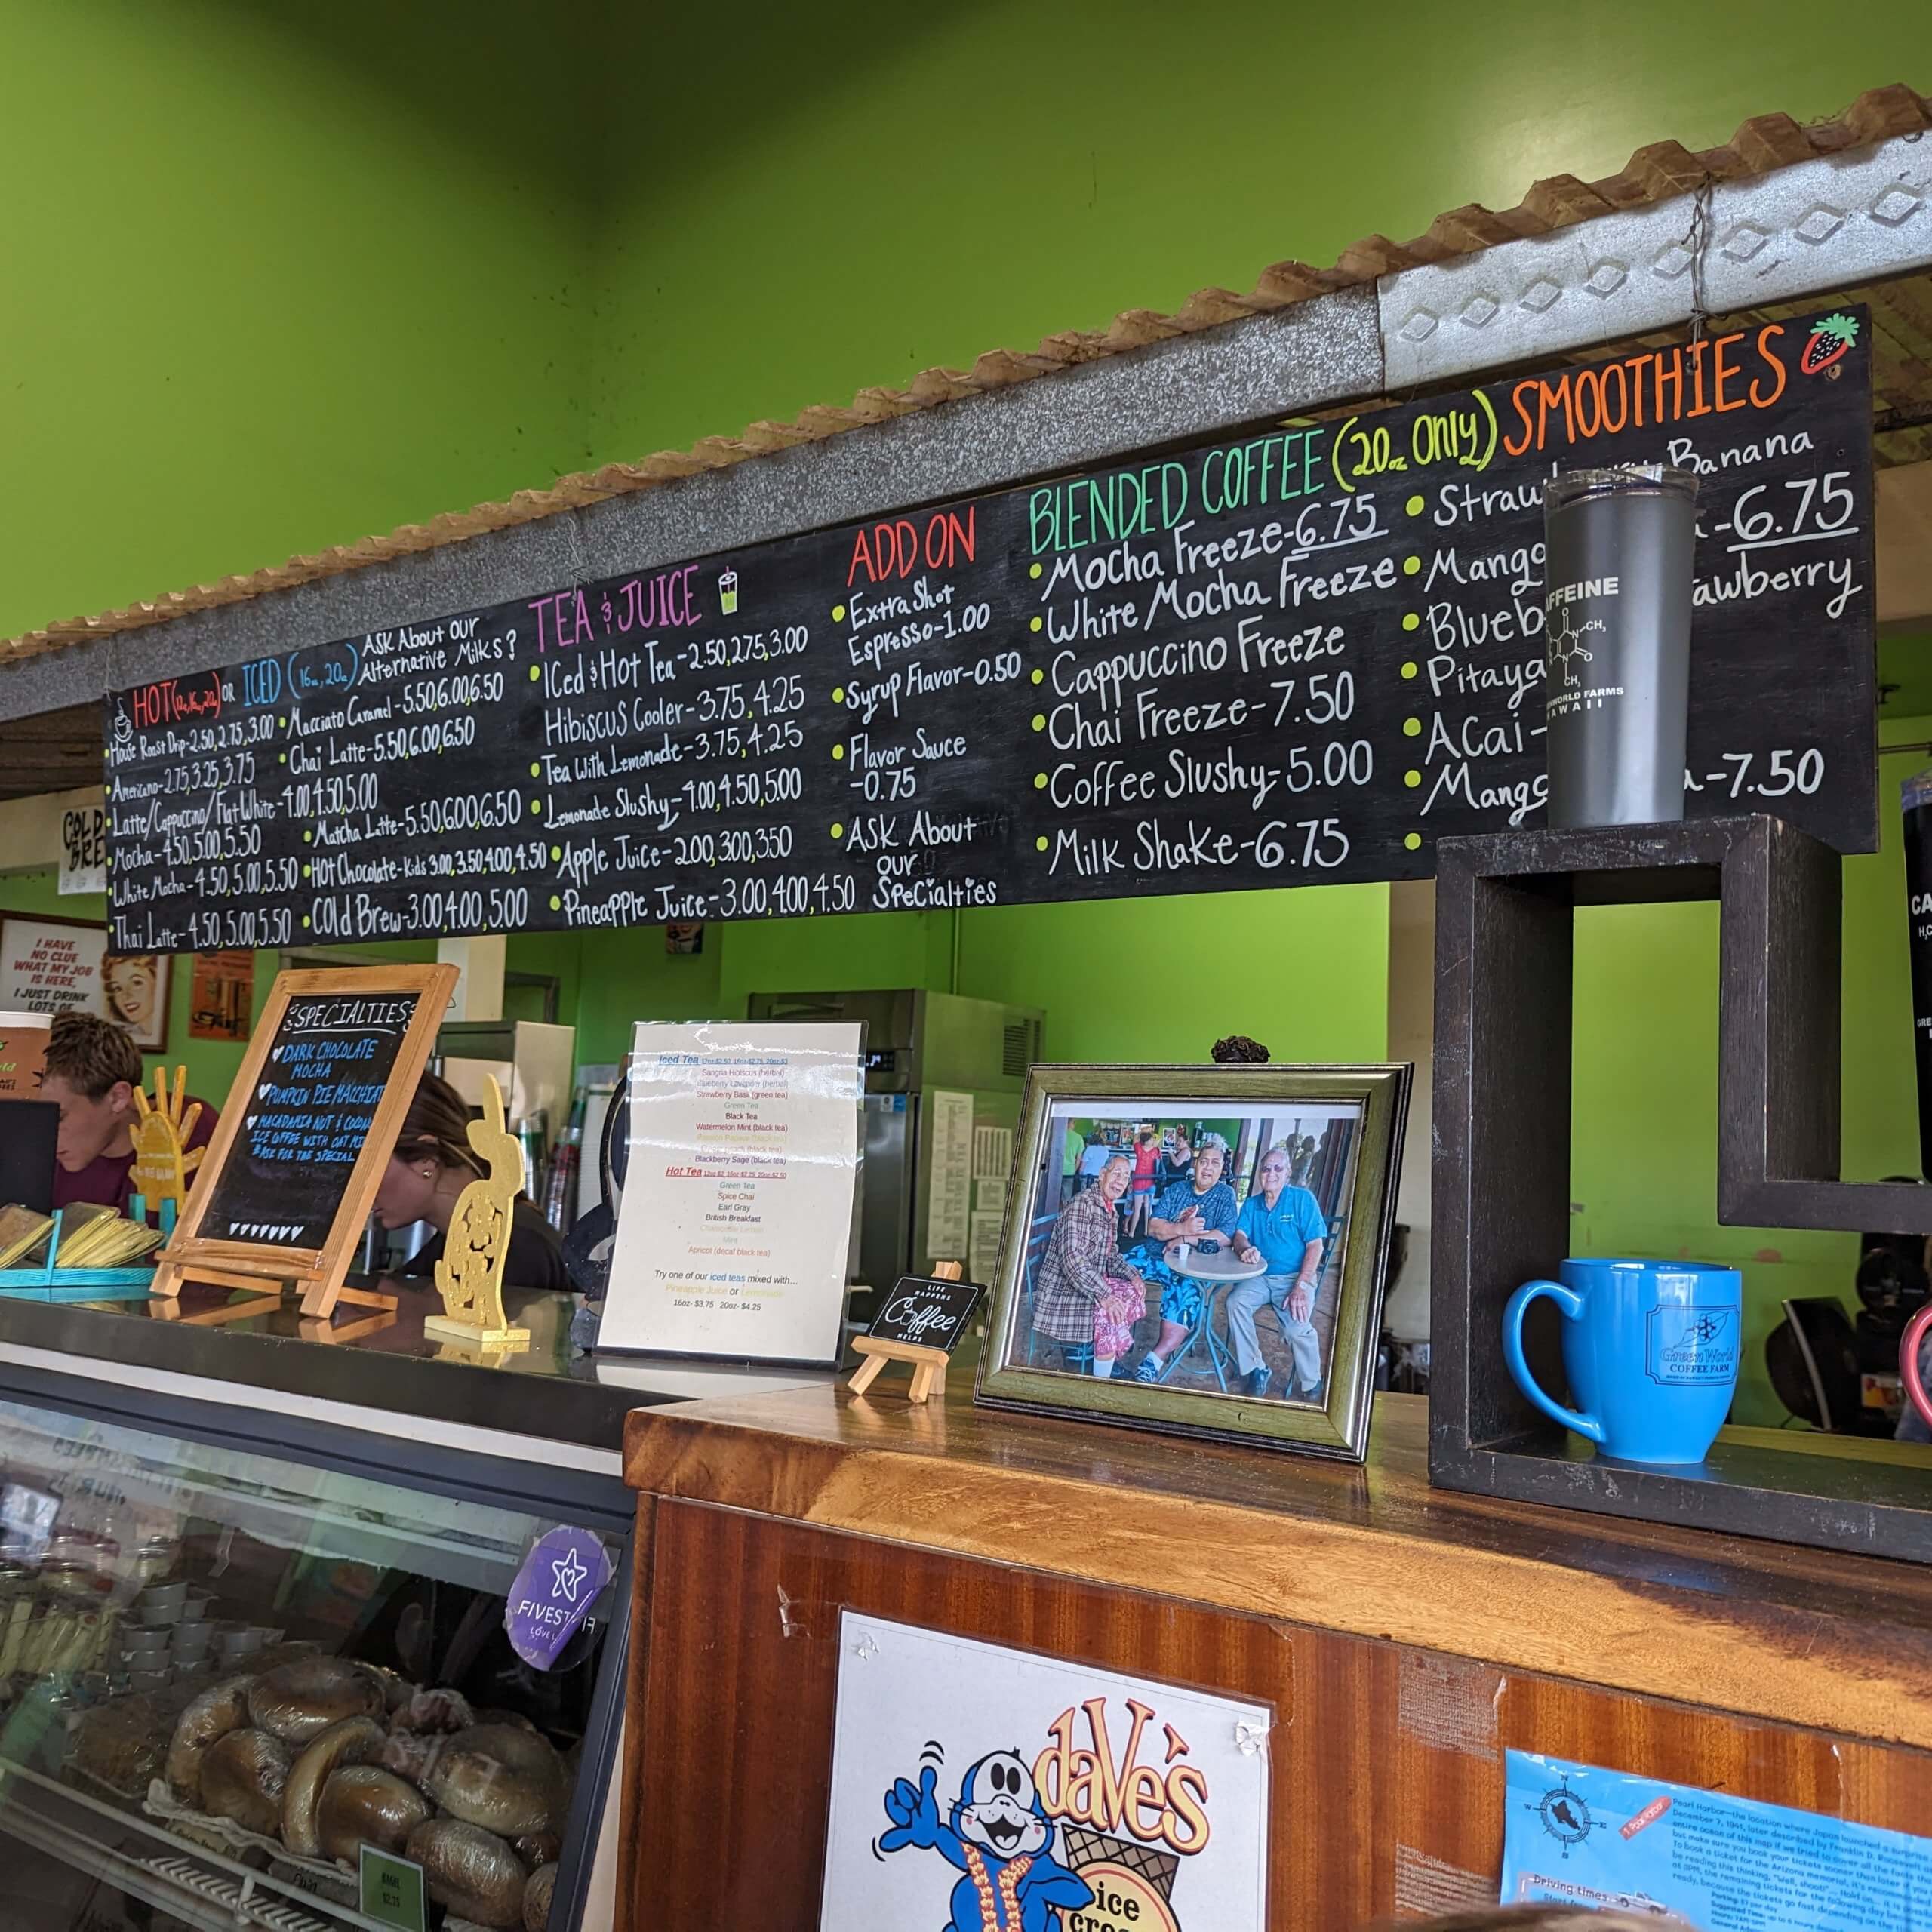
Stops #1 & 2: Green World Coffee Farm & Pipeline Beach
Our first stop was the Green World Coffee Farm for coffee and snacks. We then headed to Pipeline Beach, which is known for its surfing. In the winter, the waves are HUGE at the beach, but since it was spring, they were still big, but not huge. We got to see some surfers doing their thing, which was cool.
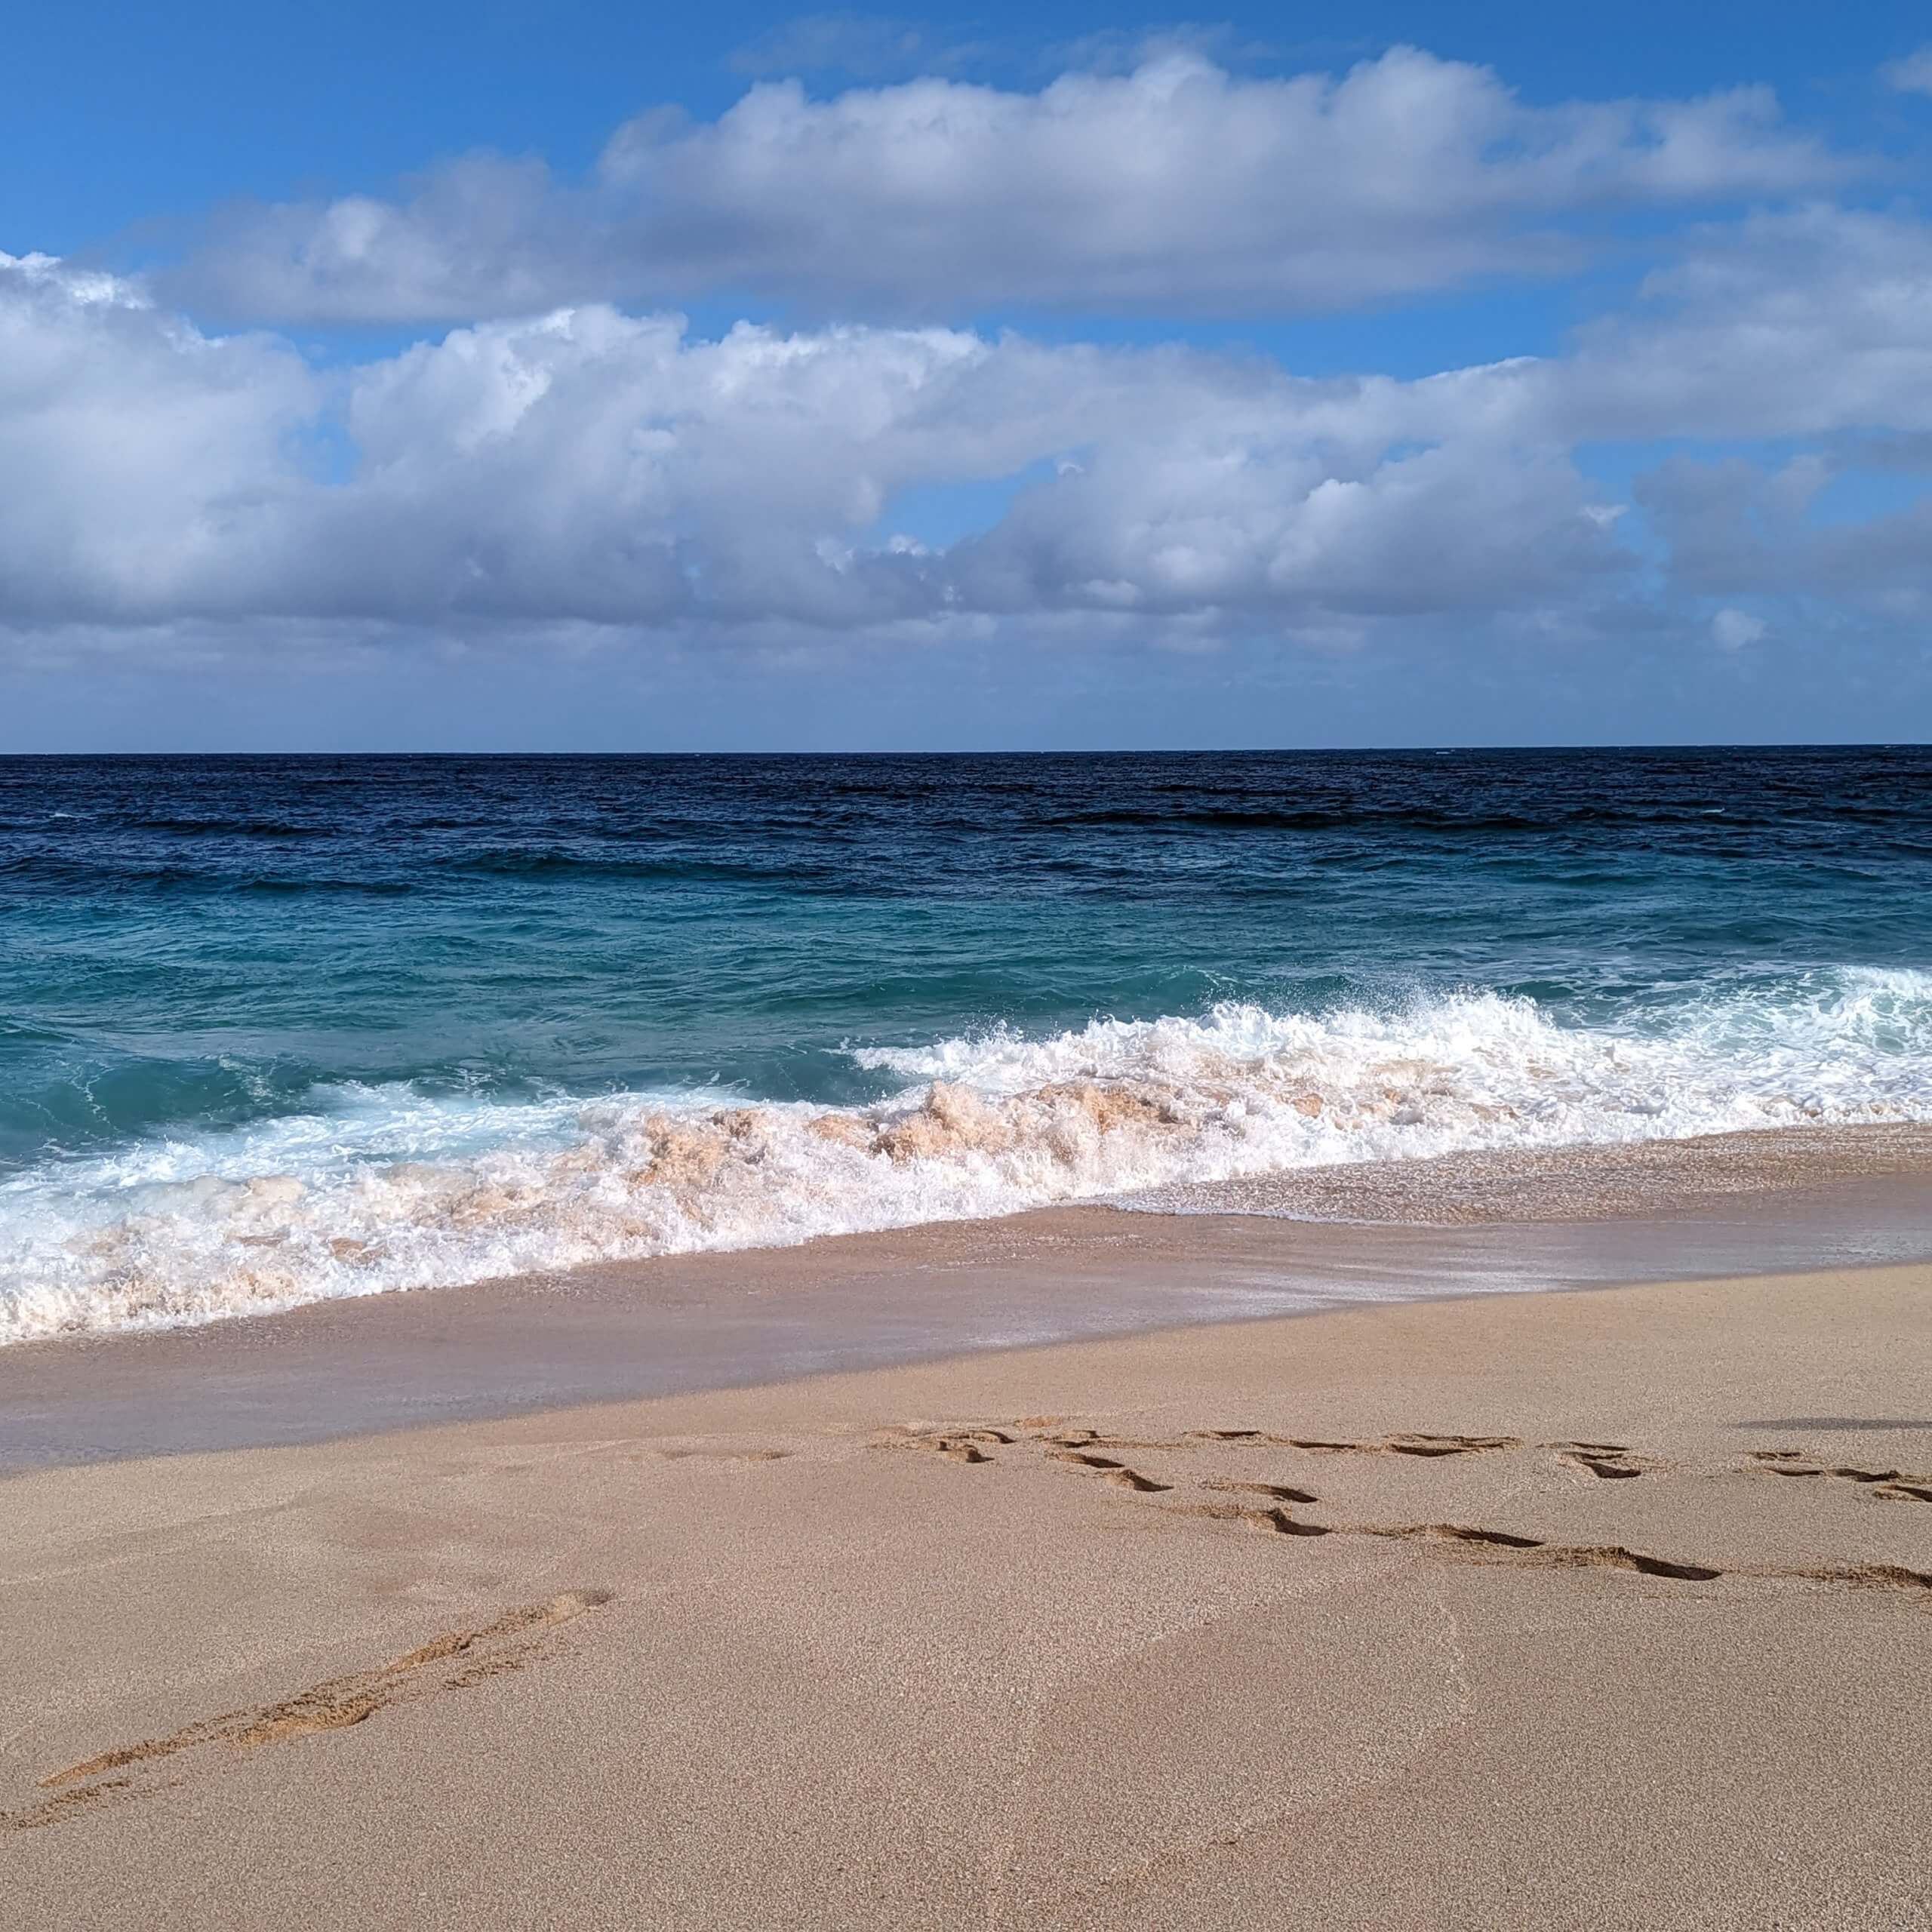
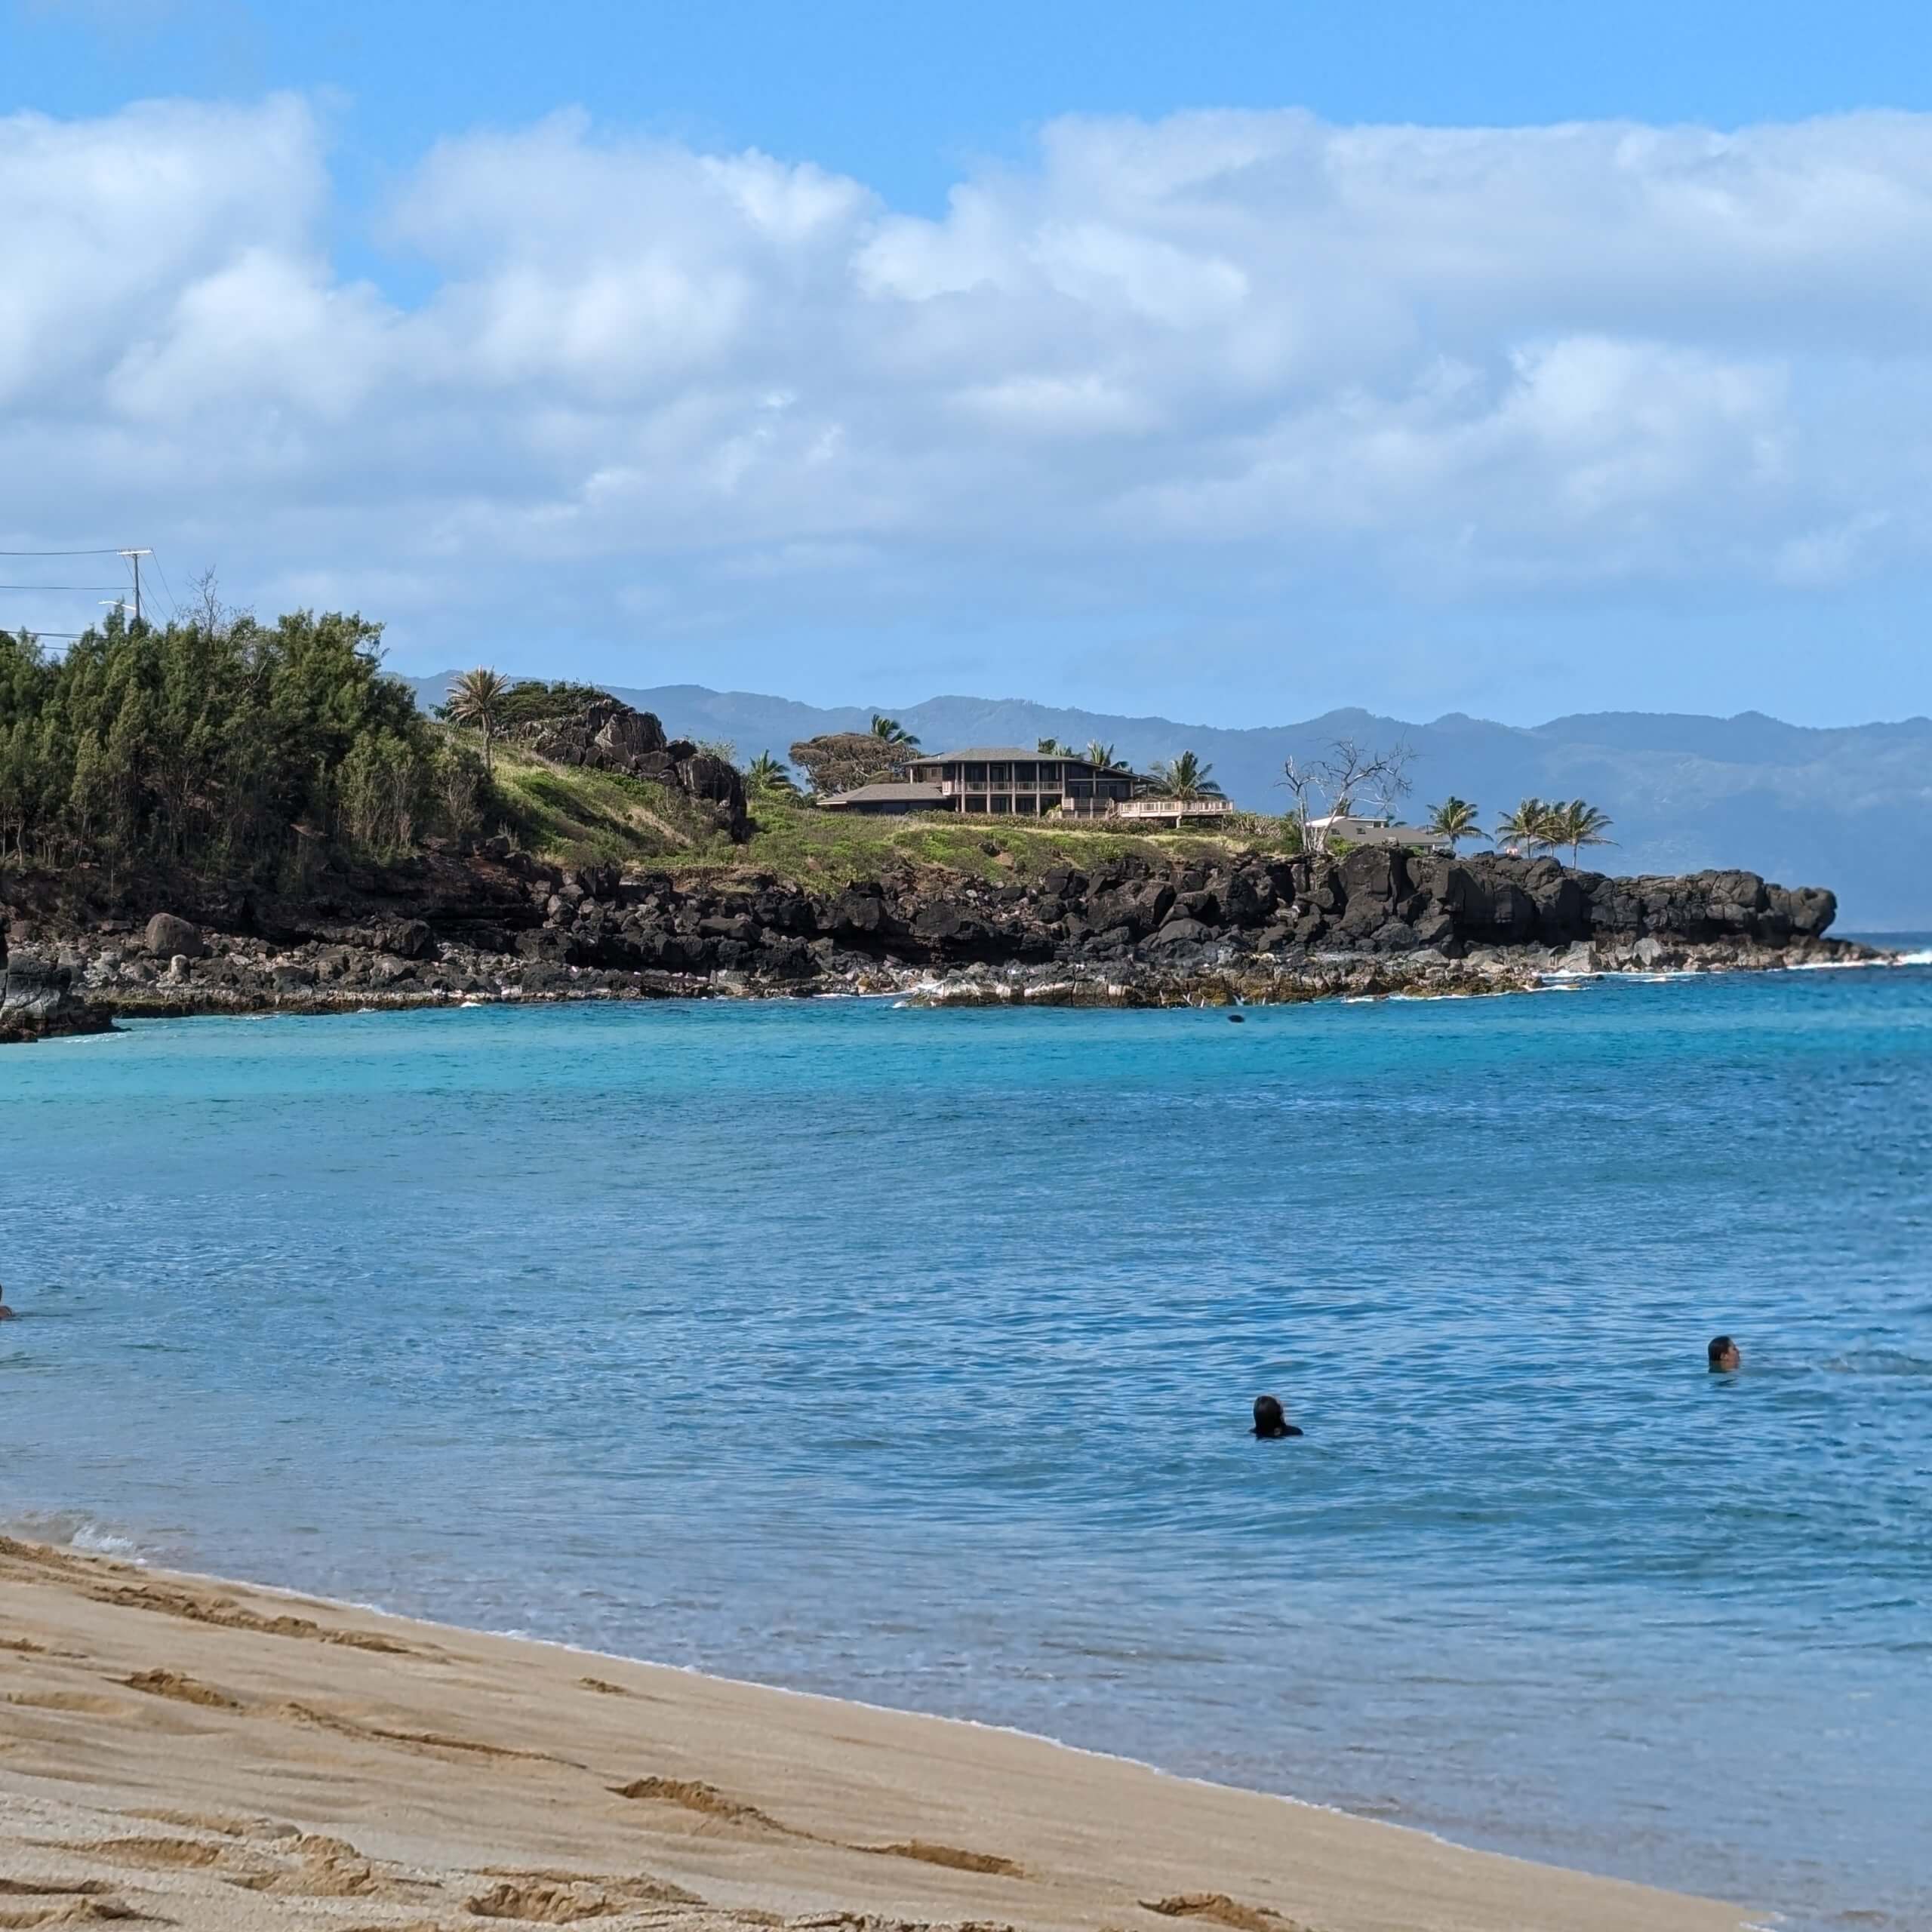
Stop #3: Waimea Bay
We then headed to Waimea Bay where we were able to swim for a bit. The water plus the wind made it a little chilly for me to swim, but my husband and boys were in the water for a while. The beach was beautiful and there weren’t many people. Totally different than in Waikiki where people are everywhere!
Stop #4: ‘Anahulu River
We then did some stand up paddle boarding in the ‘Anahulu River, where the water was calm. This was our first-time paddle boarding and I’ll tell you, it’s a workout! Everyone had fun. Since we’d never paddle boarded before, the guide took our youngest on his board. At first, my son was nervous to be with someone else, but he quickly warmed up to the guide, Bo. They were splashing other kids and shaking their boards—just having a blast!
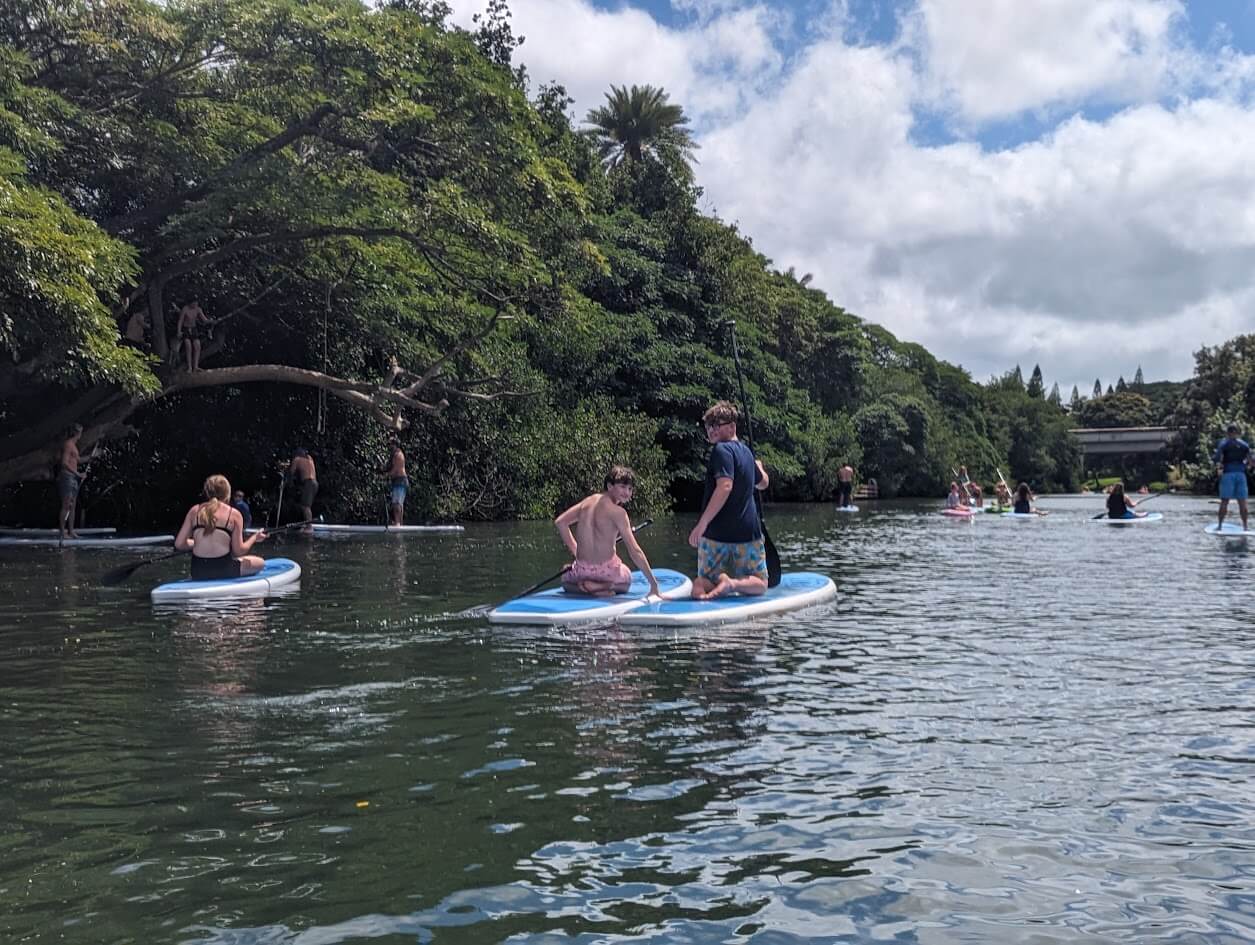
There was a rope swing into the river that we were able to try too. And there was a low bridge that we could jump off of. Our two older boys jumped in!
Stop #5 & 6: Pua’ena Point Beach Park & Tsue’s Farm
After paddleboarding, we went to Pua’ena Point Beach Park for some swimming and snorkeling. We then stopped at Tsue’s farm for lunch. They pre-ordered our lunch plates, so they’d be ready when we arrived. We were able to eat and then change into dry clothes. The food was really good too!
Stop #7: Dole Plantation
On our way back to Waikiki, we stopped at the Dole Plantation. We were able to check out the gift shop and grab some dole whip for the ride home. If you love pineapples, be sure to add this stop to your list because it has so many different items!
The tour guides dropped us off at our hotel and we took some time to relax after a long day of fun and sun! This tour ended up being our kids’ favorite activity on our entire trip. They loved the guides and everything that we did on the tour. And when people ask them about their trip, they still talk about this tour (even a couple of months later)!
Dinner & Fireworks
We had a late lunch, so we weren’t hungry until later on in the evening. We walked around Waikiki and ended up just grabbing a sandwich from the ABC Store.
By the time we got back to our room, we were pretty tired, but I forced myself to stay awake to go see the fireworks (at 7:45pm). Since we were staying at Hilton Hawaiian Village, we didn’t have to go far. Plus, since we’re Diamond members, there was a viewing area we had access to, which was nice. Even getting there right before they started, we still got seats. The rest of the resort was jam packed though!
Even if you’re not staying at the resort, you can view the fireworks for free. I would suggest walking to the resort if you can though because once the fireworks are over, cars and people are everywhere!
We were in bed again by 8:30pm. The hotel had live bands playing each night, but we were so tired since we were up so early every day. I would have loved to go have a drink and just listen, but that 6 hour time change really makes it difficult!
Day 4 – Saturday (No Plans)
Breakfast: Liliha Bakery
If there is one thing you do when you’re in Hawaii (especially for those of you coming from the East Coast), have a built-in rest day. By this time, the time change was really catching up to us. In the morning, we woke up and headed to breakfast at Liliha Bakery. We went to the original location on Kuakini Street, but it’s pretty small. There is a diner bar that seats, maybe 15-20 people. We ended up getting lucky and being able to grab 5 seats for our family.
Prices were reasonable and the food was good! The butter rolls were so good and the kids loved the huge pancakes! We also grabbed a few things from the bakery.
Aloha Swap Meet
After breakfast, we stopped at the Aloha Swap Meet to check it out. We walked around for a bit and purchased a few things. None of us typically buy many souvenirs, but if you do, this is a great stop since the prices are a lot cheaper than what you’ll see in the hotels.
Relax
We planned to check out Disney’s Aulani and Ala Moana Shopping Center, but we were all beat, so we headed back to the hotel. We napped, swam and just hung out in the room for most of the day. All of us just needed some time to relax!
Since we were so tired, we ended up just canceling our early dinner reservations and grabbed something quick later on in Waikiki. It was another early evening for us!
Day 5 – Sunday
We knew today was going to be a long day so resting yesterday was a good plan!
Stop #1: Leonard’s Malasadas
We had an early morning, so we decided to stop and try some malasadas at Leonard’s. No matter what you research, if Hawaii is in the search, these come up. Malasadas are Portuguese donuts (some with filling, some without). I liked the non-filled version the best, but I honestly can’t say they were the best donuts I’ve ever eaten either. But we checked something off of our list.
Stop #2: Pearl Harbor
We had reservations for The USS Arizona for 8am, which meant we needed to be there by 7:30am to park and get checked in. We made our reservations online at recreation.gov as soon as the spots were released. This is definitely the way to go! Reservations cost $1/person, but it beats having to waste time standing in a standby line. You can read all about Pearl Harbor in this post.
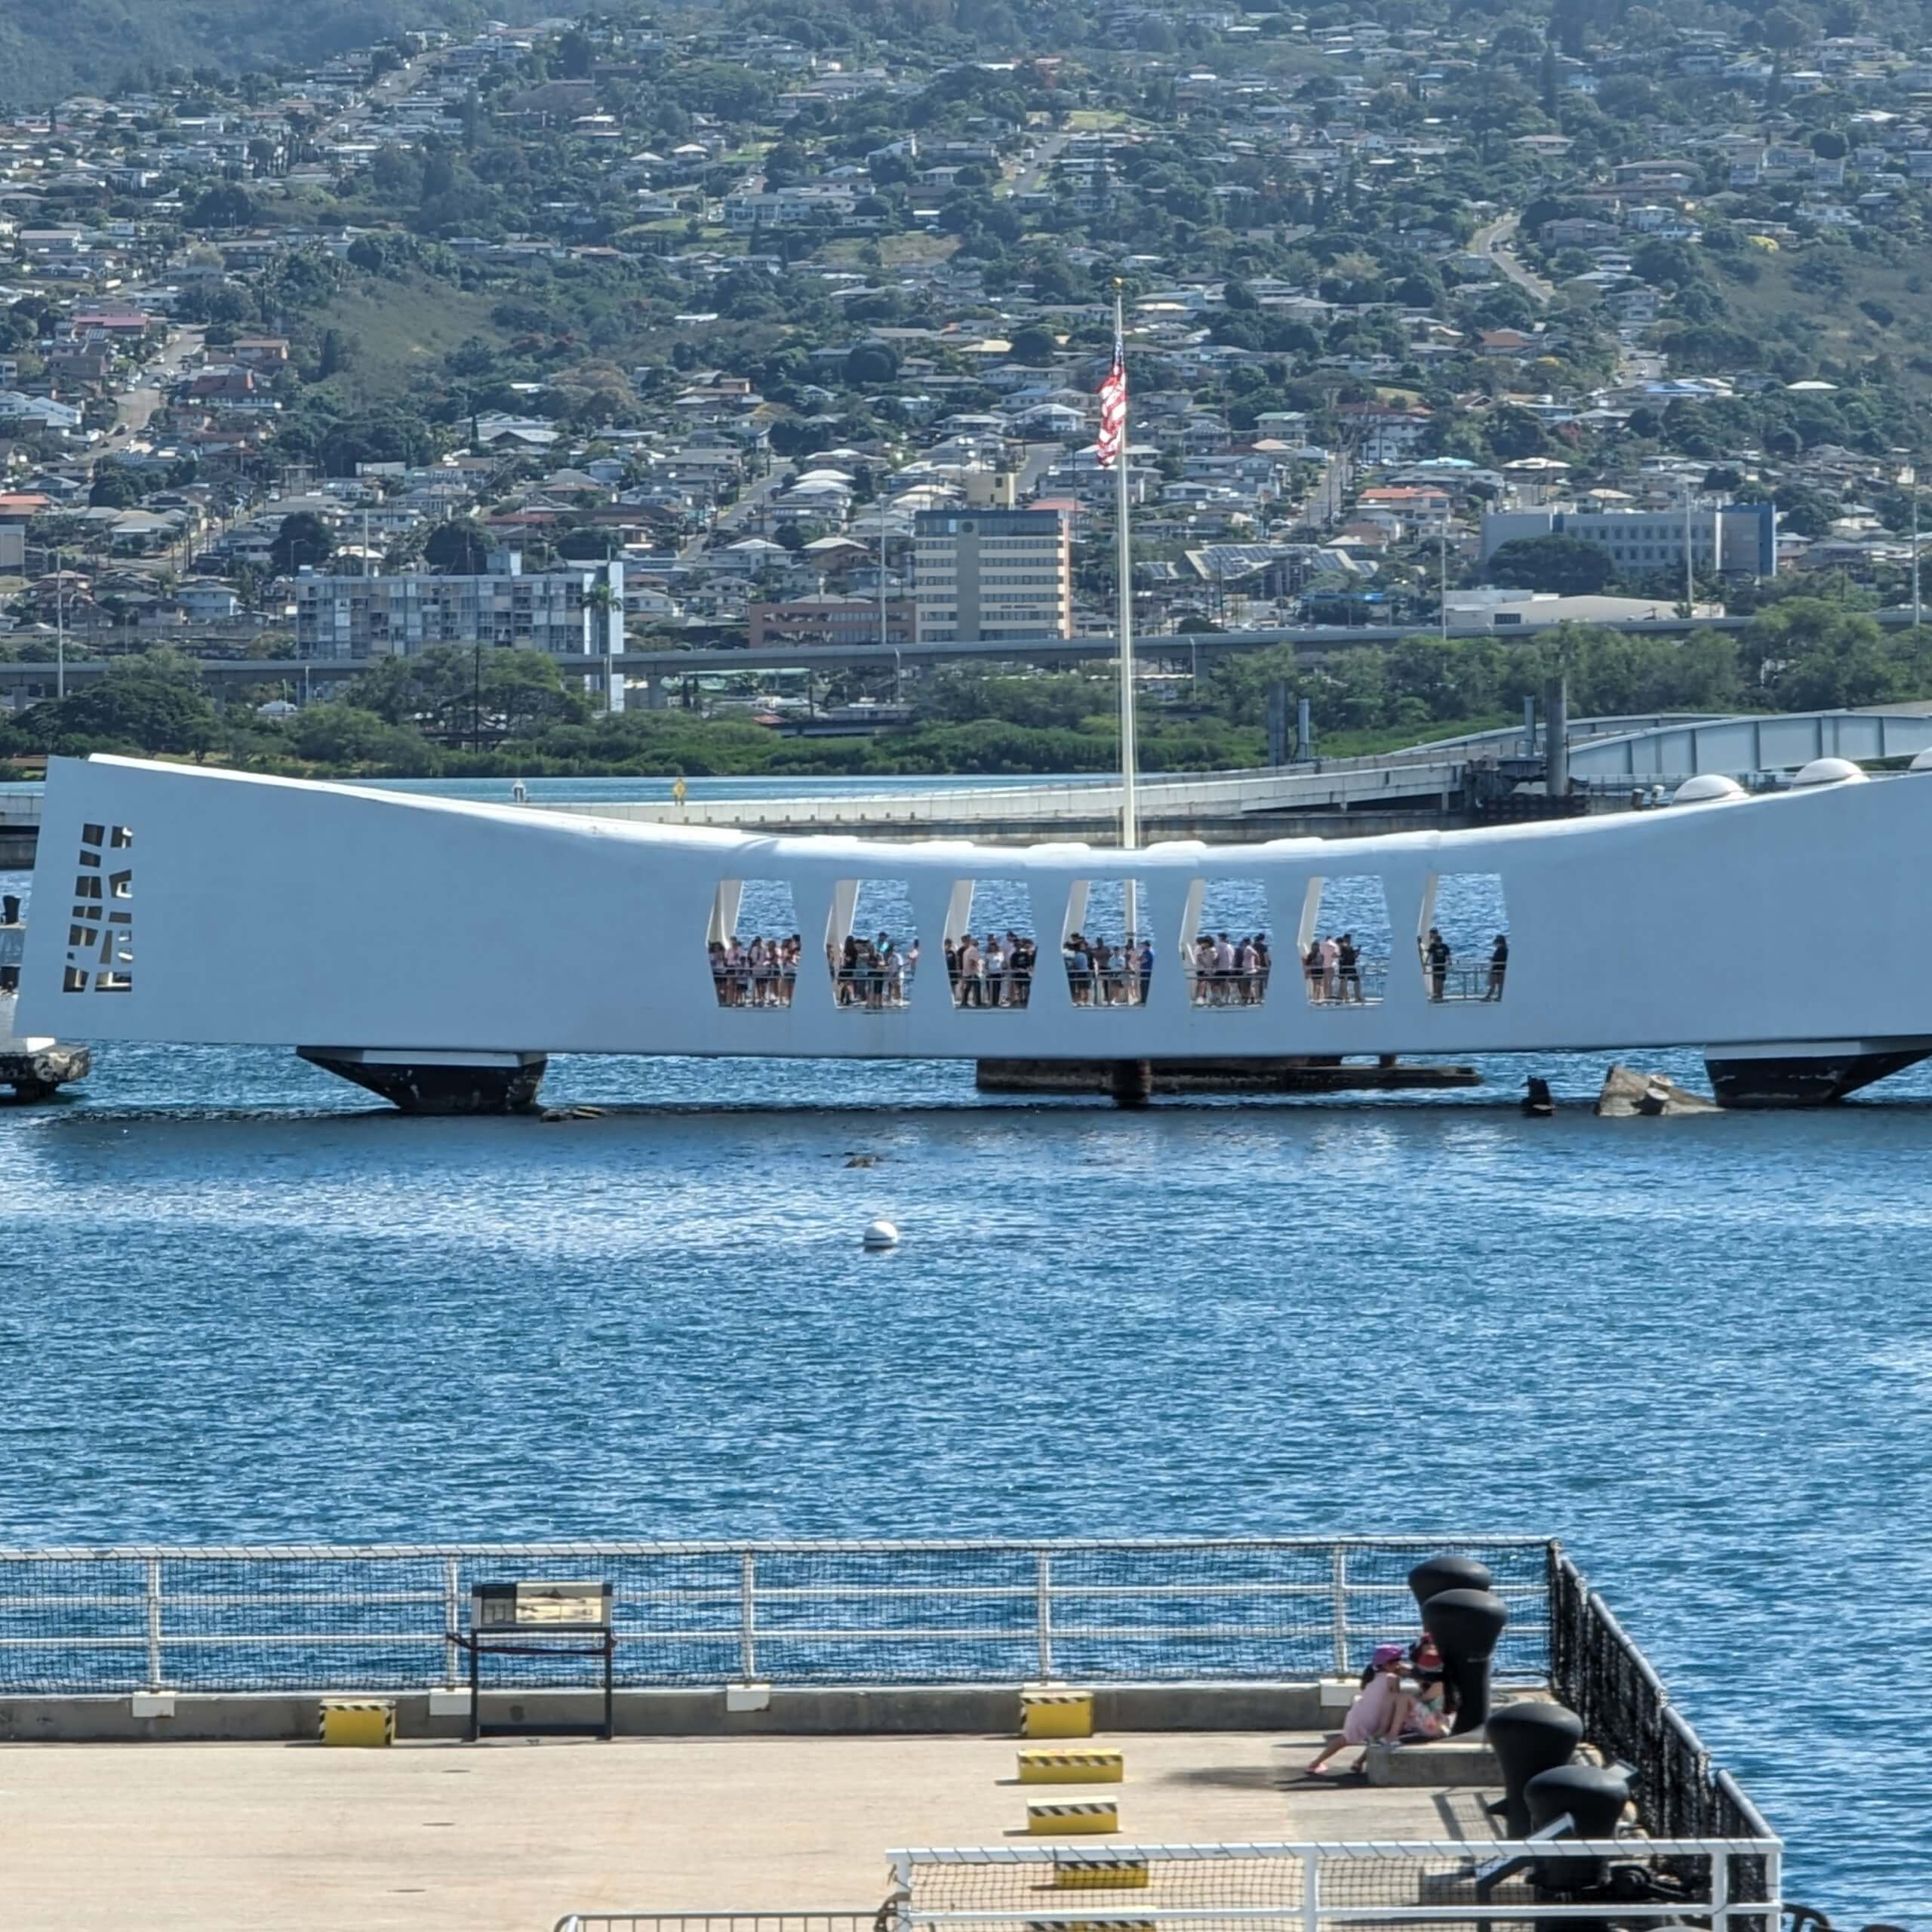
After taking the boat ride to the memorial and checking out the free exhibits, we took the shuttle over to Ford Island to check out the USS Missouri Battleship and the Aviation Museum. Our Go City Pass made both of these attractions free, so we figured why not see they while we’re here.
We spent around 3.5-4 hours at Pearl Harbor. Some can spend all day there, but our kids didn’t really care to go in the first place. Just keep that in mind when you’re planning your trip.
Stop #3: Kailua
We were hungry so our plan was to stop at the Hawiian Island Café for lunch, but I didn’t pay enough attention to their hours and found out they were closed on Sunday. We were heading to Sea Life Park for the afternoon and evening, so we just kept driving in that direction. I wanted BBQ and heard that Kono’s was a good option. They had a location in Kailua so we decided to stop there.
The town was cute with walkable shops and restaurants. We parked the car and my youngest son and I grabbed our lunch, which was really good (we actually went back for more)! Our older two and my husband went to Foodland and got food from their Grab and Go section again. We also stopped at LeCrepe Café and got a Romeo et Juliette Crepe to go. I’m the one who wanted to stop so we shared one crepe since no one else really wanted anything, but I think I got like 2 bites because the savages ate it all! It goes without saying, we’d recommend it!
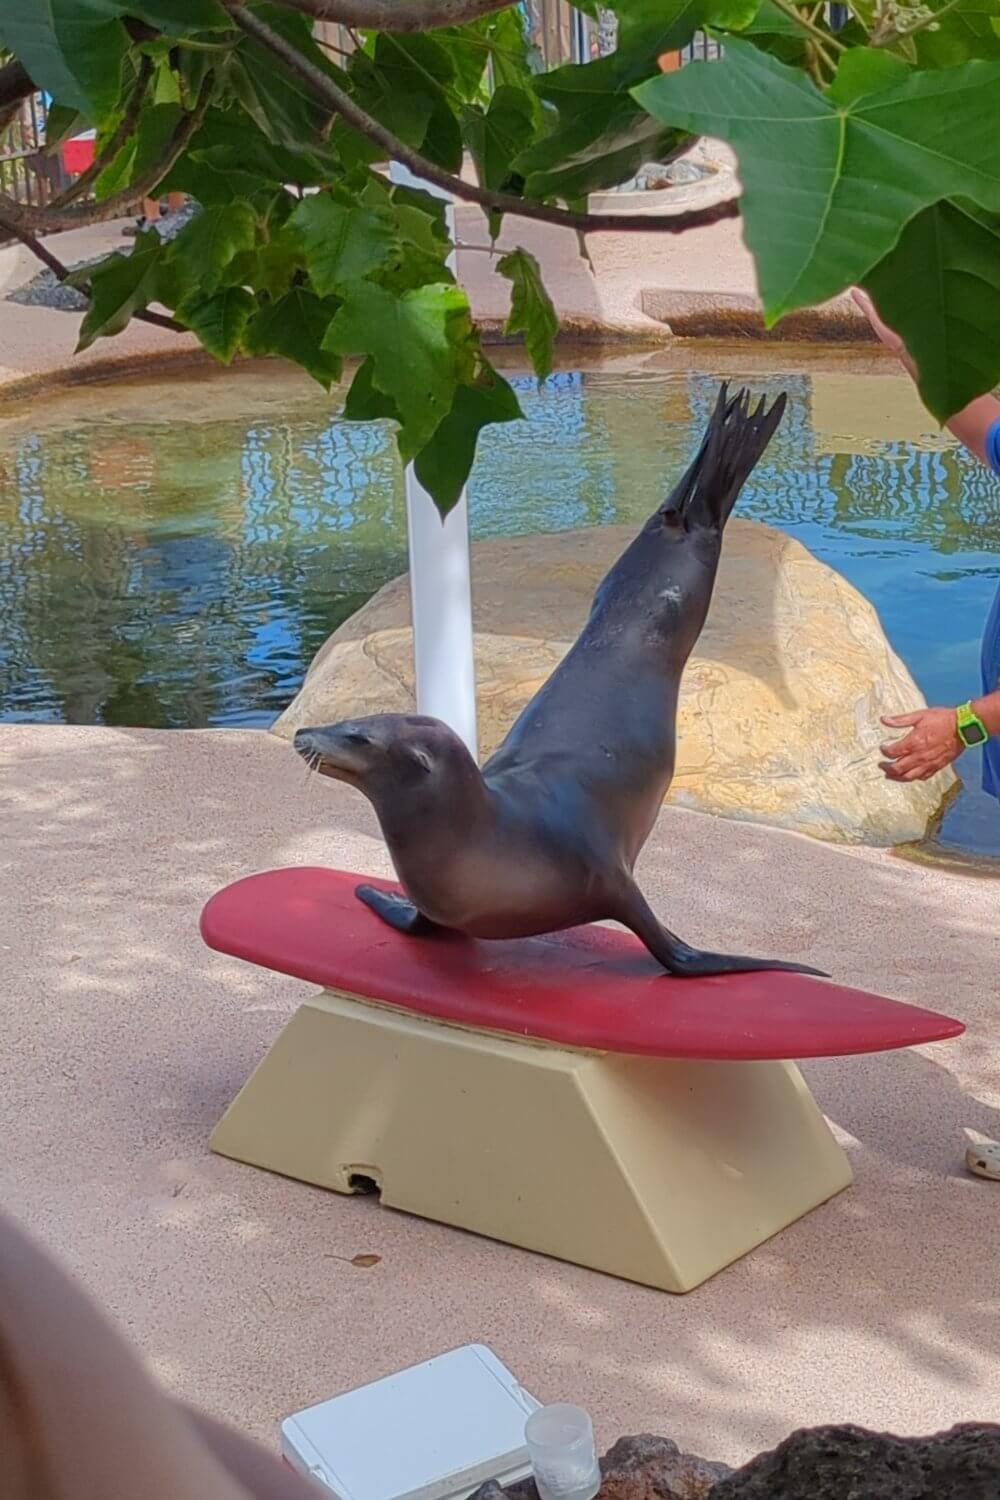
Stop #4: Sea Life Park
Whether you have the Go City Pass or do the Aloha Kai Luau, you’ll have access to Sea Life Park. Our kids love aquariums so we knew this would be a definite stop on our list. It’s not a huge place, but they have several different “talks” throughout the park at specified times to learn about the animals. We watched the Monk Seal, Shark Feed, Sea Lion, and Penguin talks, which were all very interesting. We took our time checking out all of the sea life and then ended the day with the Dolphin show, which was also really good.

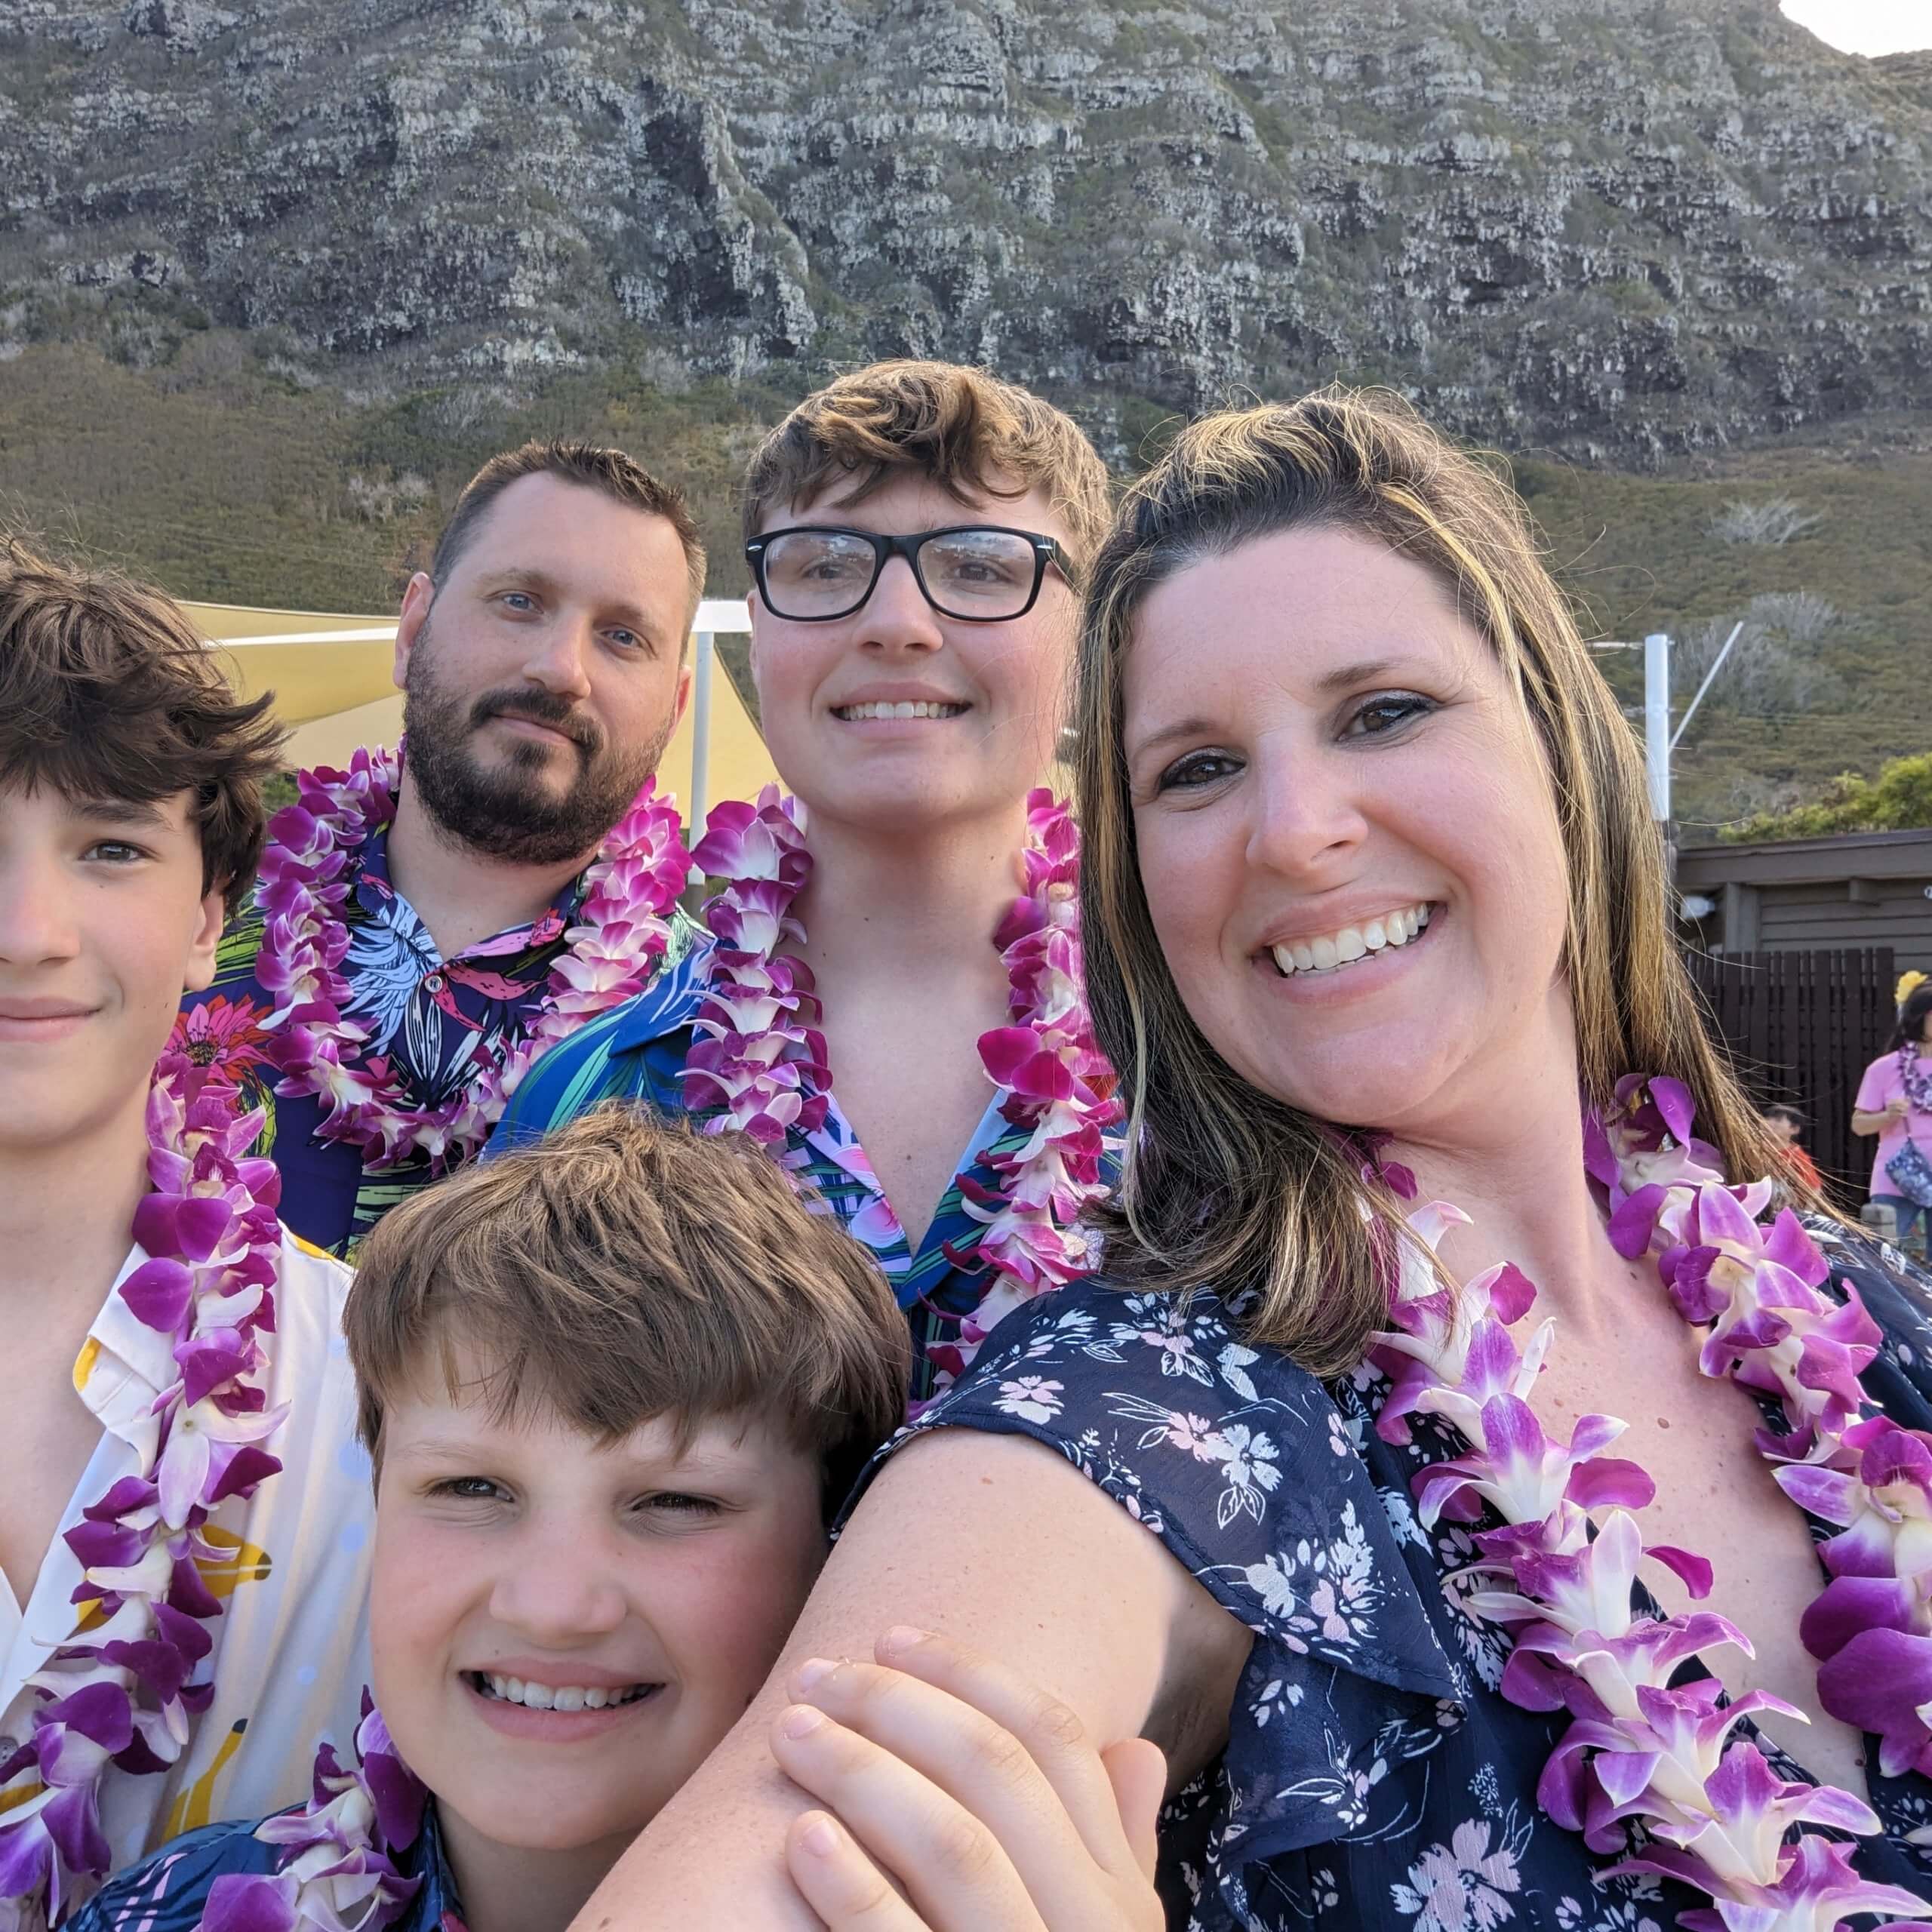
Aloha Kai Luau
It was a great place to spend a couple of hours. Plus, it was the same location as our evening luau (which was also included with our Go City Pass). Once the park closed, luau guests waited in the restaurant for a bit until the park was cleared out. We packed a bag with our luau outfits and changed during this time. Then we were taken to the part of the park where the Luau was being held. We got our drink tickets, leis and family photos, then headed into the event area.
Luau Activities
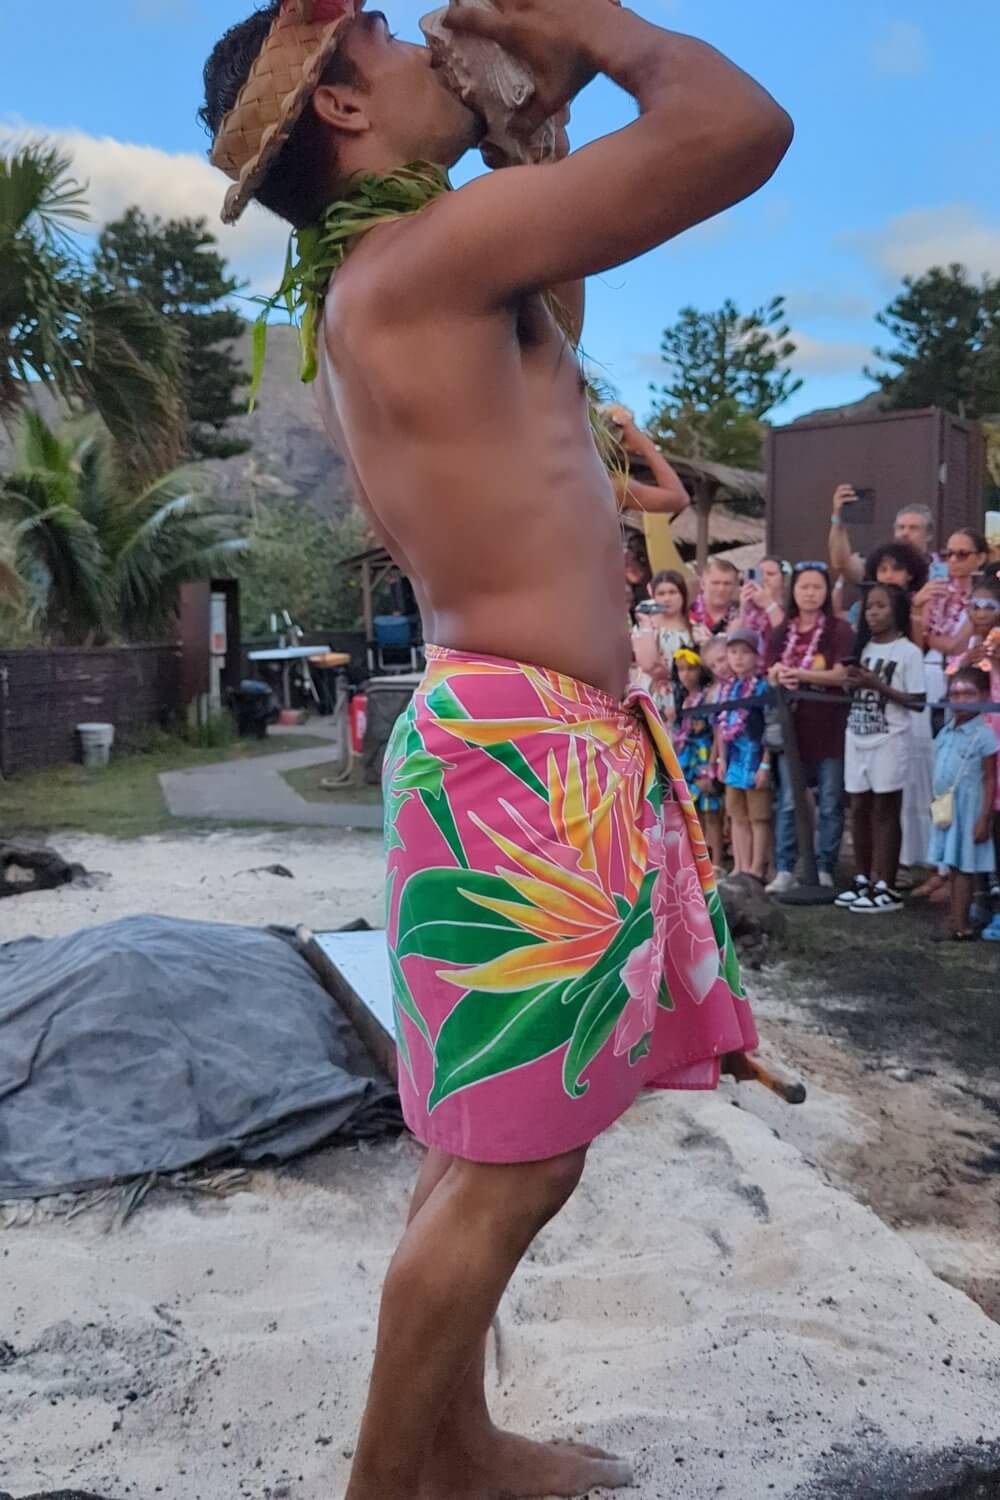
They had several cultural activities set up, selfie spots, plus the imu station where they cooked the pig. They had drinks like water and punch available for free (no ticket required), but pop and alcoholic beverages were one ticket and each person received two. You could easily have your kids drink the punch and end up with their drink tickets! We didn’t use all of ours, so we actually grabbed some cans of pop on the way out and just threw them in the fridge in our room to have when we were thirsty.
Luau Food
The luau food was really good—we had no complaints! And the show was good too. Some of the activities were more geared towards younger kids, but even my older ones participated. They don’t always partake in those kinds of activities, but they did at the luau and actually said they enjoyed it—what a shock!
We ended up leaving just before the end of the luau so we could beat the traffic. It was about a 30-minute drive back to our hotel and we were pretty exhausted. We left our hotel before 7am and got back around 9pm.
Day 6 – Monday
This was our last full day in Oahu before heading over to Maui for our last couple of nights. Since our Saturday was pretty full, we wanted to do some relaxing, so we made it a beach day—well at least part of it.
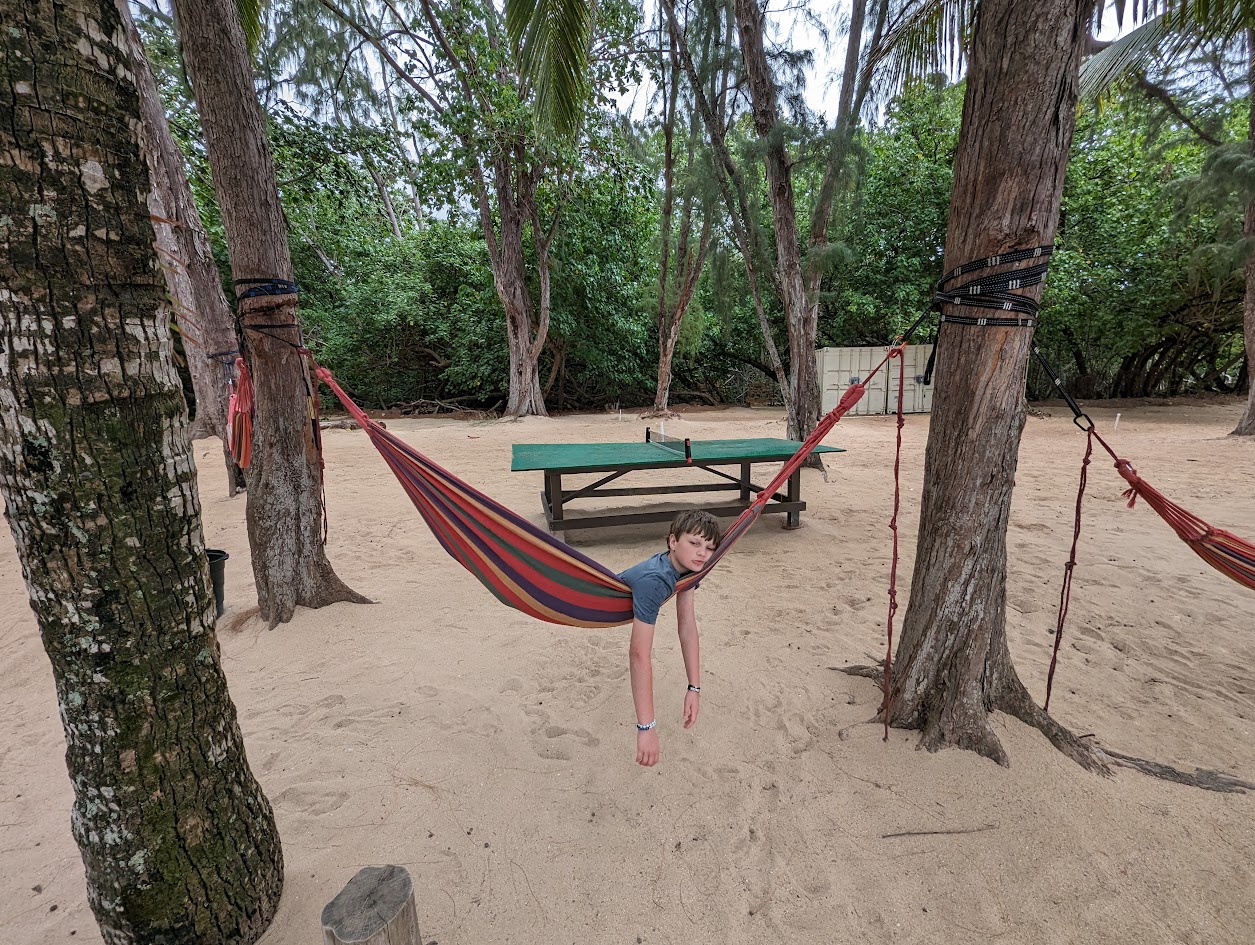
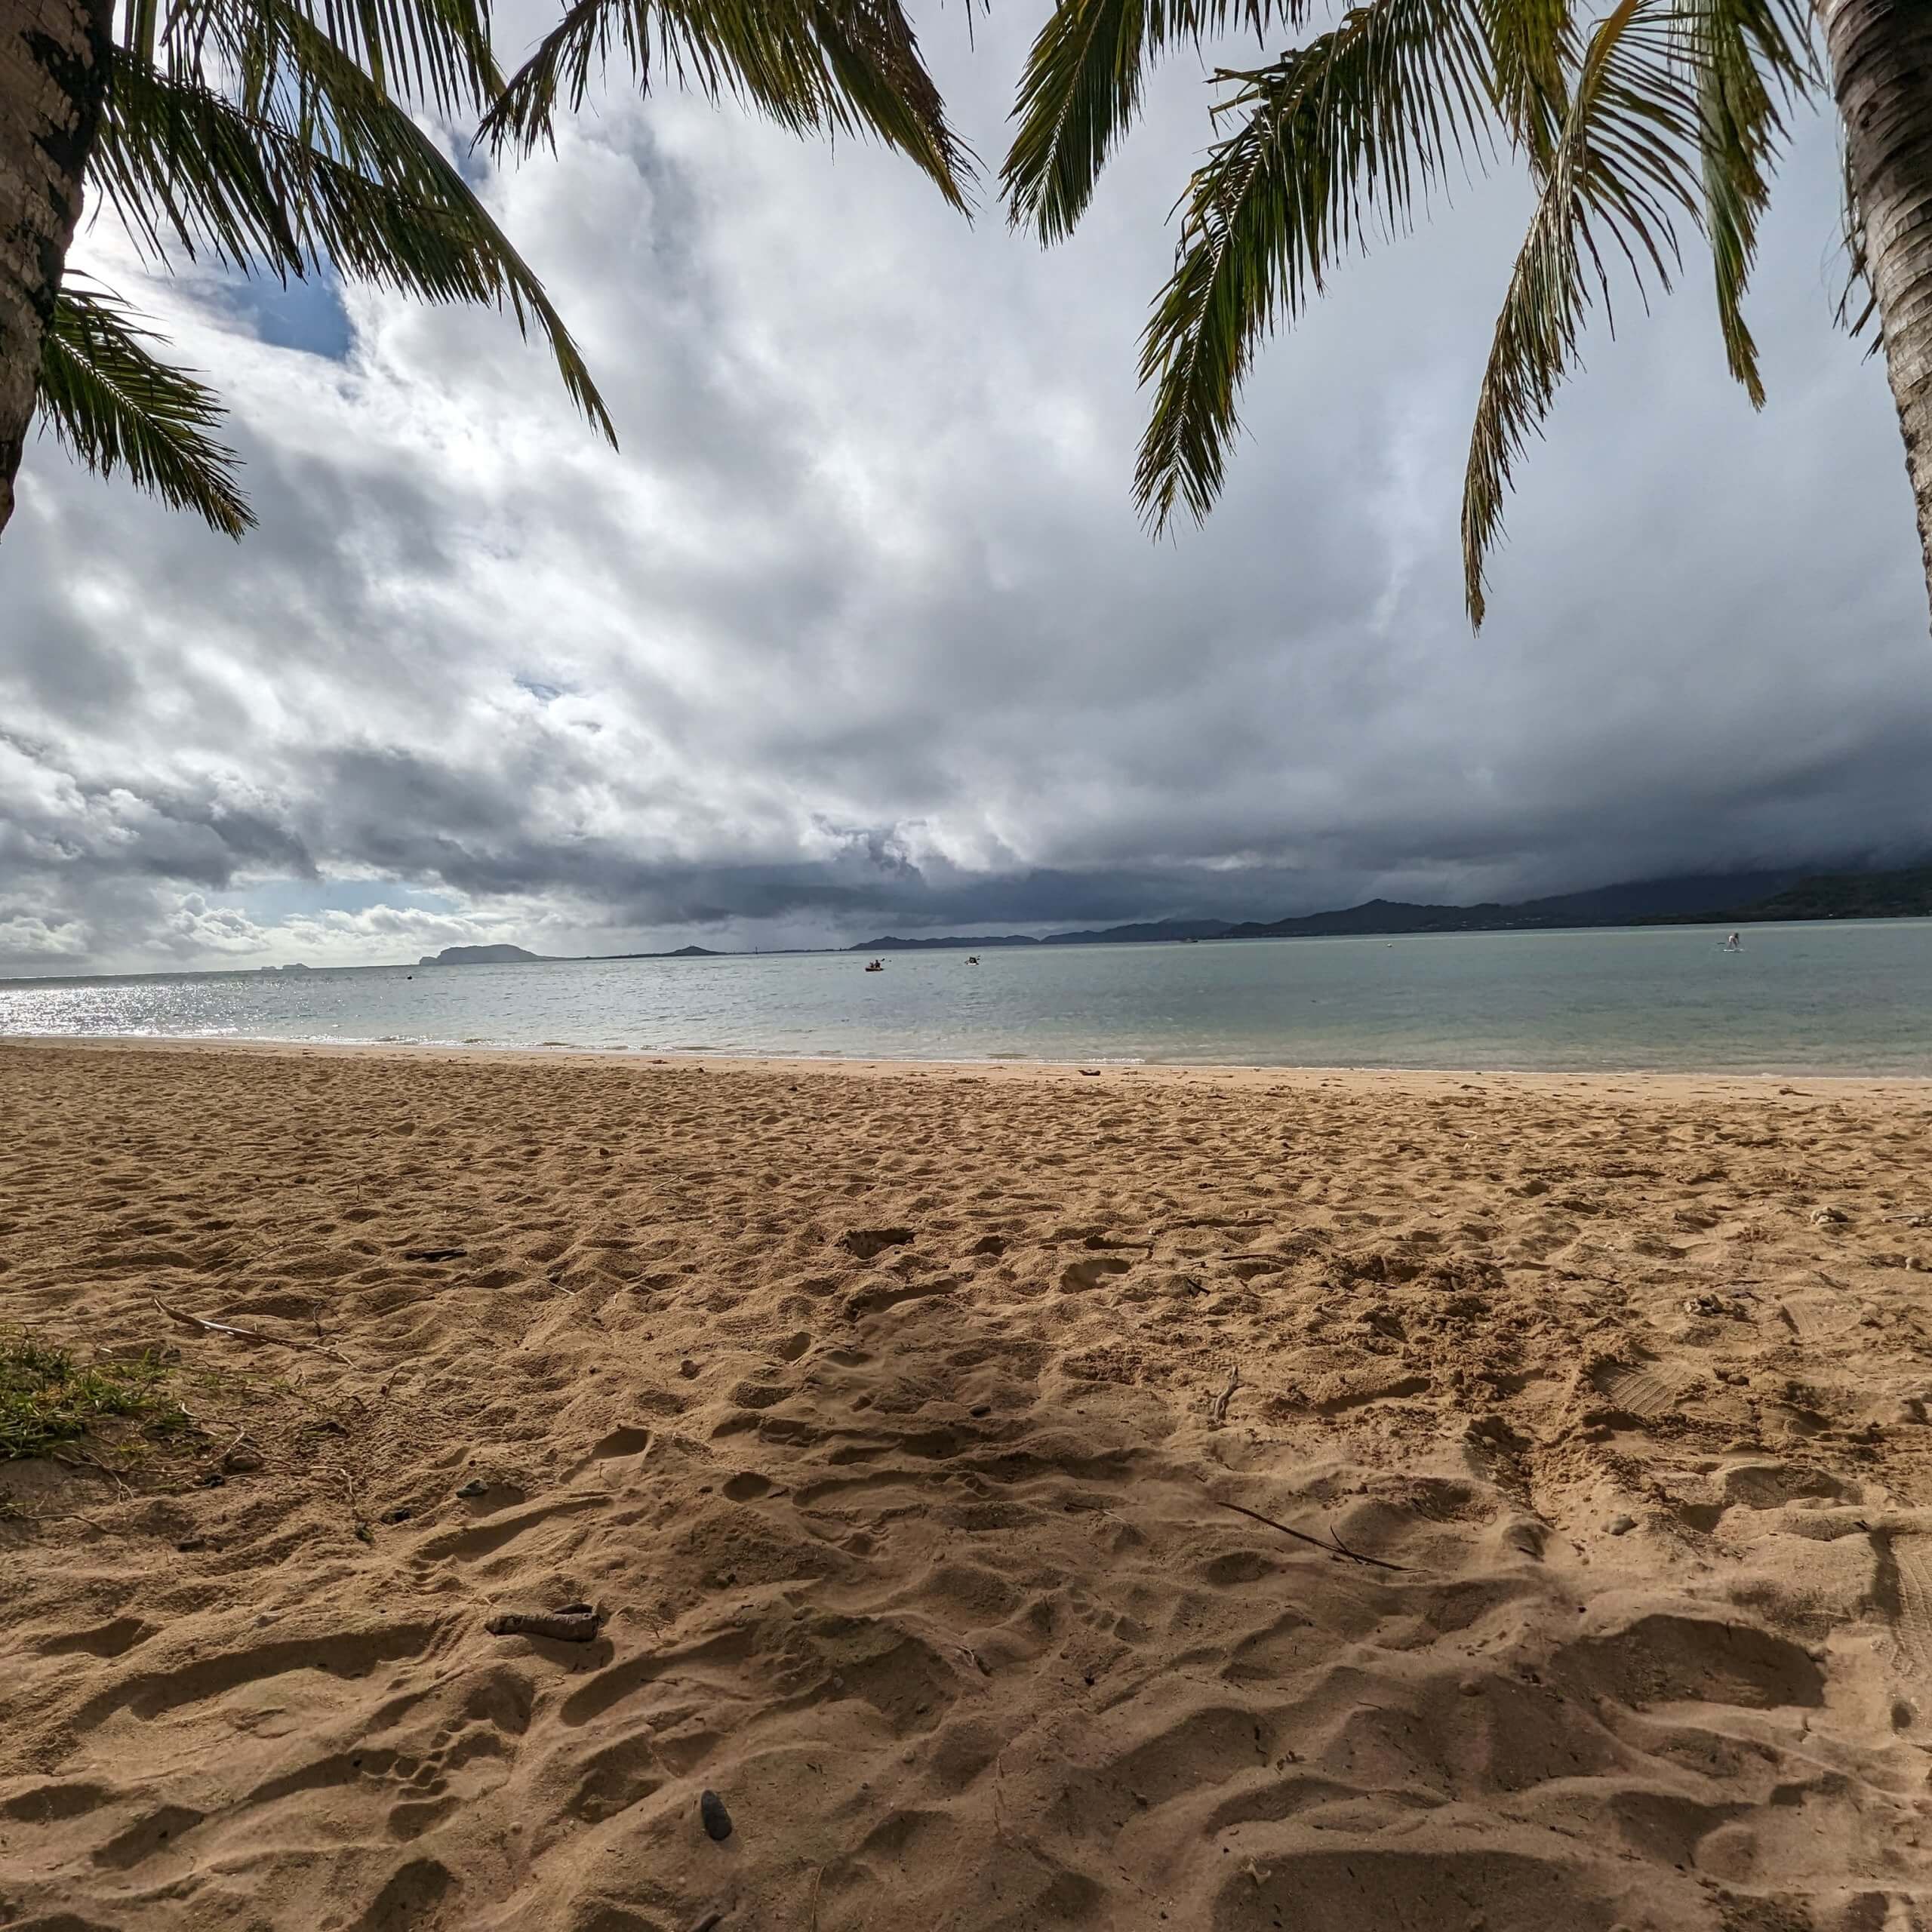
Stop #1: Kualoa Ranch – Secret Beach
Kualoa Ranch offers a full day beach experience or half-day (morning or afternoon). The ½ day experience was also part of the Go City Pass so we chose this as our morning activity. This ended up being another one of our favorite activities. We started at Kualoa Ranch and they bussed us over to Secret Beach where we had to take a short boat ride to get to the beach.
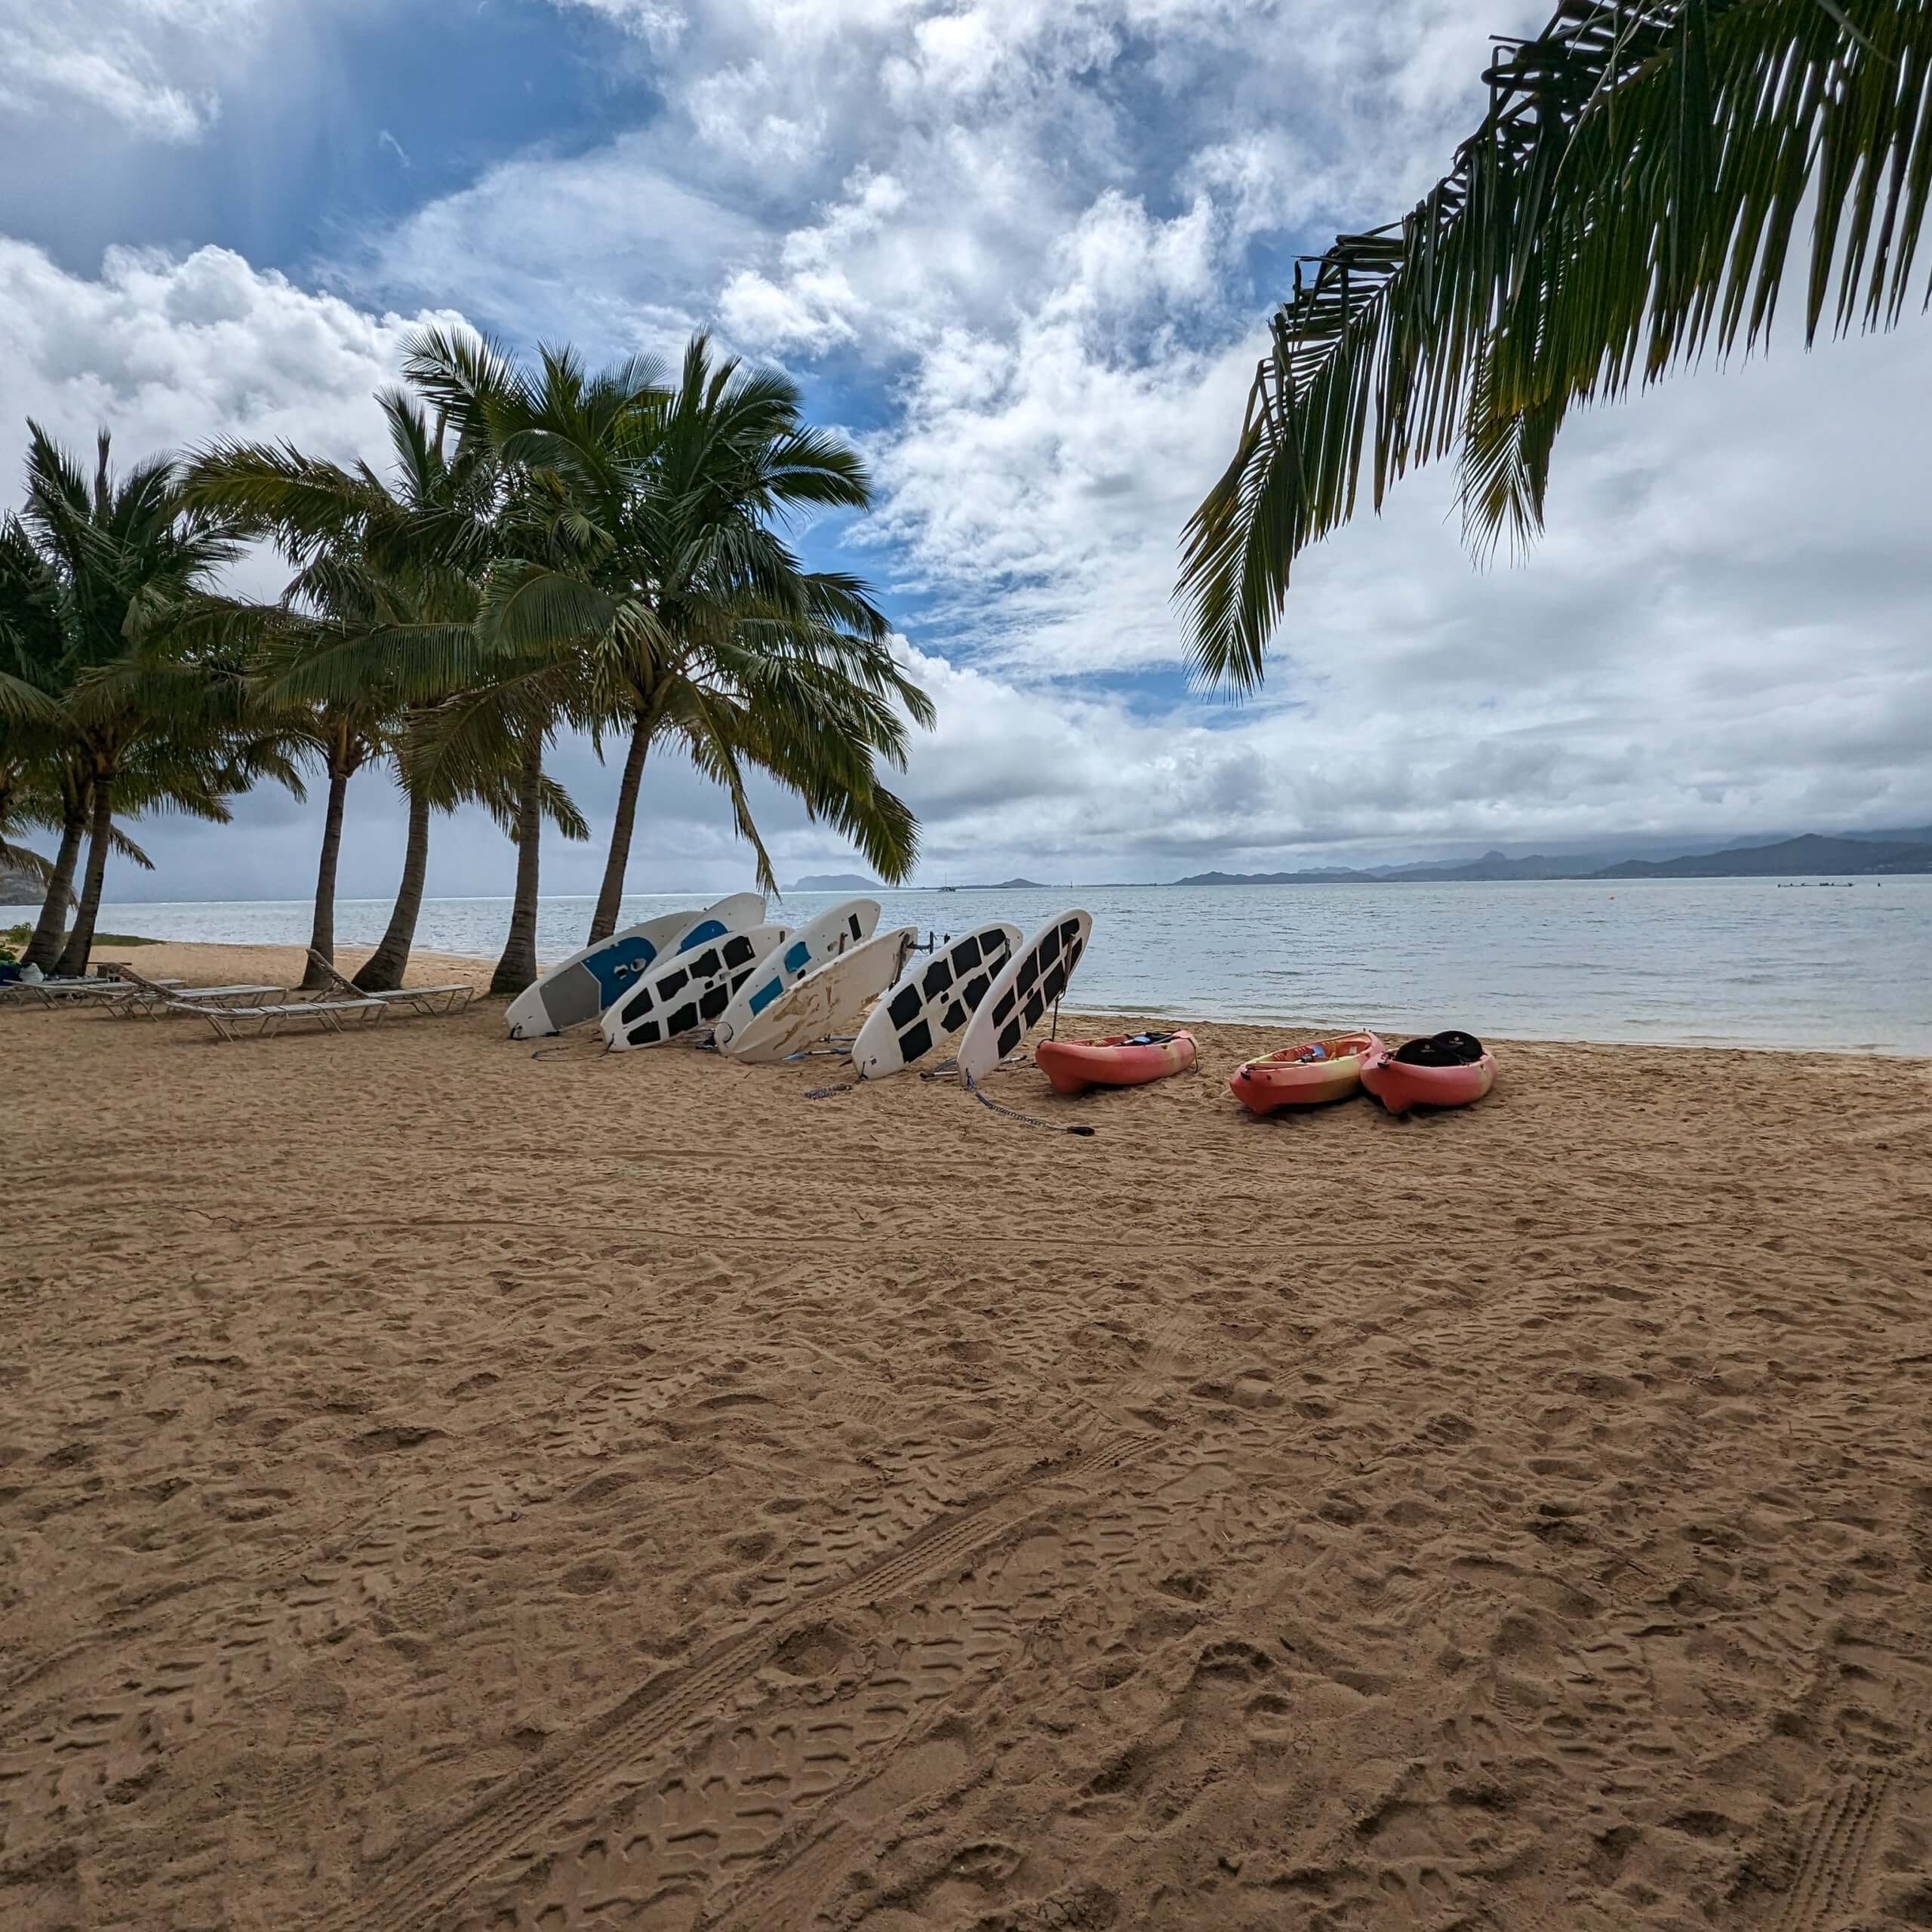
Included Activities
There were plenty of chairs, plus you had full use of kayaks, paddle boards, cornhole, ping pong, volleyball, and hammocks. There were sand toys available as well, so no need to bring your own! In addition, they offered several mini excursions like a boat tour showing some of the movie sites that were filmed there. They also had a couple other boat tours too that took you out to a sand bar.
They had covered picnic tables you could use and even shaded beach areas.
It was a really great way to just relax for the day! We ended up grabbing some lunch items from our hotel, utilizing our daily food and beverage credit. We packed a cooler to bring to the beach and had lunch before we left for our next stop.
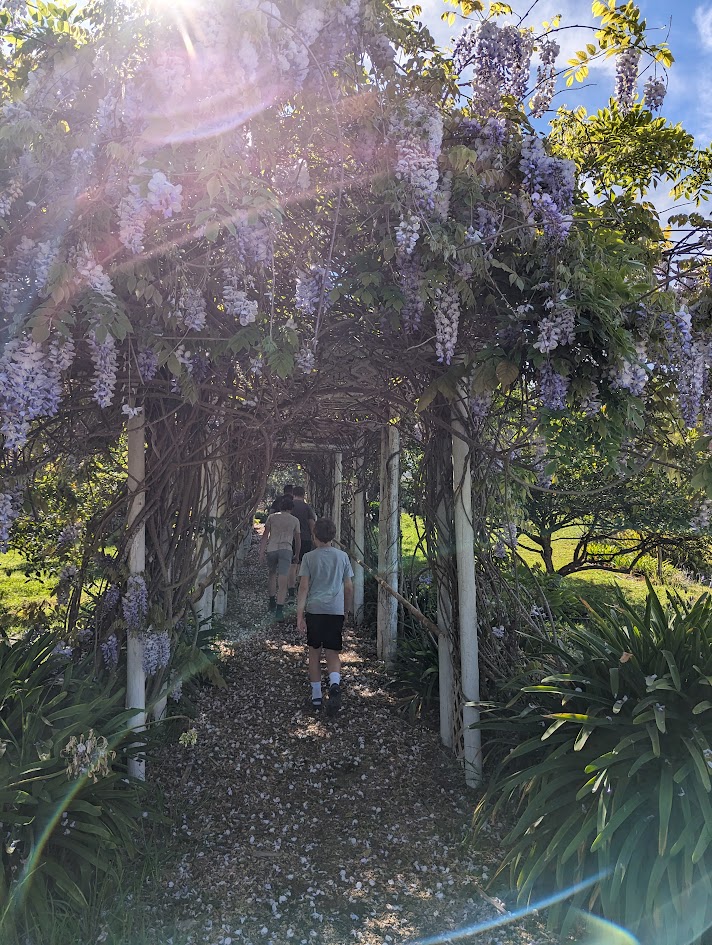
Stop #2: Polynesian Cultural Center (PCC)
One of the recommendations we found was to check out the Polynesian Cultural Center. It was only about a 15-minute drive from Kualoa Ranch to PCC, plus the PCC didn’t open until 12:30 so paring the beach with PCC was perfect!
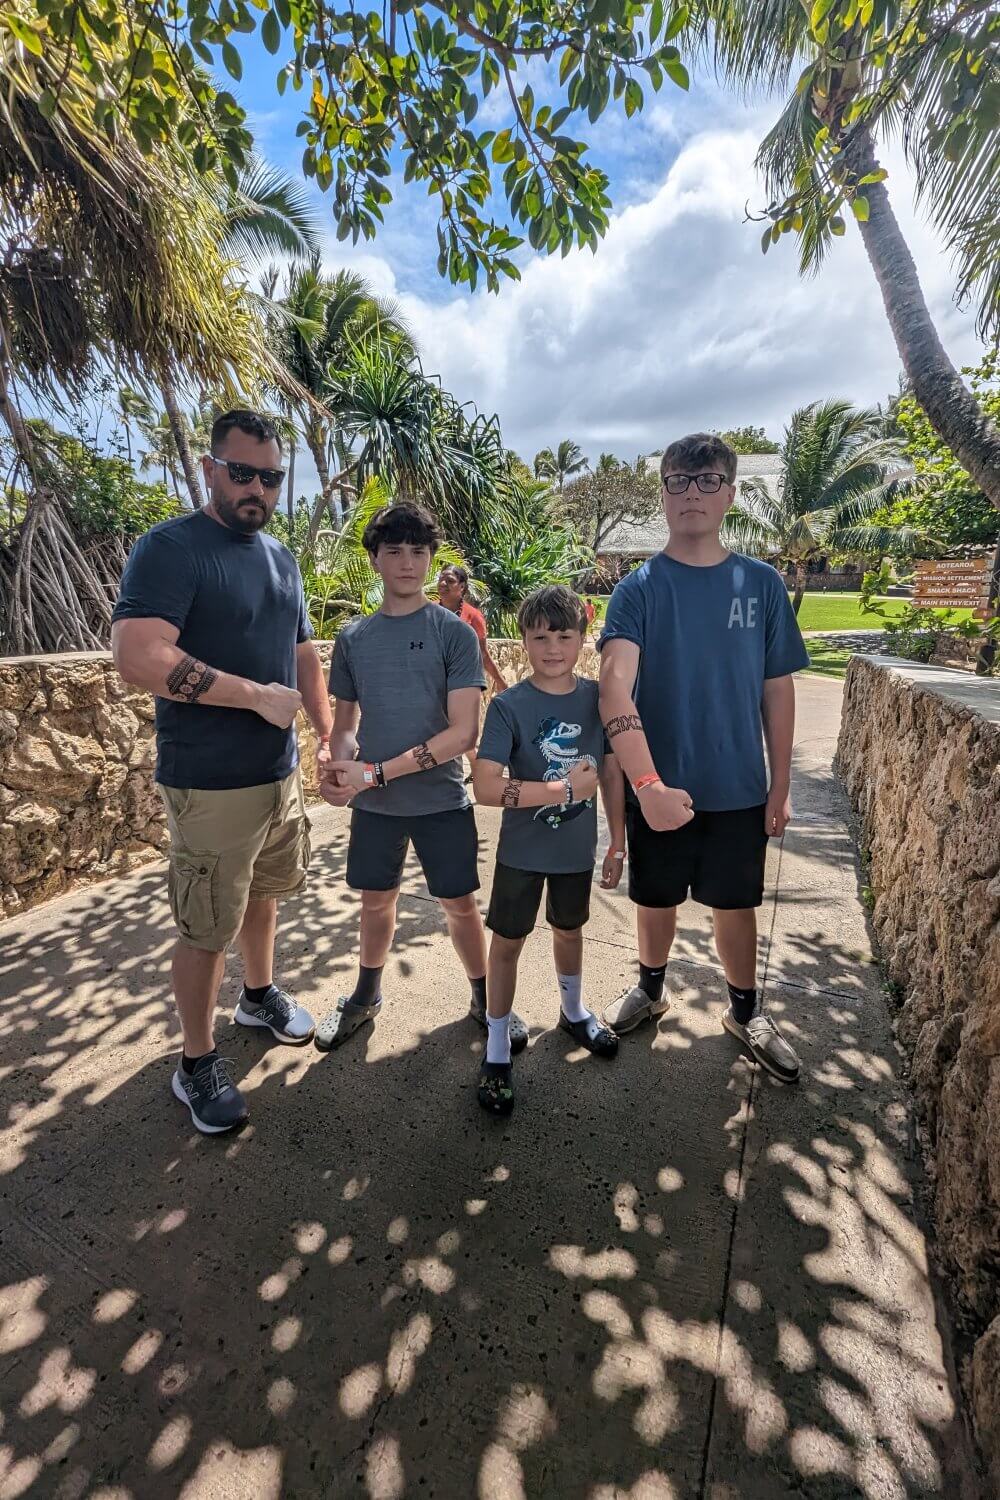
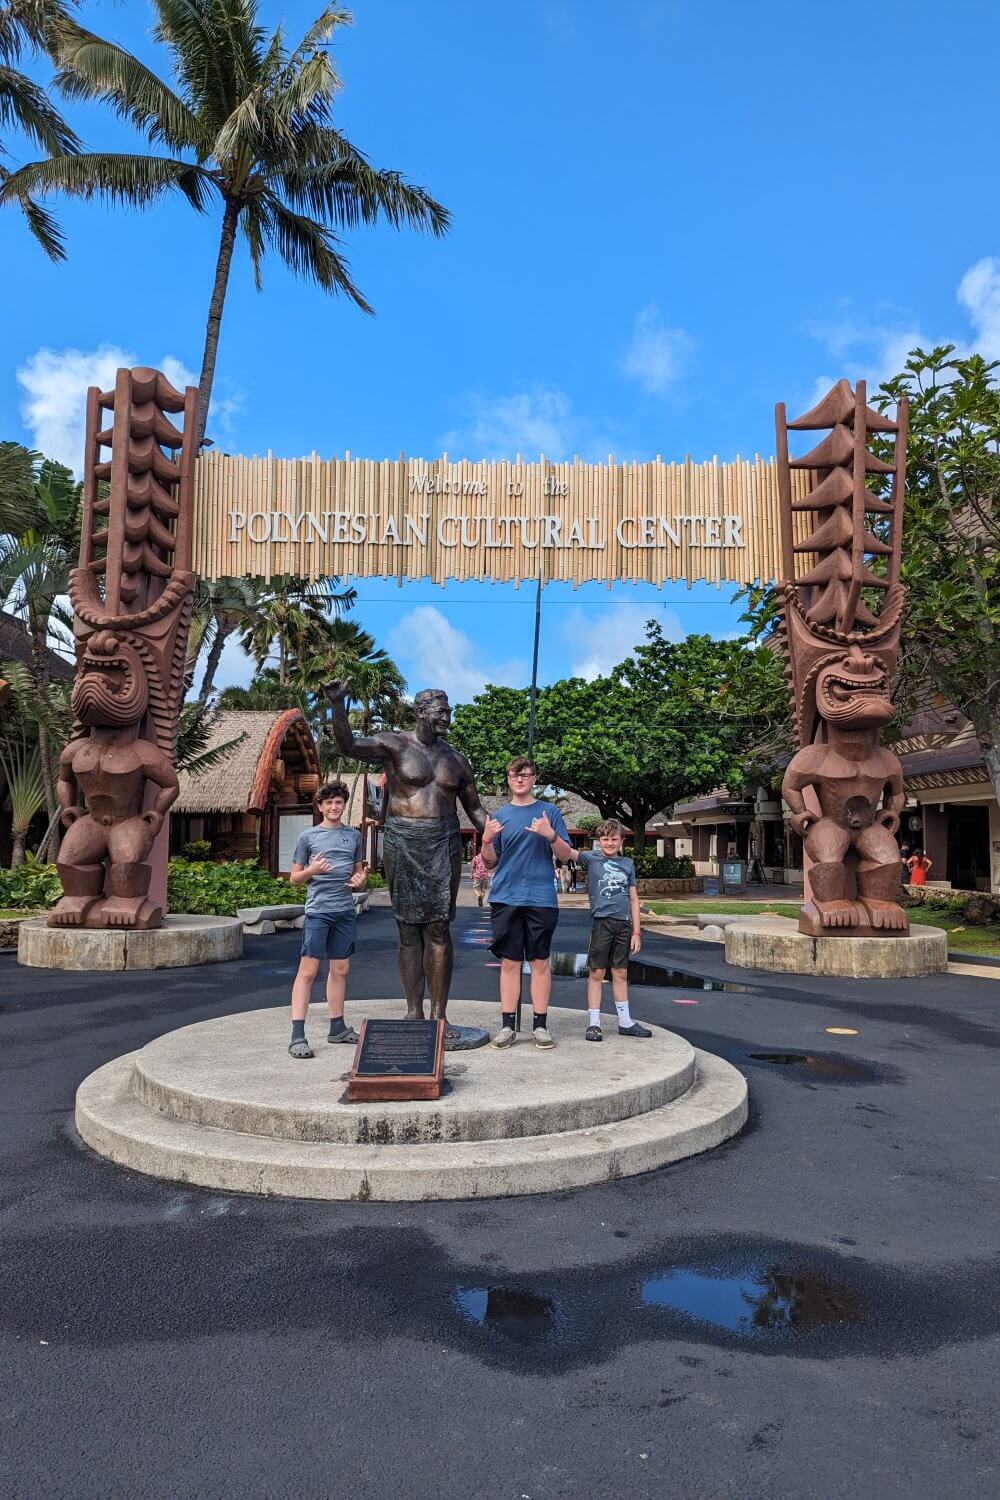
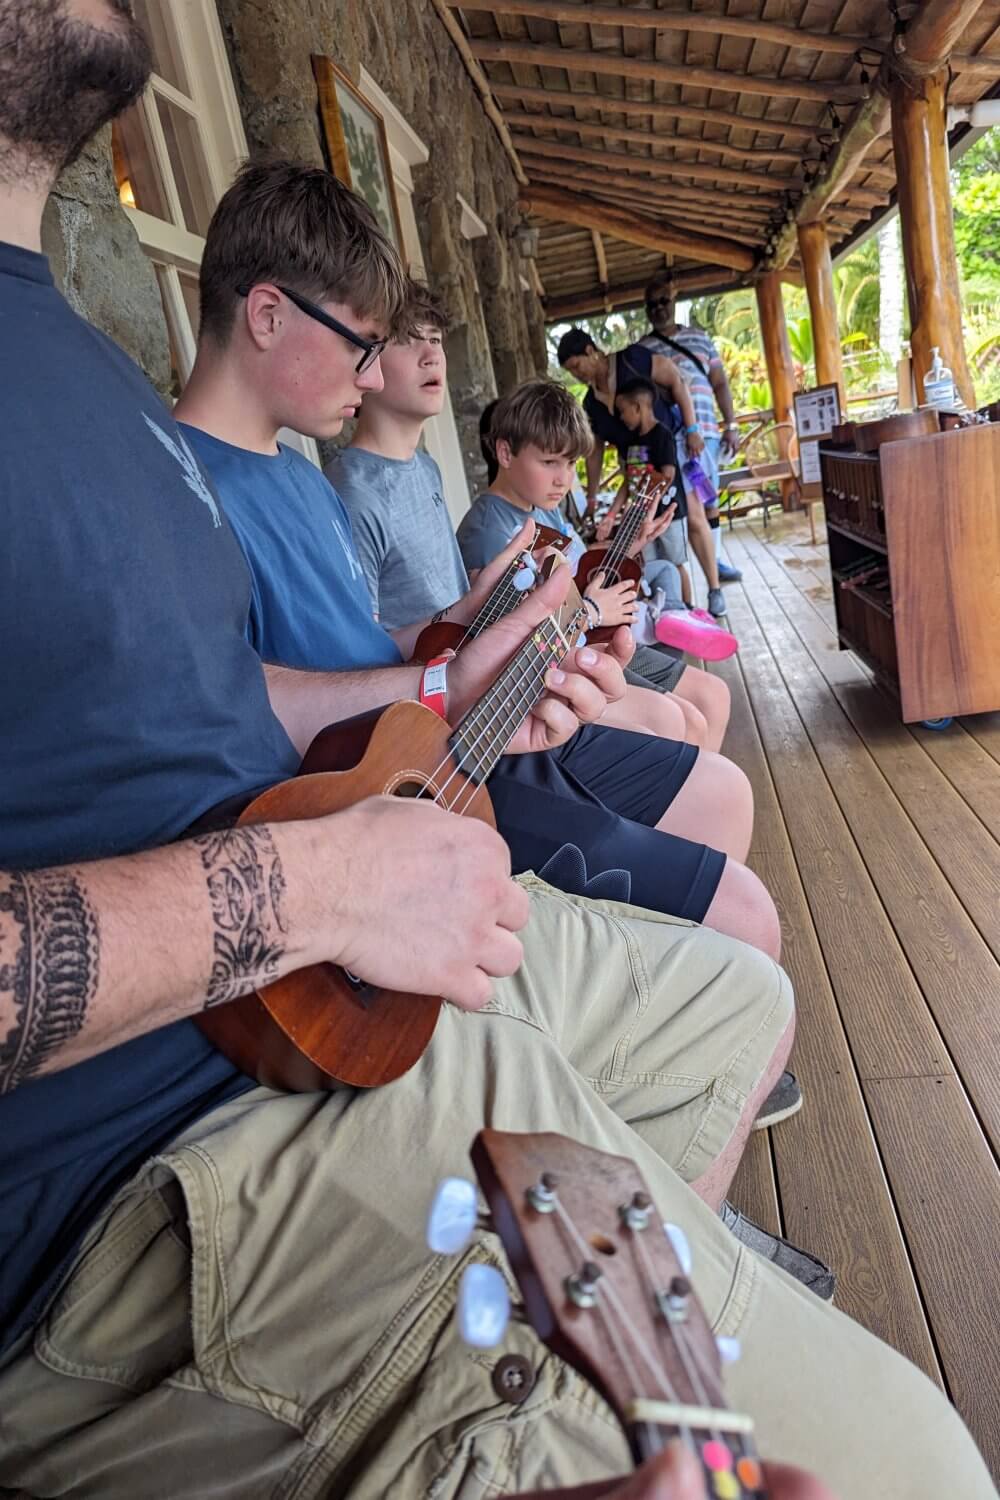
When we arrived at the PCC, the lines were pretty long. We were able to use the Go City Pass with this activity as well. The PCC is divided into sections of the South Pacific and offers cultural activities at each of the “islands.” Our kids tried things like spear throwing, took ukulele lessons, fished, went on a canoe ride, tried different foods unique to the islands and more. It was a fun place to spend our afternoon.
Stop #3: Pounders
We also had dinner at Pounders, which is right on site with the Polynesian Cultural Center and it was one of our favorite meals. The food was wonderful and they had some really good cookies too!
Stop #4: Hilton Hawaiian Village
After leaving the Polynesian Cultural Center, we headed back to the hotel for the night. We needed to get packed up and ready to leave the next morning for our flight to Maui.
Day 7 – Tuesday
It was an early morning for us! We packed up the car and headed to the airport to catch our inter-island flight to Maui. We actually had a later flight booked, but ended up switching it to an earlier flight since we figured we’d be up early anyways, plus it’d give us more time in Maui.
TSA PreCheck
The flight was only about 45 minutes, but the airport was booming when we got there. Thankfully, we have TSA PreCheck, so we were able to skip the long lines and were through security in about 5 minutes! If you do even some airport travel throughout the year, I highly recommend looking into TSA PreCheck! We got it this year and don’t know why we didn’t jump on the bandwagon sooner! You can read all about why we love it and how to sign up for it (for free) in this post.
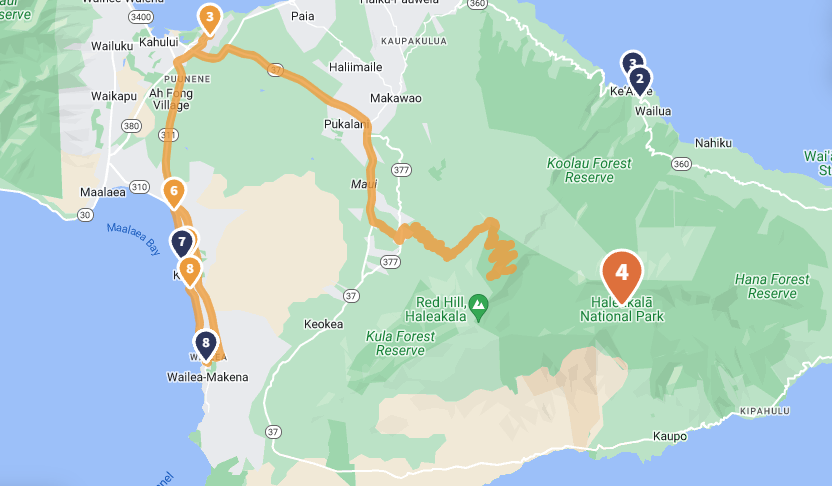
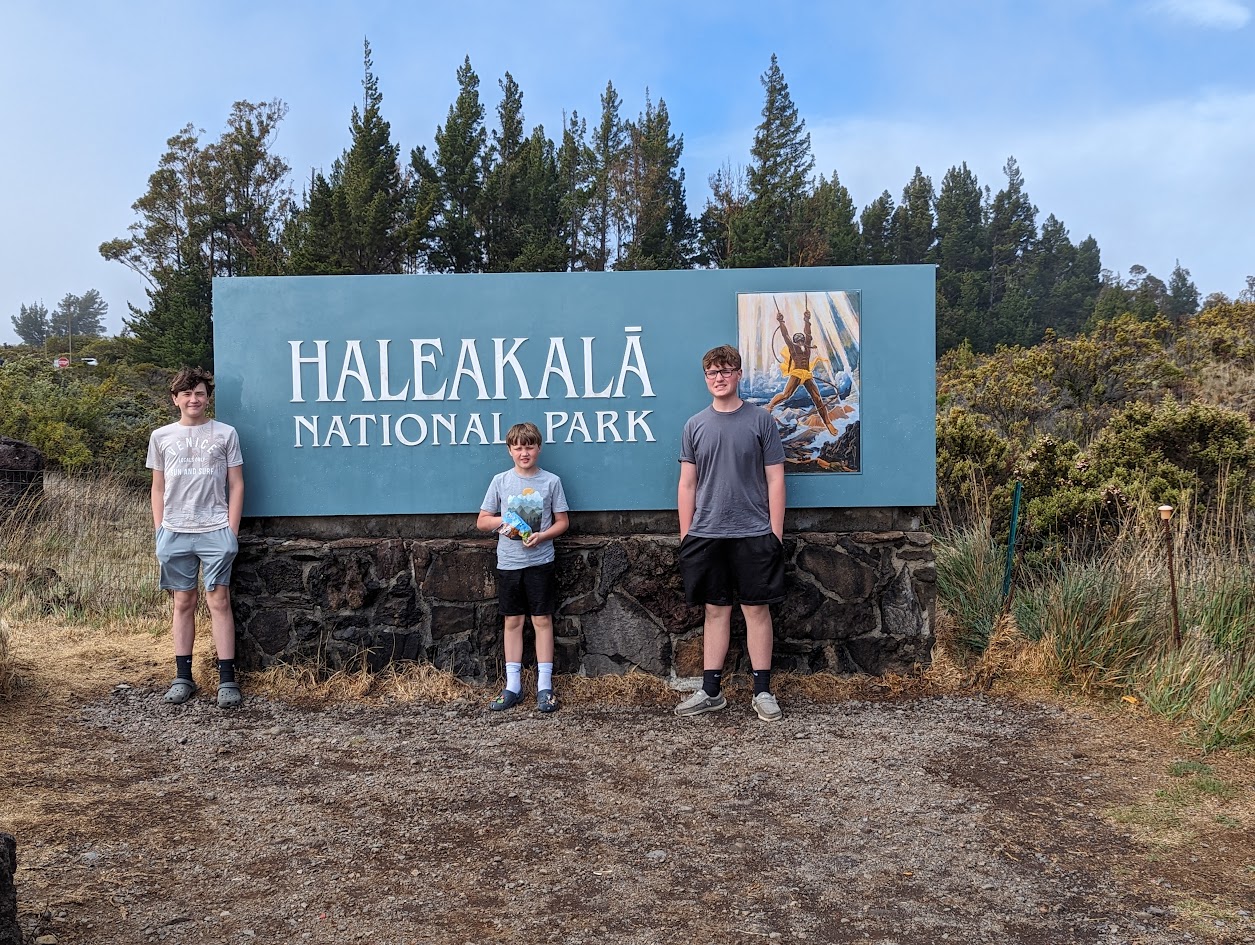
Stop #1: Haleakala National Park
Once we landed and got our rental car, we headed to Haleakala National Park. Over the last few years, we’ve hit several National Parks and Haleakala is a park I’ve wanted to check out for quite some time! I did a presentation in college on Haleakala and said I would get there one day!
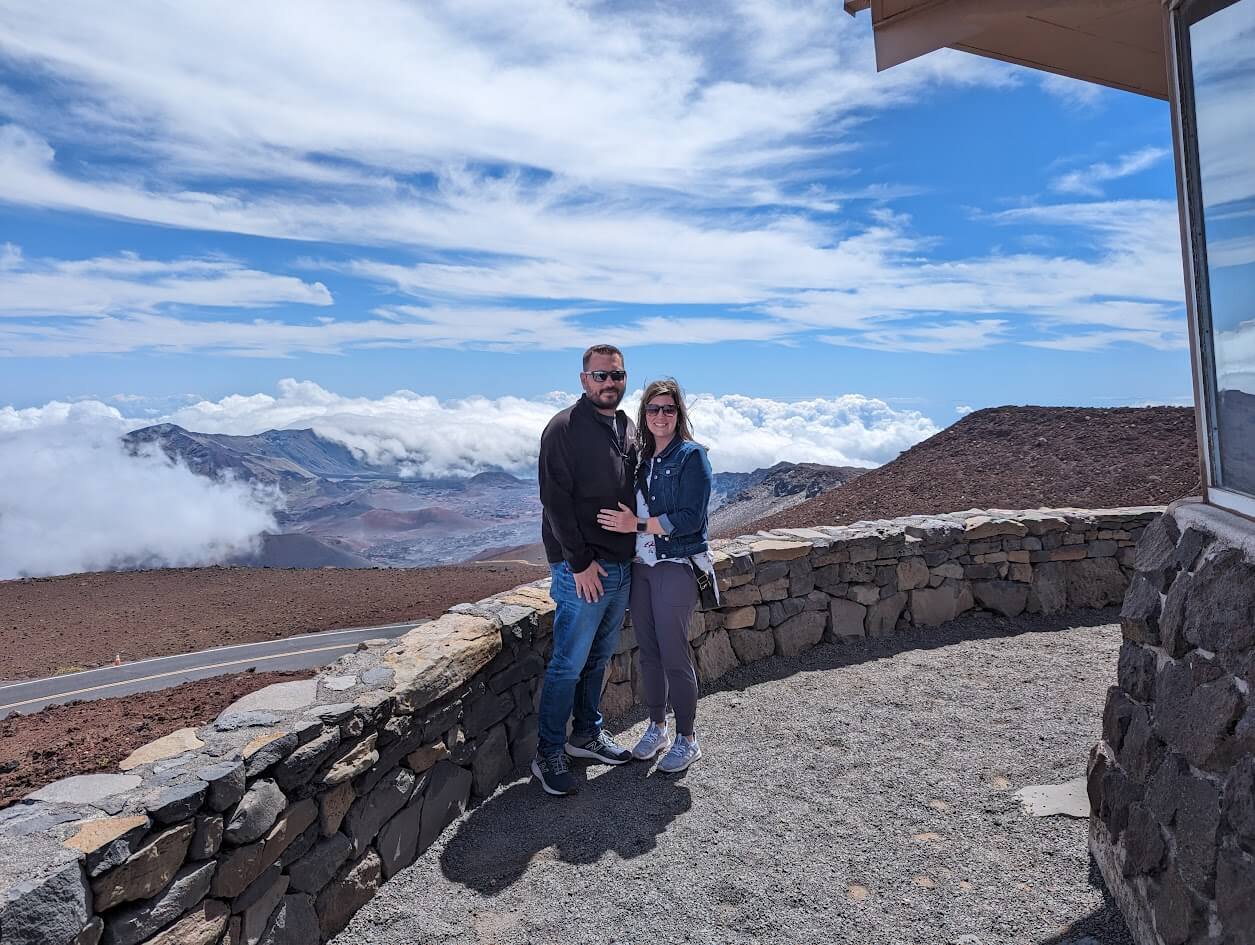
The drive to the summit of Haleakala is a little over an hour from the airport. As we drove up, we found a few places to stop along the way. The summit is in the clouds and just a really cool view. The cost is $30/vehicle for a 3-day pass. We opted to get the America the Beautiful Pass, which was $80, but gives you access to National Parks all around the US for a year. Since we’re heading out west for our summer vacation so it will actually save us money on that trip.
We weren’t at the summit long—really just enough time to snap some pictures. Then we began our drive to our hotel, which was another 1.5 hours. The drive up and down was beautiful though! The kids would have rather just went to the hotel, but with this being on my bucket list, we were making the stop!
Stop #2: Food Truck Park
By the time we were done, we were hungry. There was a food truck park on the way to our hotel, so we grabbed some lunch on our way.
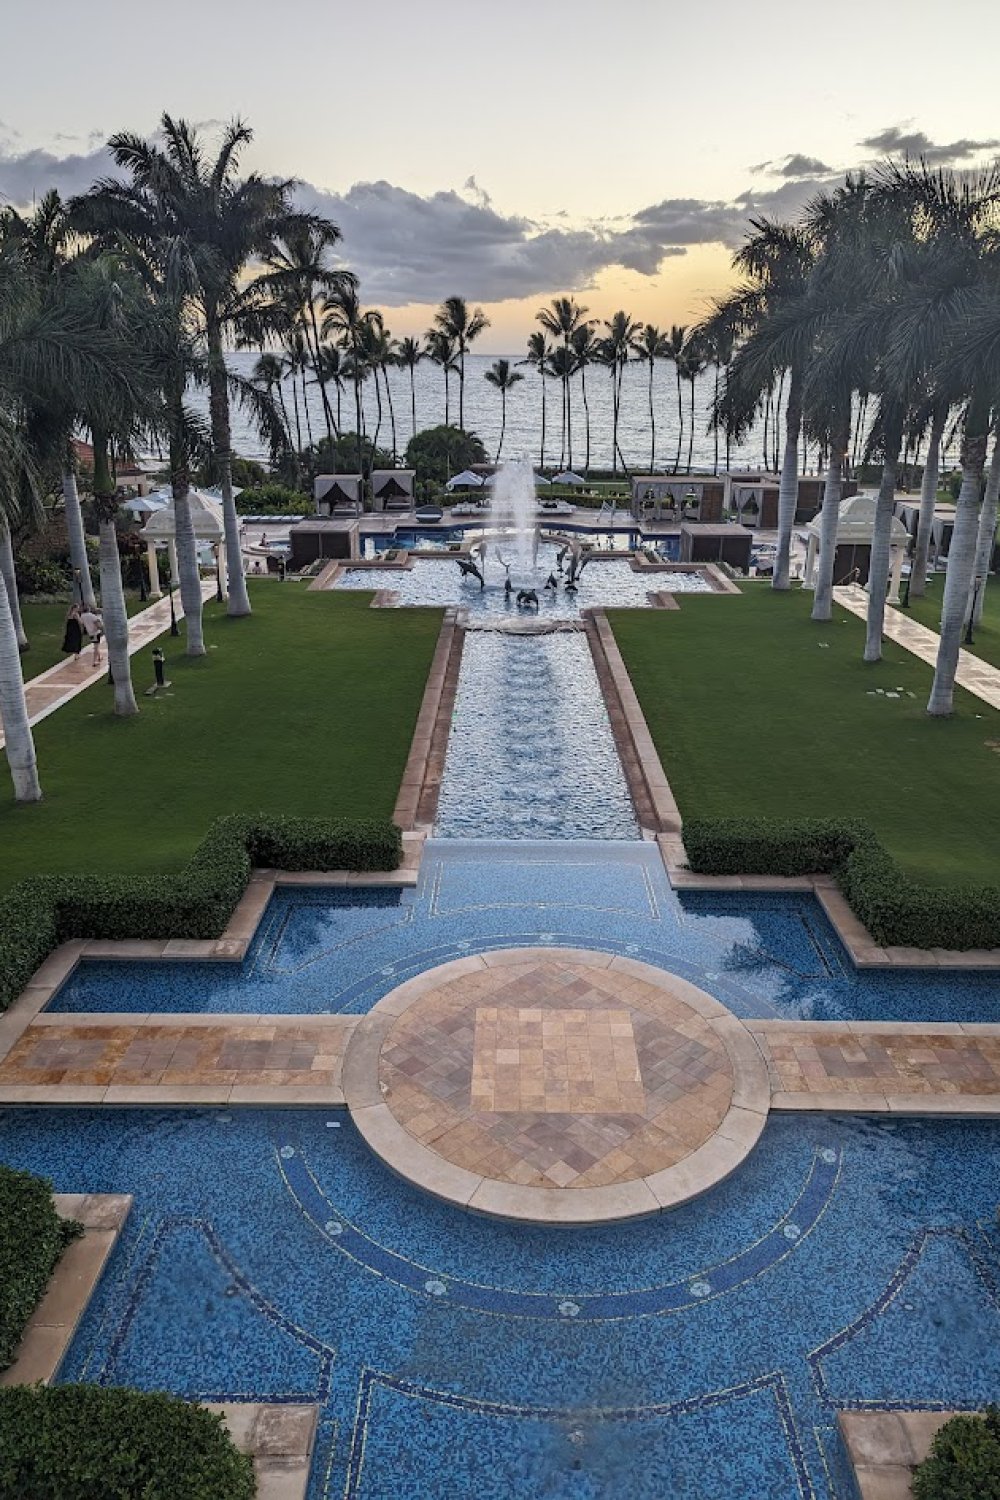
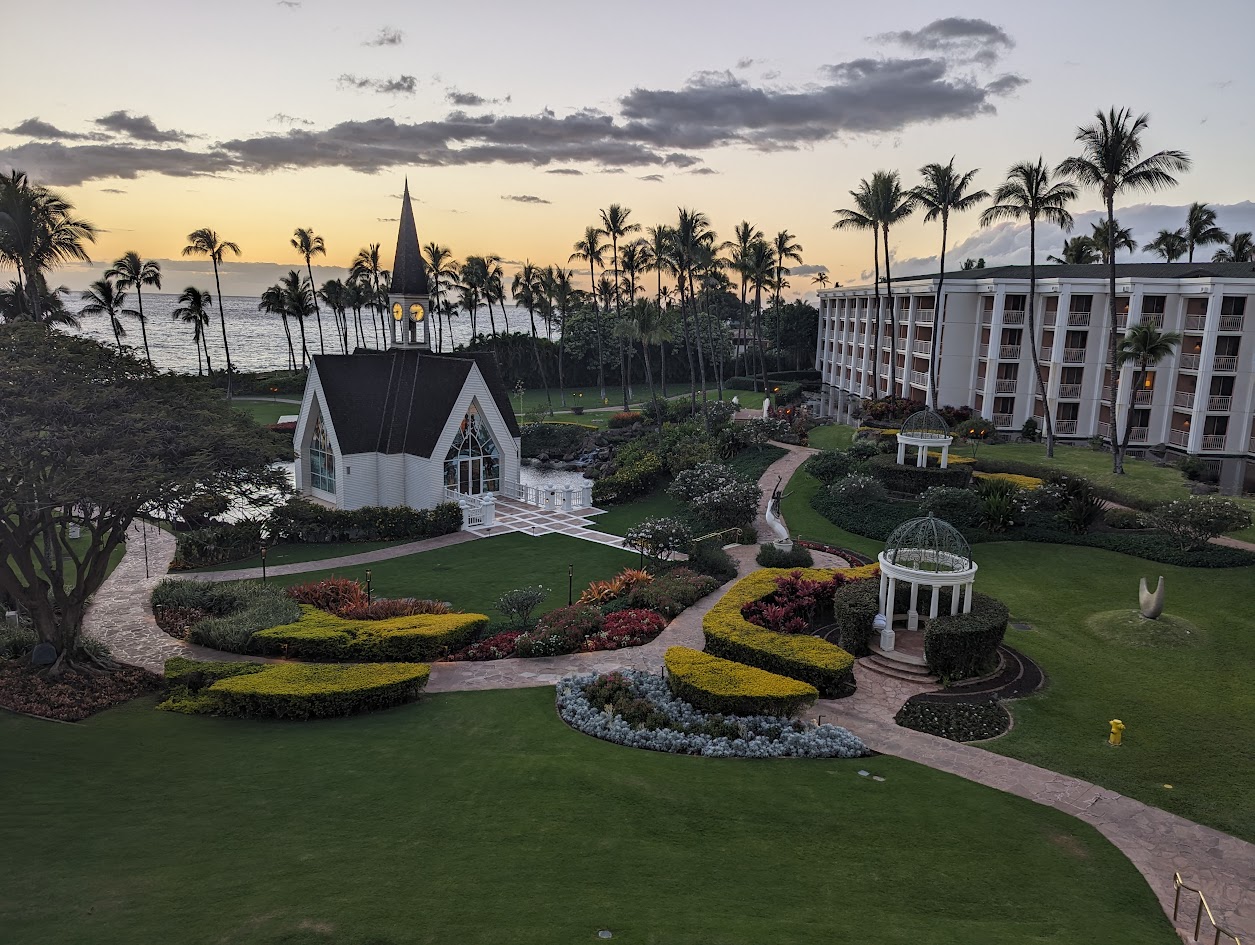
Stop #3: Grand Wailea – A Waldorf Astoria Resort
We were all pretty excited to get to our hotel. Our family doesn’t typically stay in luxury resorts, but we used some free night certificates we earned from our Hilton Surpass cards. The resort was stunning! We took our bags to the room and checked out the resort. The grounds are absolutely beautiful, and the pool is exactly what you’d want with kids in tow!
Stop #4: Three’s Bar and Grill
We made reservations for an early dinner at Three’s Bar and Grill to take advantage of their happy hour. In our experience, the restaurants on Oahu were much more than Maui. I’m sure Maui has its fair share of expensive restaurants, but our dinner was under $100 for our family of 5—even with a couple of cocktails! The food was really good as was the service, so I’d highly recommend checking this place out if you’re in Maui!
Stop #5: Grand Wailea
After dinner, we headed back to our hotel because we were ready to check out the pool! We got in some swimming and relaxed in the hot tub before heading to bed.
Day 8 – Wednesday
It was another early morning, which worked out because we were still waking up pretty early. We grabbed some breakfast at our hotel, again using our food and beverage credit that came with being a Gold/Diamond Hilton member.
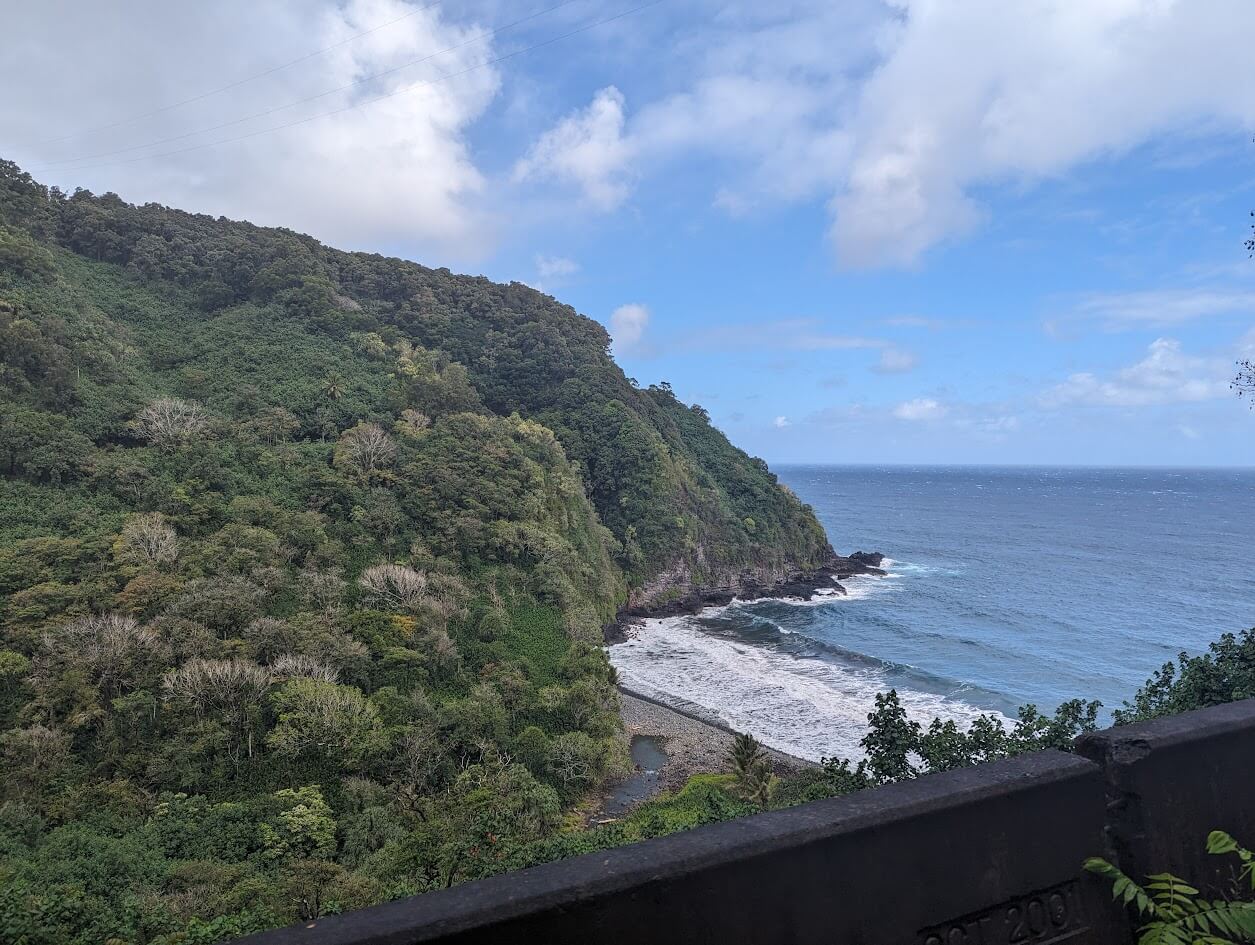
Stop #1: Road to Hana
Our first stop was the Road to Hana. We knew we wanted to see Maui but didn’t want to spend our entire day away so we decided to drive to the half way point on the Road to Hana. This allowed us to see several points along the way but get back to the hotel early enough to relax and enjoy the day.
When driving the Road to Hana, I had a list of stops to make/things to see. However, on our way to the halfway point, some of the Mile Markers aren’t really visible so it’s hard to know where we needed to stop. It was actually easier for us to pay attention and find those places (typically after we drove past them), but then stop on the way back.
The Road to Hana is a road that is super-windy with lots of switchbacks. It’s important to let the locals pass by you and not block traffic. There are stop offs along the way where you can easily pull to the side to let people pass by.
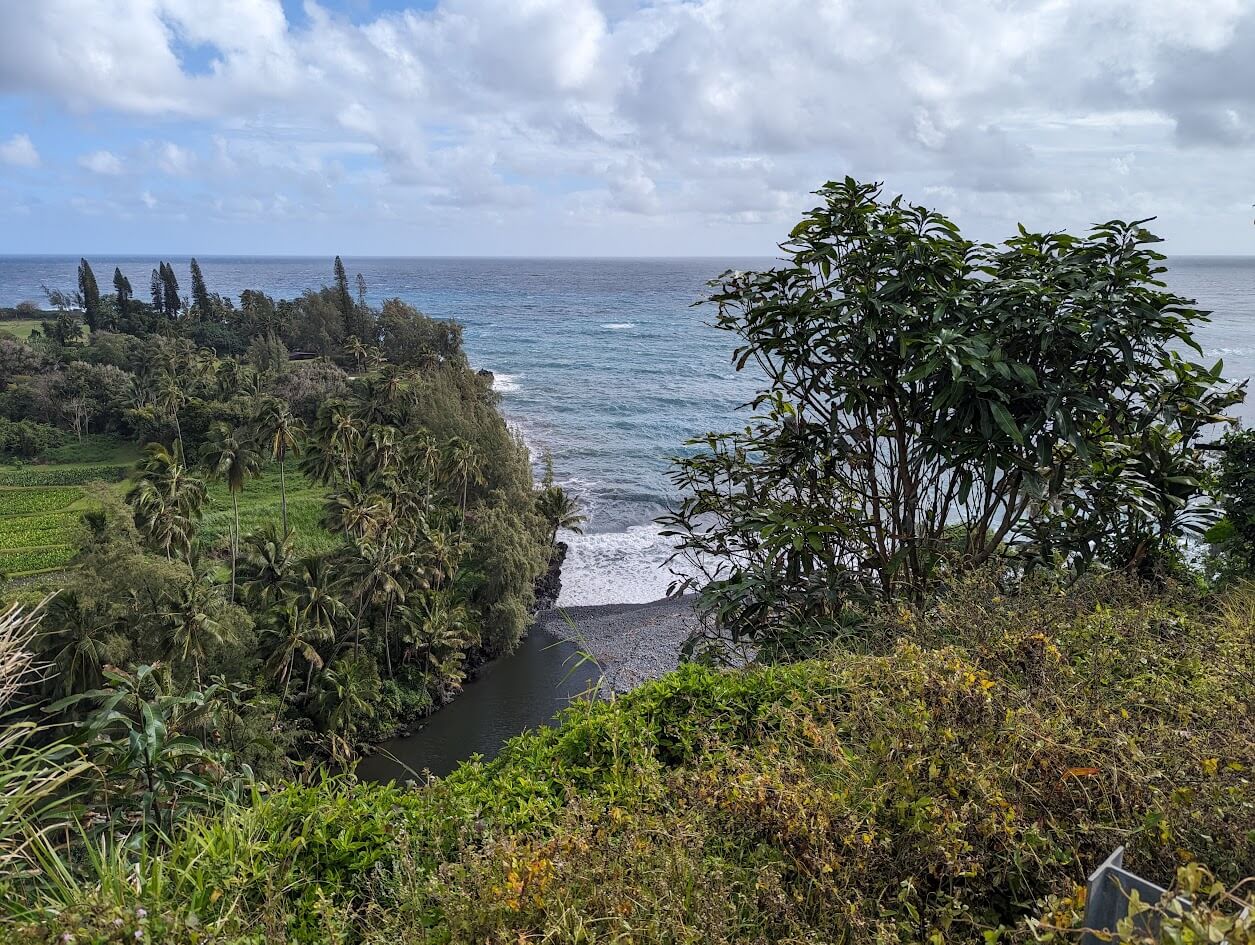
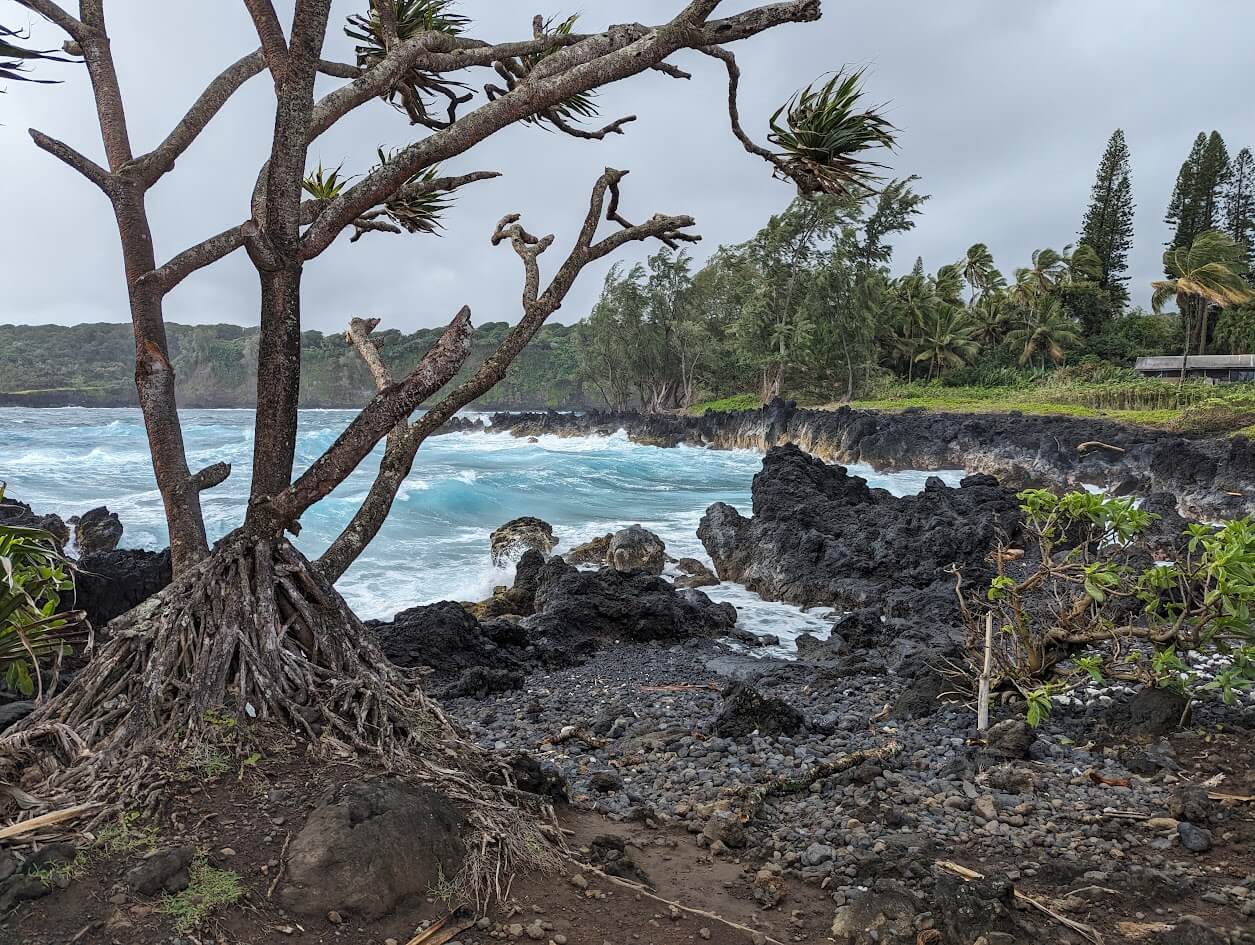
Stop #2: Halfway to Hana
We ended up driving to the halfway point, which was the Keanae Penninsula. This was about an hour and 40 minutes from our hotel. The Keanae Penninsula was the last part of the island formed by lava.
As we headed back from the halfway point, these are the stops we made:
Stop #3: Auntie Sandy’s Banana Bread (Mile Marker 16)
If you’re driving the full way to Hana, this is a stop you’ll want to make on the way there because they may be sold out if you wait until you are driving back! Because this is close to the halfway point, it was before 10am when we arrived. We grabbed a loaf of banana bread, which was still warm, and a few cookies to snack on during our drive.
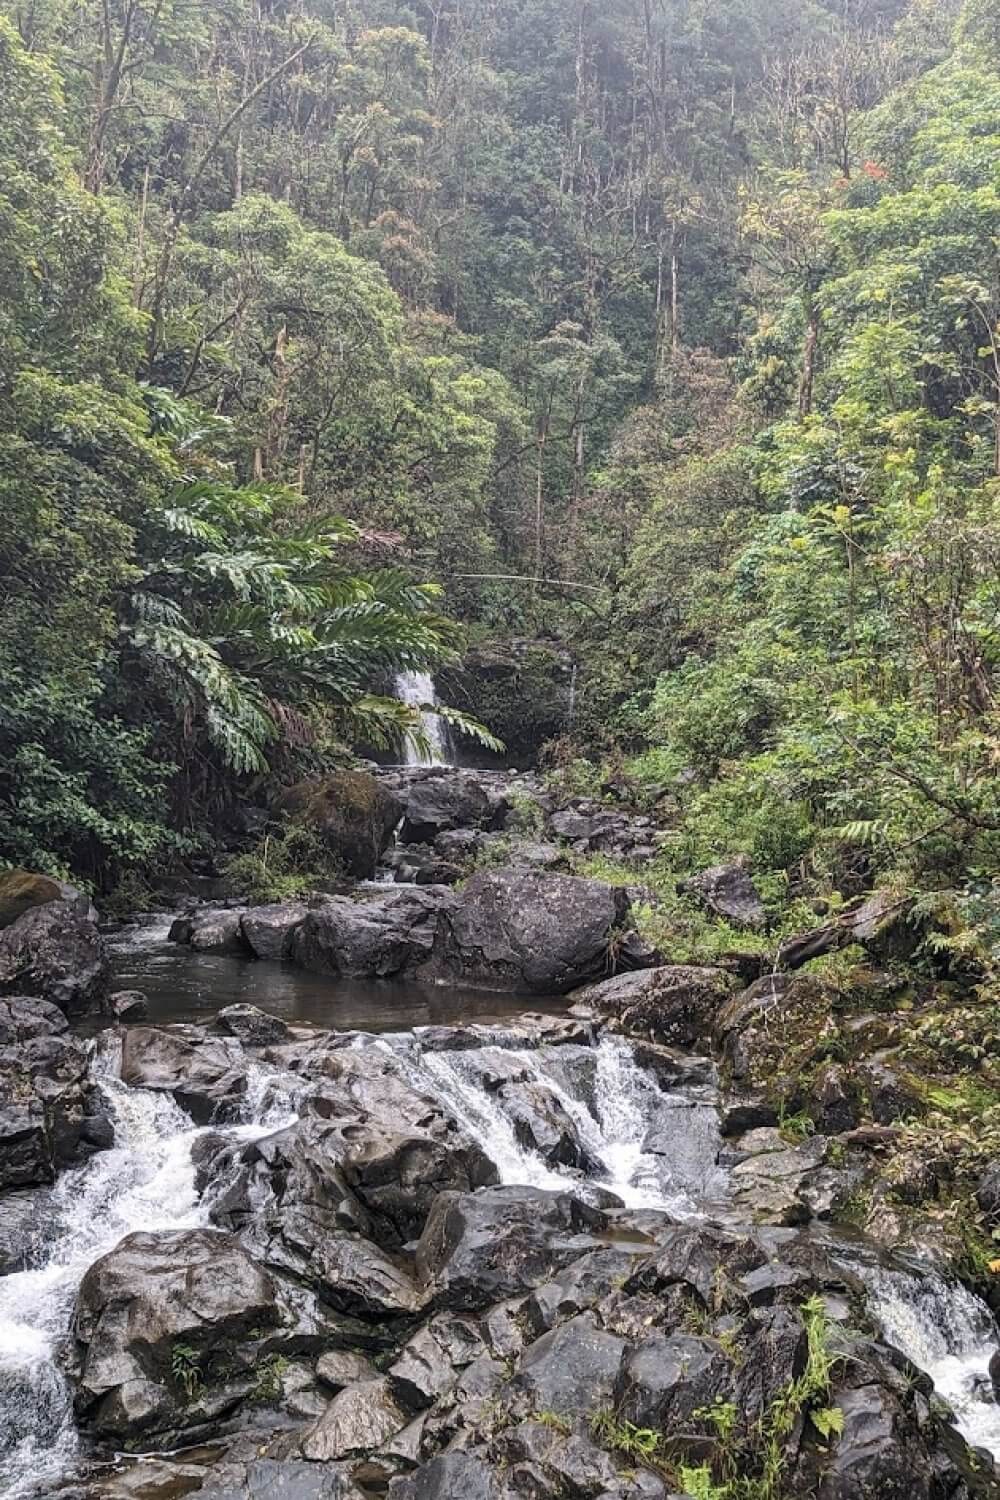
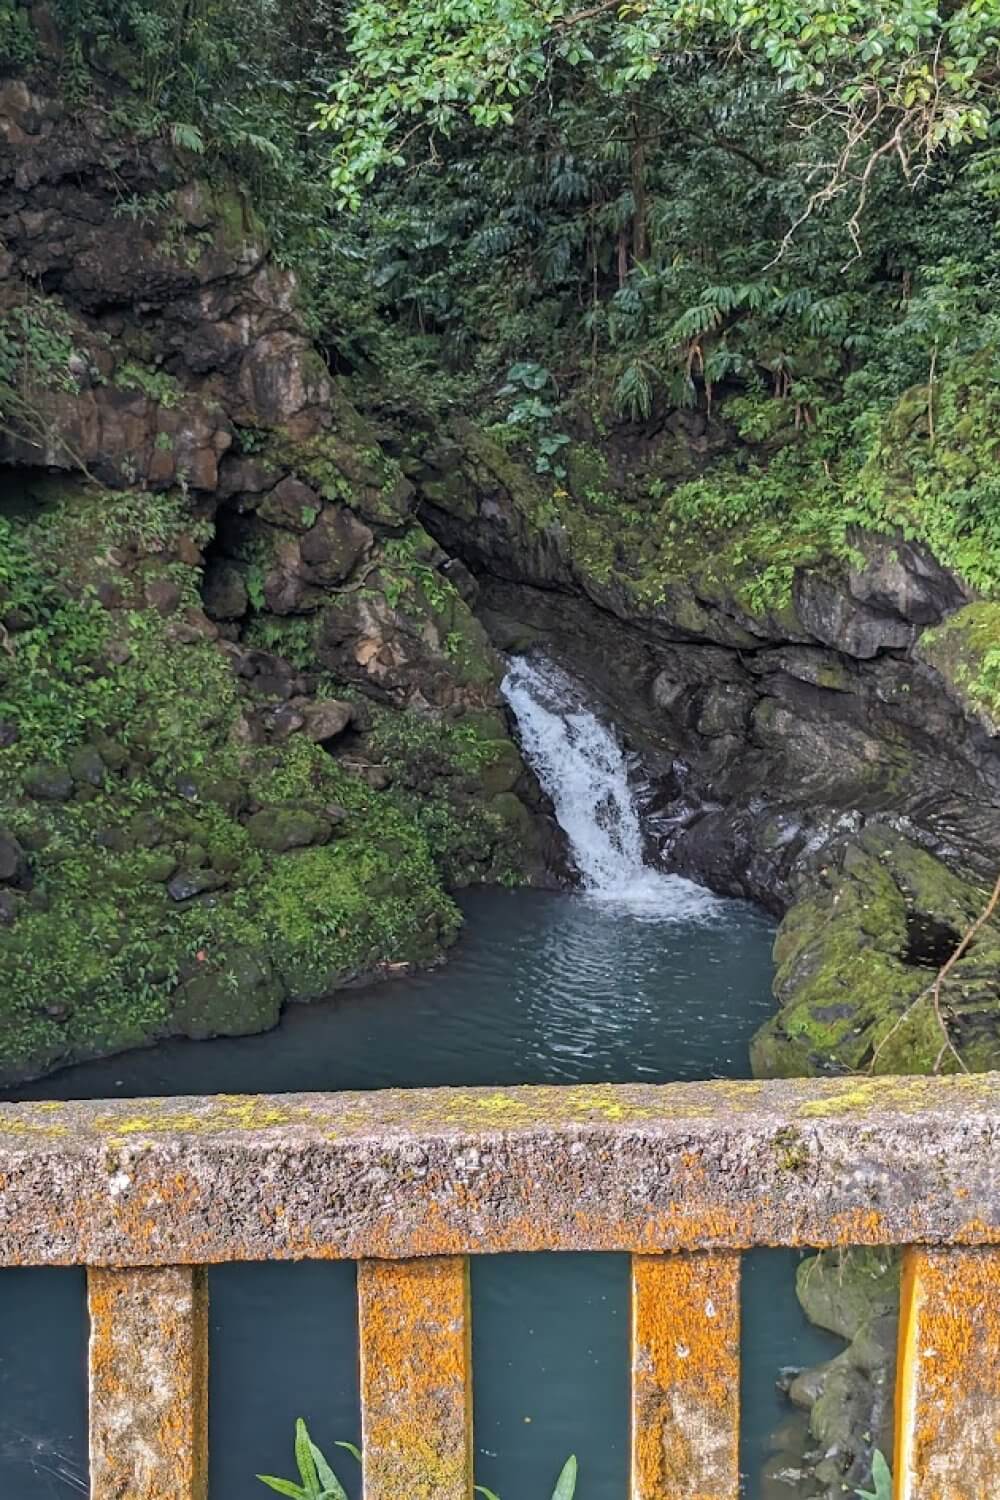
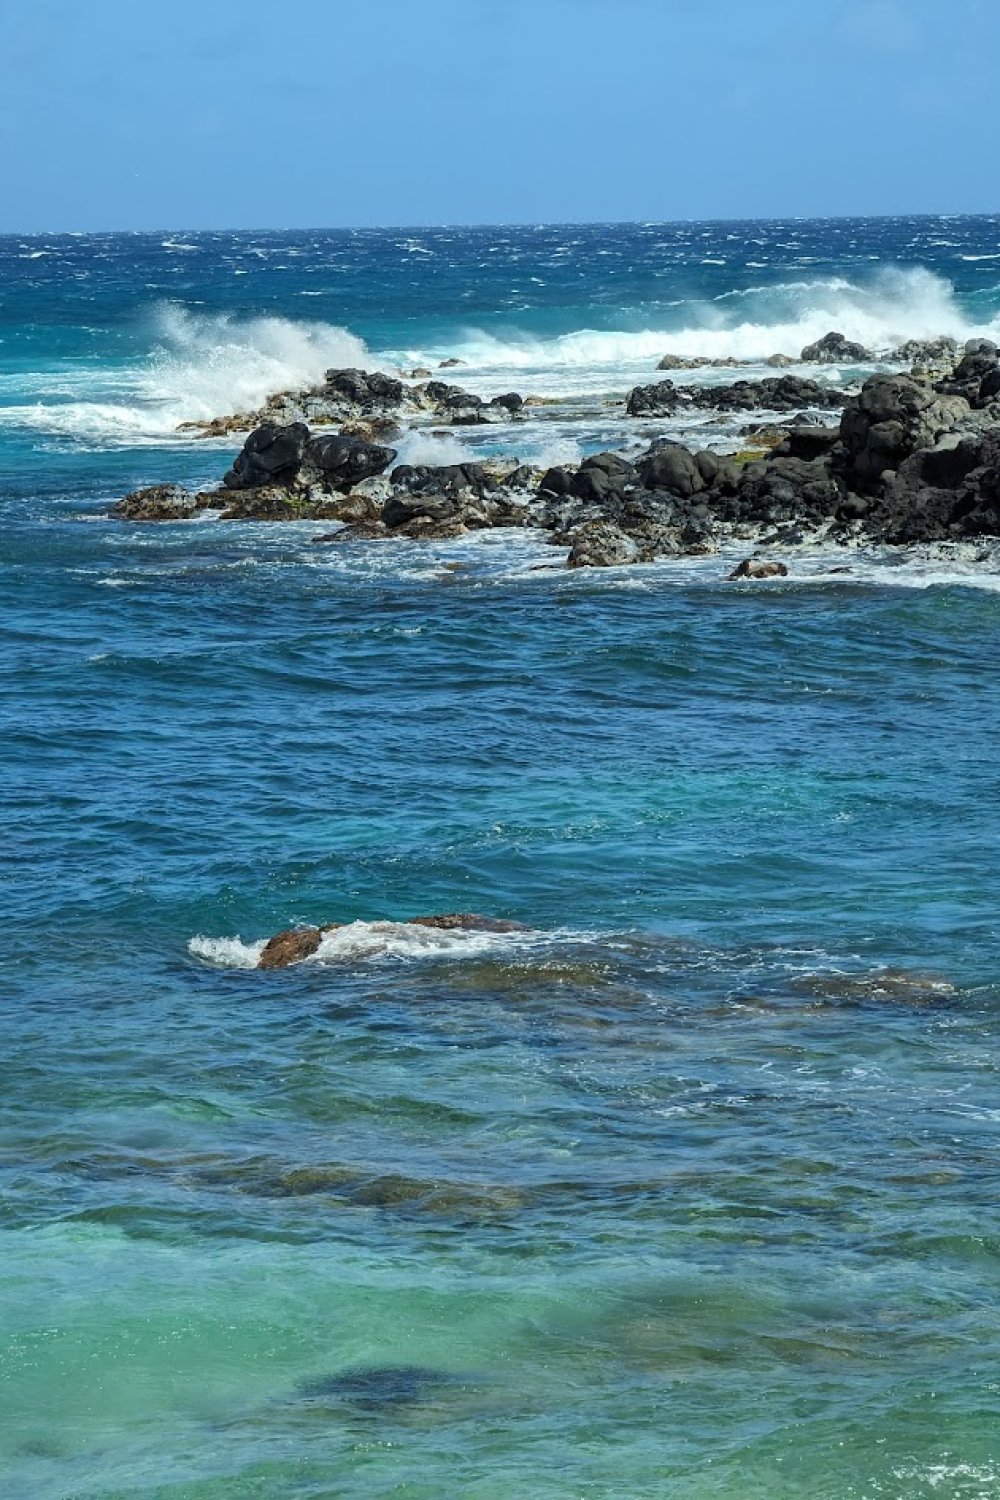
Stop #4: Mile Markers 16 to 11
There are several pull offs where you can grab some different views of the shoreline or waterfalls. Some things are easier to see than others. Stop when you can take in the beauty! Having a Jeep was awesome because I could stand up and hang out of the roof to snap pictures!
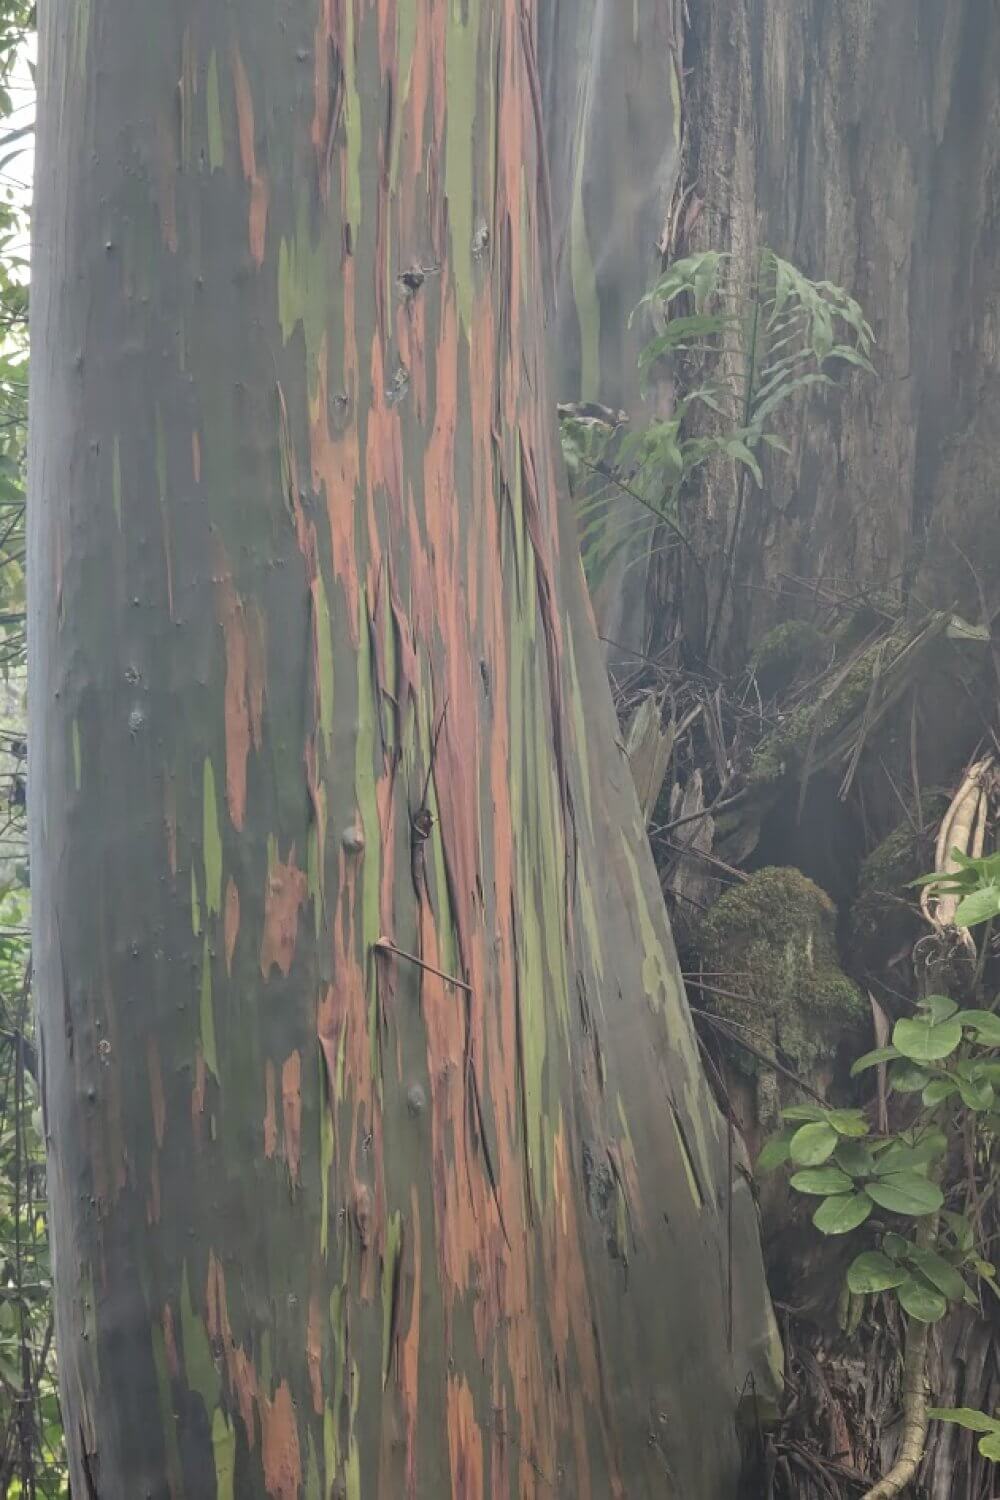
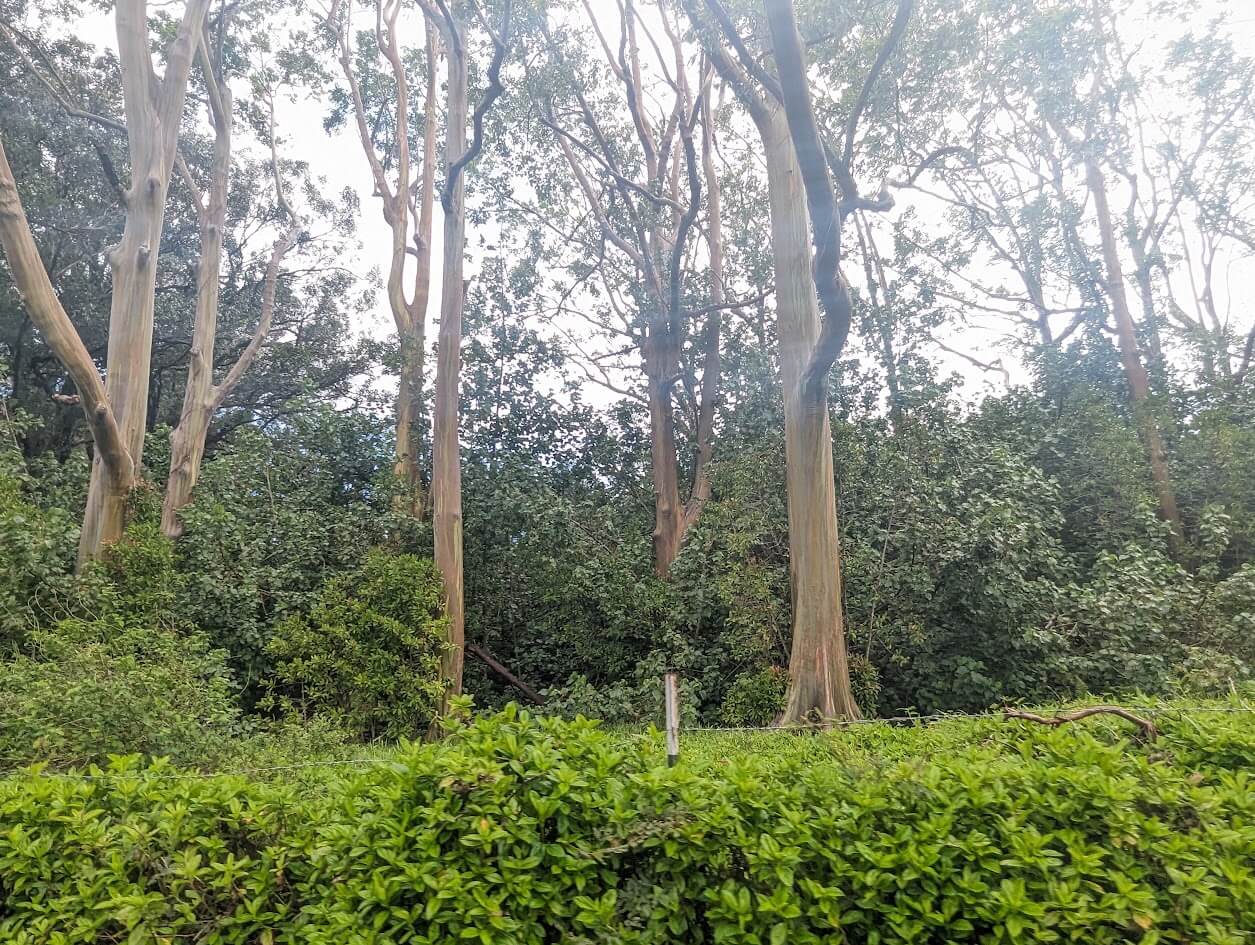
Stop #5: Painted Forest – Eucalyptus Trees (Mile Marker 6.75)
These were pretty cool to see so I highly suggest making a quick stop. These weren’t as easy to find on the way in—we saw where they were after we passed it, but it made it a lot easier to know where to stop on our way back.
Mile Marker 2 has Twin Falls, but it costs to park/view them, so we skipped this. Our goal was to just see things, rather than spend our entire day making tons of stops.
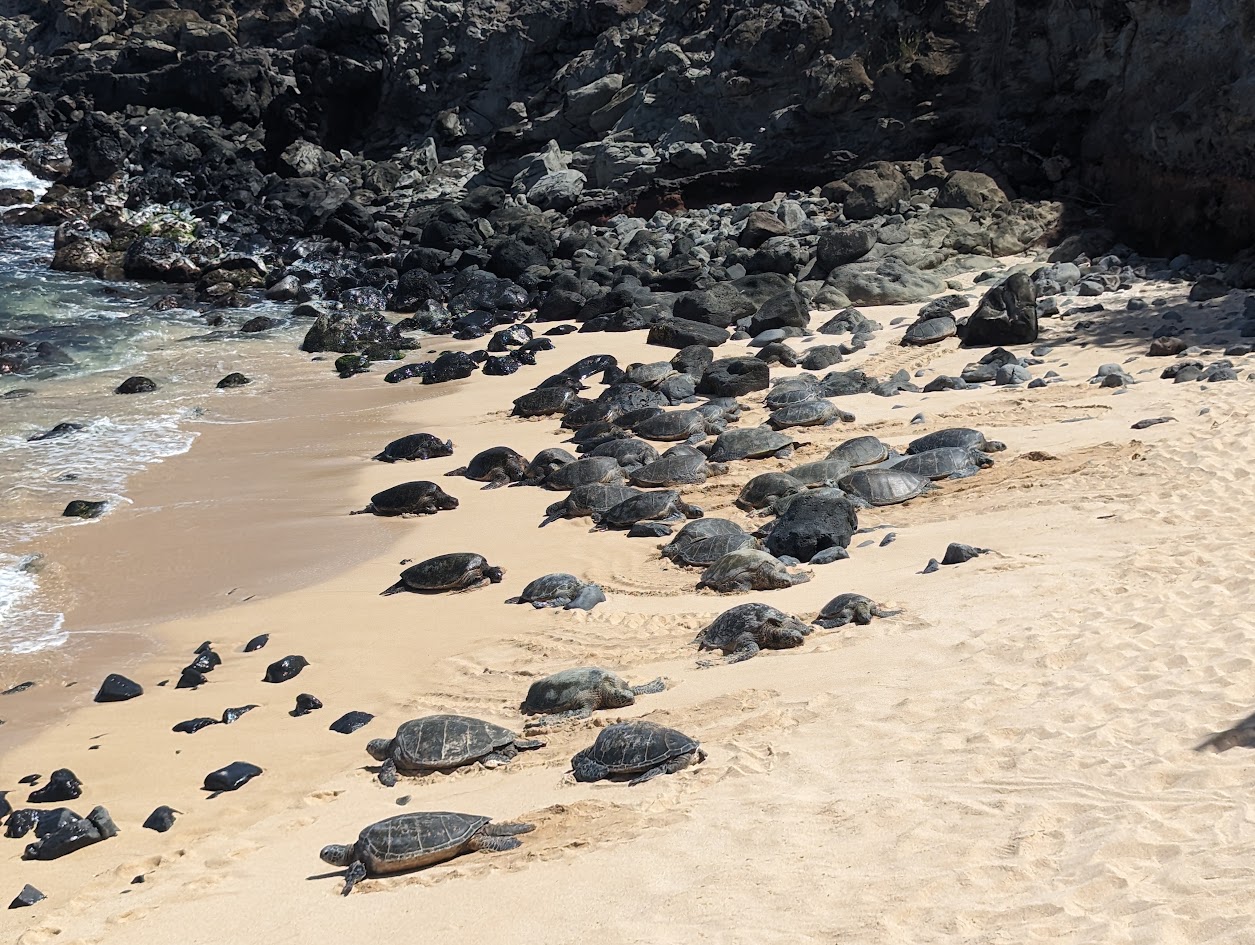
Stop #6: Ho’Okipa Beach Park
This was probably our favorite stop on the way! We stopped and took in the beautiful shoreline and watched surfers riding the waves. On the shore, sea turtles just soak up the sun.
Stop #7: Town of Paia
We stopped in the town of Paia and browsed in the shops and had lunch at the Paia Fish Market before heading back to Wailea
Stop #8: Grand Wailea
We were back to the hotel by about noon and took the day to just relax and enjoy the pools. This resort is absolutely beautiful and a perfect place for families!
Stop #9: Nalu’s
For dinner, we went to Nalu’s, which had a happy hour with really good mai tais. Dinner was actually under $100 for our family of 5, which was great!
Stop #10: Grand Wailea
After dinner, we headed back to the hotel and just enjoyed the evening walking the grounds of the hotel. We watched the sunset and listened to live music. Our older boys hung out walking around the resort. They grabbed some milkshakes after realizing that their room key was a like a credit card. If you don’t want your kids to have charging privileges, make sure you let the front desk know.
Day 9 – Thursday
Our flight didn’t leave until 3pm today so we grabbed chairs at the pool early in the morning and relaxed. The weather was so much warmer in Maui than it was when we were in Oahu. It was really windy and kind of chilly for my liking in Oahu, so I didn’t want to swim at all. I had to force myself to get into the water when we snorkeled.
In Maui, it was high 80’s every day and the pools were warm, but still refreshing, which is perfect for me!
Maui vs. Oahu
It’s hard to say what island I enjoyed more—especially for our first time. I feel like we did so much and saw so many amazing beaches on Oahu. It’s a place that I feel like is nice if you really like the touristy stuff.
Maui on the other hand, seemed so much more laid back. It’s more rural vs city like Oahu is. I feel like if you want more of a relaxing vibe, Maui is probably the better island. However, if you want to be on the go, seeing and doing all sorts of activities, Oahu is probably the place for you. I am glad we were able to see both on this trip. Although Kauai and the Big Island are on my list!
Our Favorite Activities
If you’re in the planning phase and want to know what our family liked most, here is our list:
Oahu
- Kevo’s Beach Bus – our kids said this is the best tour they’ve ever done and would want to do it again
- Luau – shockingly, even our older kids had a blast at the luau. Cost-wise, I’m not sure if we’d do another if we came to Hawaii, but I feel like we needed it for our first trip!
- Kualoa Secret Beach – this was one of our favorite activities! It was a perfect place to relax and enjoy an uncrowded beach. Plus, it had everything you needed for fun (toys, kayaks, paddleboards, beach volleyball, etc)
- Sea Life Park – Our kids love aquariums and we all really enjoyed our time here. It’s not big so you really only need a few hours to see it all.
- Byodo-In Temple – This place is just so cool to see, plus it’s super inexpensive and it’s on your way to/from Waikiki to Kualoa Ranch!
- MacNut Farm – We loved the samples of coffee and macadamia nuts and came home with bags of both! It’s also a quick stop and just a few minutes from Kualoa Ranch!
- Downtown Waikiki – Our kids enjoyed walking downtown and checking out the restaurants and shops. It was a nice evening activity, once it was cooled down!
Maui
- Snorkeling – In Oahu, we used the Honolulu Snorkel Company, which was great. Whether you choose to snorkel in Oahu or on another island, it was something our kids enjoyed! Because we snorkeled in Oahu, we didn’t do a tour in Maui, but the snorkeling at Molokai is supposed to be pretty amazing, so if I had to do it over, I think we’d snorkel in Maui instead.
- Hotel Time – Because we stayed at the Grand Wailea, our kids would have been 100% fine if we spent our entire time just hanging out at the hotel. Although Haleakala and the Road to Hana had some pretty sights to see, the kids were not interested.
Family vs. Couples
On a family trip, most of what we do revolves around what our kids would like. We do throw in some things we’d like to do too, but it’s usually not as enjoyable if the kids aren’t having fun. Choose the things that you think your family would like best and then pop in a few adult choices and make the kids suck it up. Avoid doing a bunch of things they wouldn’t like though to keep your sanity!
Have You Been to Hawaii?
What were your favorite stops in Oahu or Maui? What about the other islands? We’d love to hear about your favorite stops!
If you’re planning a trip to Hawaii, check out our other posts!
How to Book 7 Nights in Hawaii for FREE
How to budget for your Family Vacation to Hawaii
Everything you need to know about visiting Pearl Harbor
Related Posts

How to get Hotel + Flights to Aruba for under $700 for 5 Nights
If Aruba is on your travel bucket list, check out how our family of 5…
January 25, 2026
Why Hyatt Regency Chesapeake Bay Is the Ultimate Family-Friendly Resort on the East Coast
Discover why Hyatt Regency Chesapeake Bay is a top family-friendly East Coast resort—and…
December 27, 2025
Leave A Comment